Eclipse configuration guide
Download and install Eclipse
Download and install Eclipse (oxygen) from http://www.eclipse.org.
Click the Download button. This will give you the Eclipse installer for your platform. Run the installer and choose “Eclipse IDE for Java Developers”. Do not install it into a file path containing spaces, such as (on Windows) c:\Program Files. Instead, install it in c:\eclipse, c:\ics314\eclipse, or whatever.
If you already have an older version of Eclipse installed, delete your ~/workspace/ directory or create a new one for the newer version of Eclipse.
Install the ICS-SE Java formatter
This simplifies the creation of Java programs that satisfy our formatting conventions. Download ics-se-format.xml to your local computer by right clicking on the link and choosing “Save Link As…”.
On macOS X
In Eclipse, select “Eclipse / Preferences / Java / Code Style / Formatter” to bring up the following window:
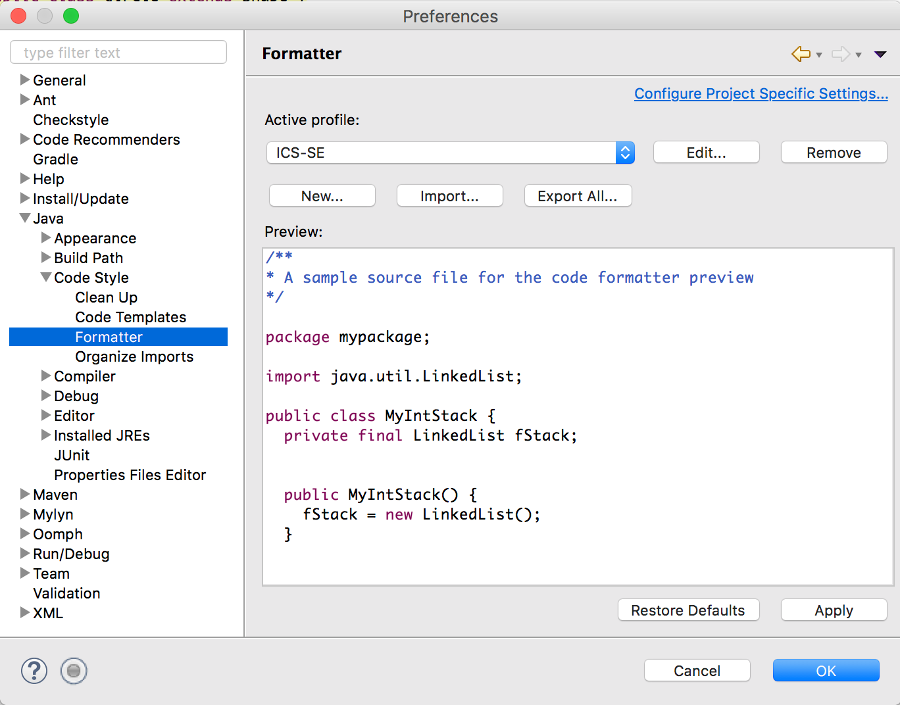
Now click “Import” and choose the file you just downloaded.
The “active profile” should now change to “ICS-SE”. Click “OK”. Now when you are editing Java source code, you can invoke “Source / Format” to reformat the Java source code according to our class conventions.
On Windows
In Eclipse, select “Window / Preferences / Java / Code Style / Formatter” to bring up the following window:
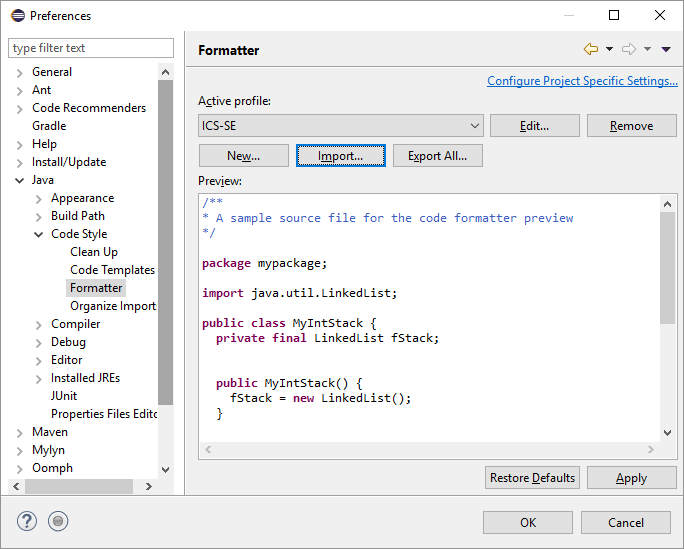
Now click “Import” and choose the file you just downloaded.
The “active profile” should now change to “ICS-SE”. Click “OK”. Now when you are editing Java source code, you can invoke “Source / Format” to reformat the Java source code according to our class conventions.
Install Checkstyle (Optional, but very useful)
We will be using Checkstyle to check for correct Java Coding Standards. So you might want to install it and configure it like we will.
Like the formatter, Checkstyle helps ensure that your code implements our class coding conventions. Follow the instructions at https://checkstyle.github.io/eclipse-cs/#!/ to install the Checkstyle Plugin for Eclipse.
You can install both the “Eclipse Checkstyle Plugin” as well as the “Extension for EclipseCS Plugin with Additional Checks”. To verify, go to “About Eclipse / Installation Details”. The window above shows the Checkstyle plugin.
Install the ICS Checkstyle Ruleset
This task configures Checkstyle to our class’s specific coding conventions. Note: if you are updating checkstyle.xml rather than installing it for the first time, the easiest way is to simply delete all current projects from Eclipse, then delete the current checkstyle.xml configuration, then download and install the new version following the instructions below.
Download ics-checkstyle.xml to your local computer by right clicking on the link and choosing “Save Link As…”.
On macOS X
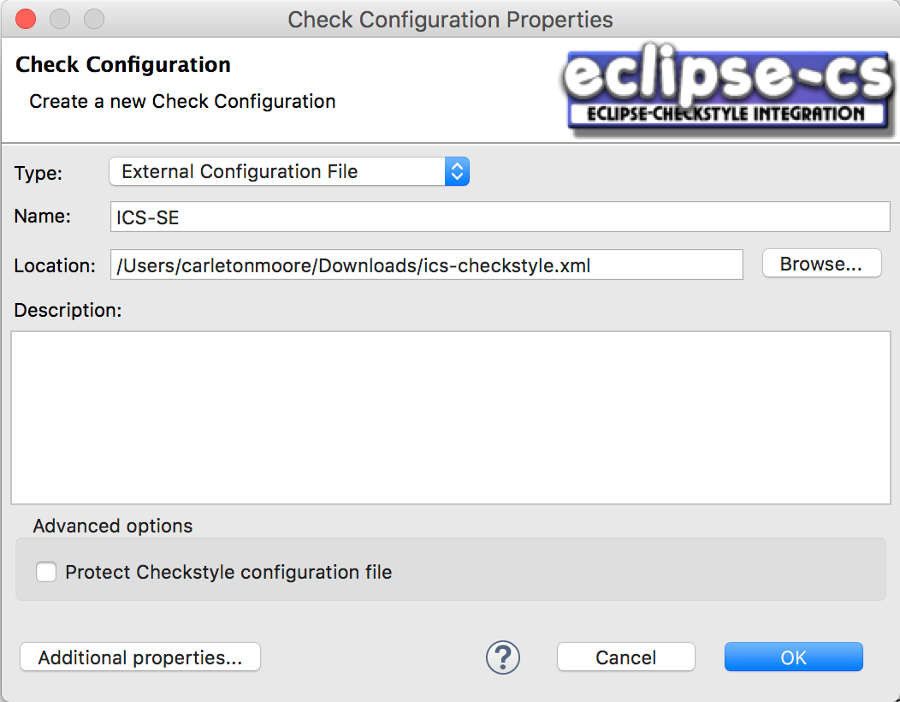
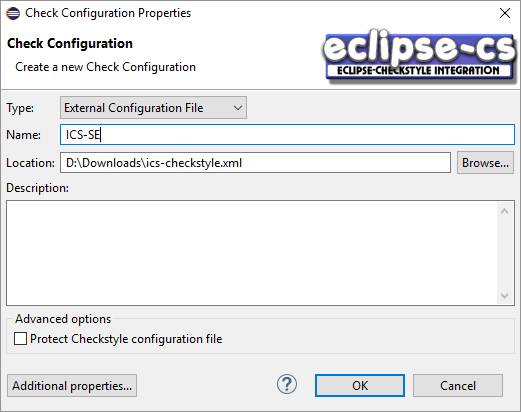
In Eclipse, select “Eclipse / Preferences / Checkstyle”, then click “New..” to bring up the “Check Configuration Properties” window. Select “External Configuration File” as the Type, provide “ICS-SE” as the Name, and browse to the file to fill the Location field.
The resulting dialog box should look like this:
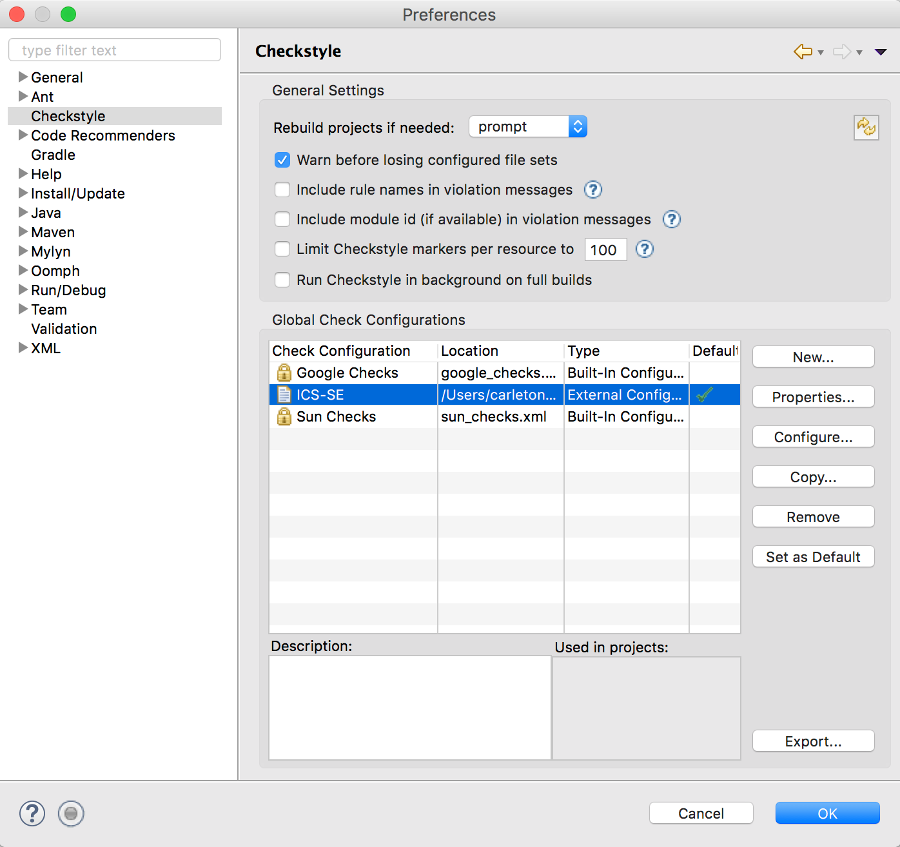
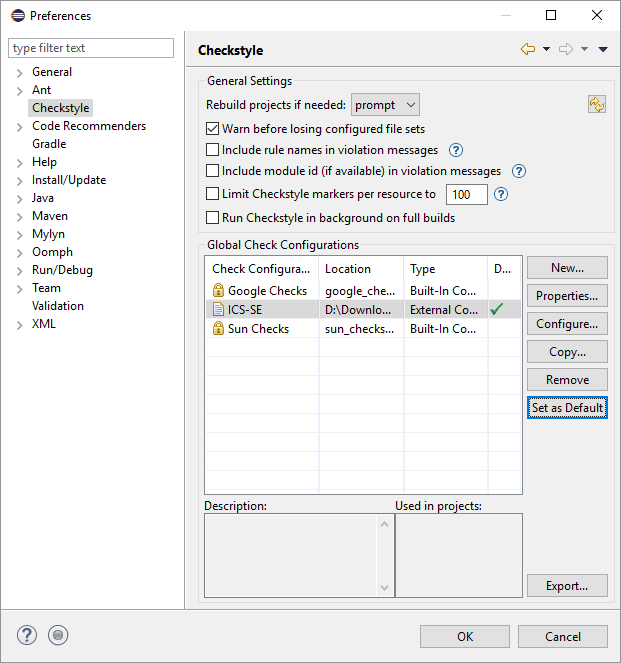
Now click “OK” to load that configuration and return to the Checkstyle Preferences window. In that window, select the ICS-SE configuration and click “Set as Default”. The resulting dialog box should look like this:
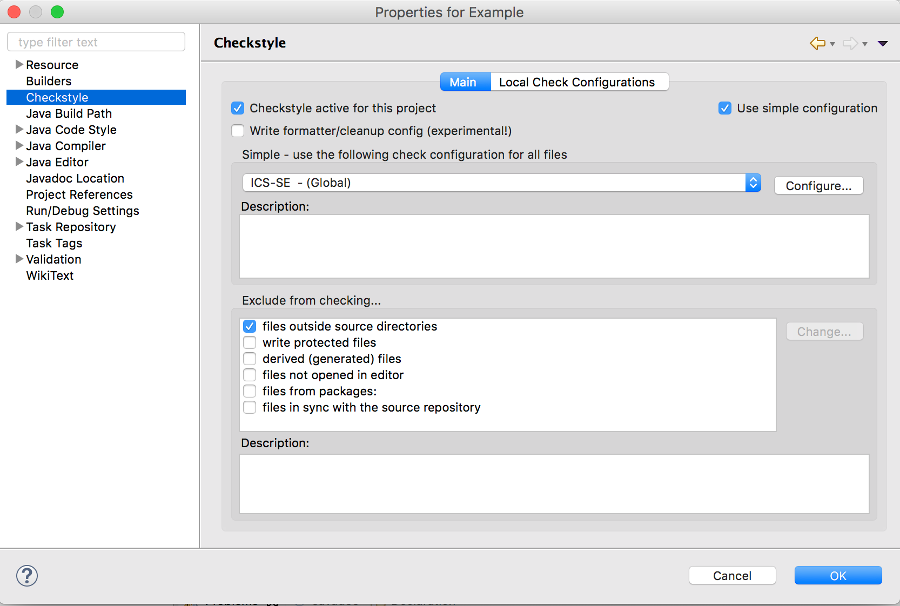
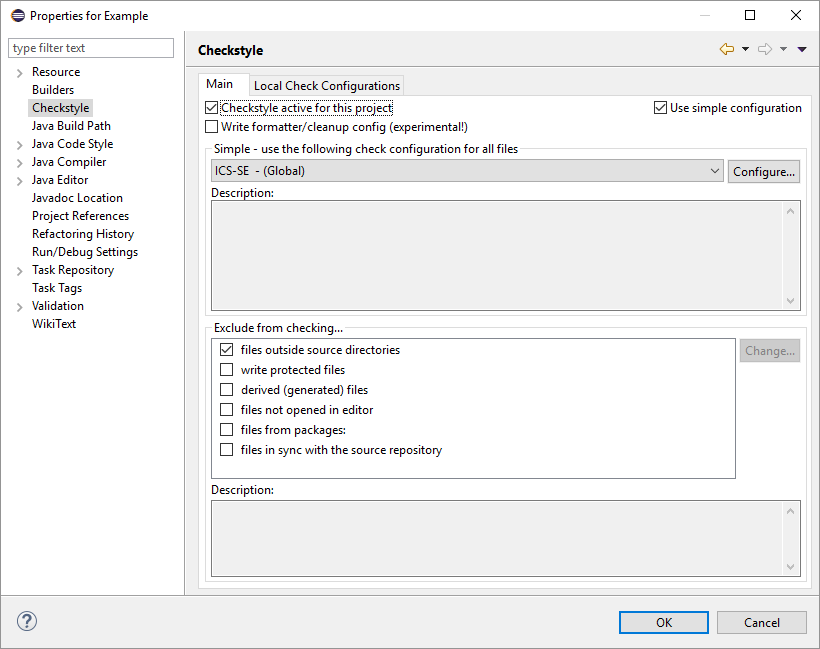
Click OK to save these changes. Now the Project Properties dialog will include a Checkstyle pane where you can activate, deactivate, and customize the application of Checkstyle, as illustrated here:
You can now check your code using Checkstyle. If you get rid of all the Checkstyle warnings your code follows the ICS Java Coding Standard.
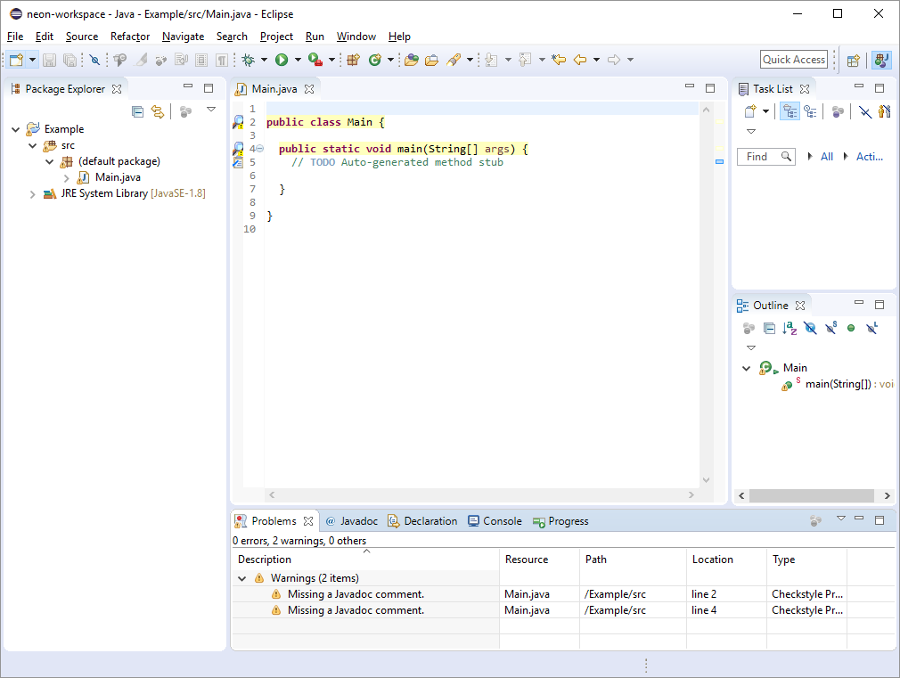
The following image shows 2 Checkstyle errors in project Example. The Main class has two checkstyle errors, highlighted in yellow.
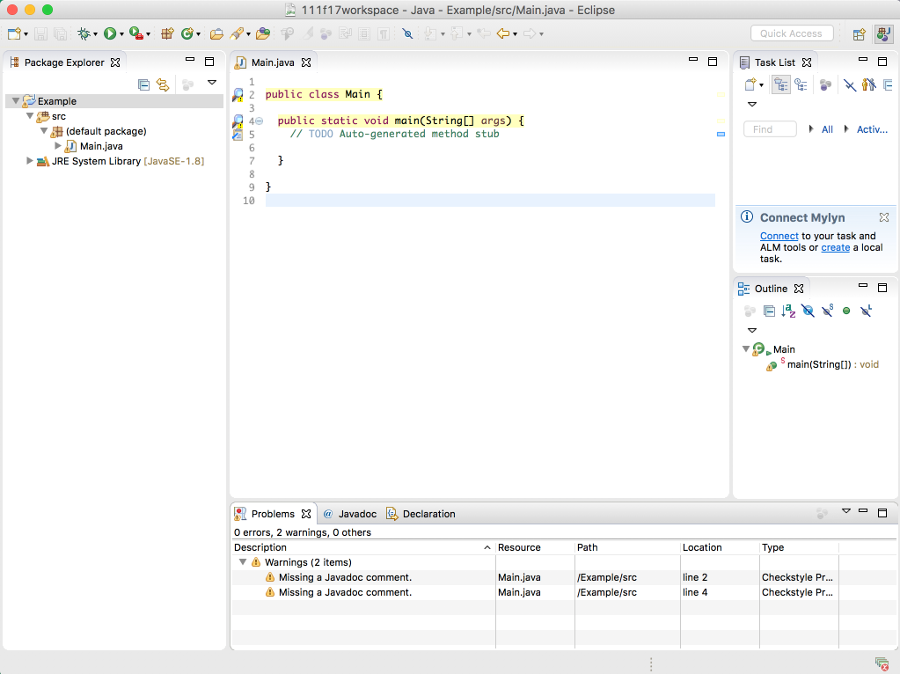
To fix the problems add JavaDoc comments for the Main class and the main method using Source -> Generate Element Comment.
On Windows
In Eclipse, select “Window / Preferences / Checkstyle”, then click “New..” to bring up the “Check Configuration Properties” window. Select “External Configuration File” as the Type, provide “ICS-SE” as the Name, and browse to the file to fill the Location field.
The resulting dialog box should look like this:
Now click “OK” to load that configuration and return to the Checkstyle Preferences window. In that window, select the ICS-SE configuration and click “Set as Default”. The resulting dialog box should look like this:
Click OK to save these changes. Now the Project Properties dialog will include a Checkstyle pane where you can activate, deactivate, and customize the application of Checkstyle, as illustrated here:
You can now check your code using Checkstyle. If you get rid of all the Checkstyle warnings your code follows the ICS Java Coding Standard.
The following image shows 2 Checkstyle errors in project Example. The Main class has two checkstyle errors, highlighted in yellow.
To fix the problems add JavaDoc comments for the Main class and the main method using Source -> Generate Element Comment.