ICS 211 Homework H01: Convert InputStream to binary, hexadecimal, and UTF-8 Strings.
Purpose
A quick refresher on creating a Java class that converts an InputStream to a String using different representations of the same information. Given that everything in a computer is stored as binary data, we will look at that data in three ways, binary, hexadecimal and UTF-8 encoding. We are going to read in the InputStream contents byte-by-byte and convert those bytes into three different String representations.
This assignment will give you practice using Eclipse to create a Java class that passes simple JUnit tests. It will also let you work on your problem solving skills.
Be sure to have set up your development environment. Environment Configuration.
Tasks
1. Create a Java project in Eclipse with your UH username
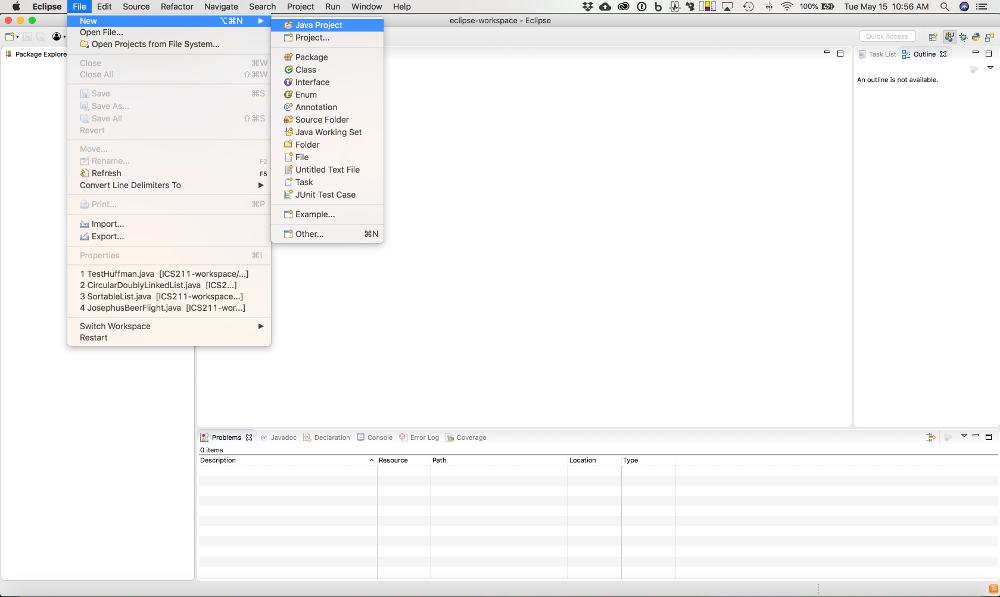
To create a new Java project, Choose File -> New -> Java Project from the menu bar.
Then fill in the dialog with your UH username. The following screen shot shows me filling out the project with my UH username, cmoore.
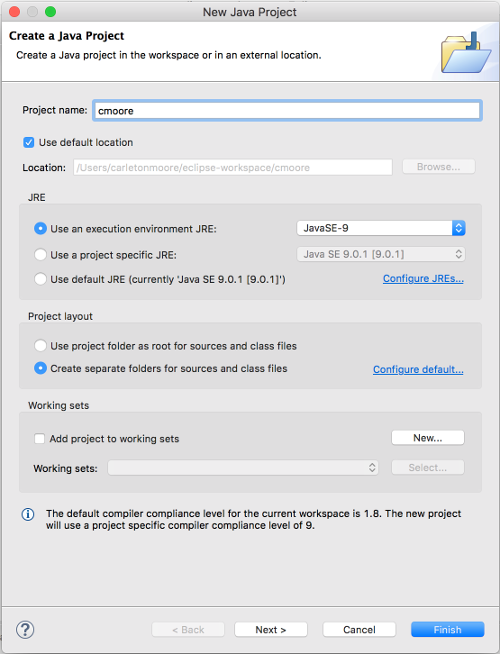
Click finish when you are done.
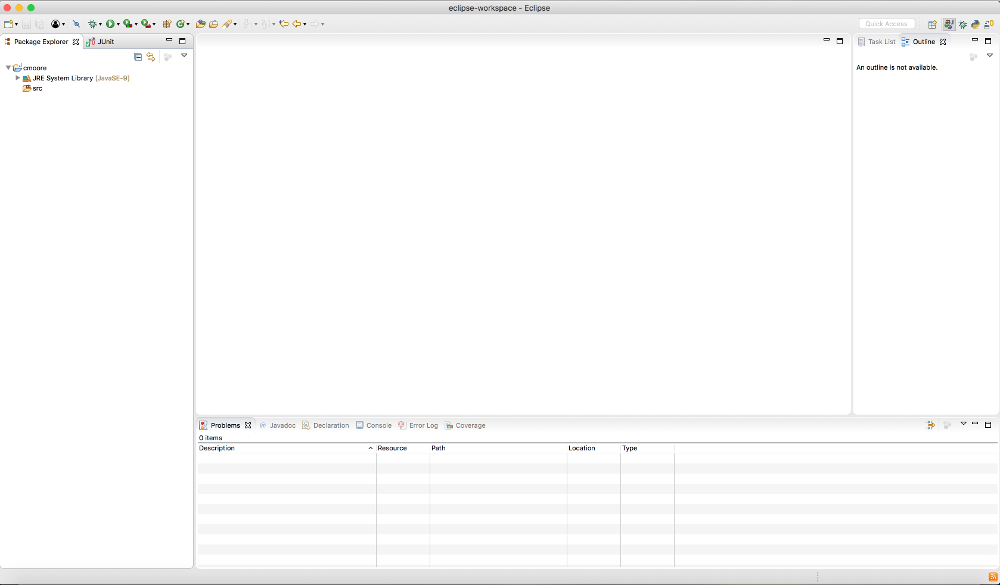
This project is where we will be doing all our homework assignments for ICS 211. Here’s a screen shot of my Eclipse with my cmoore project.
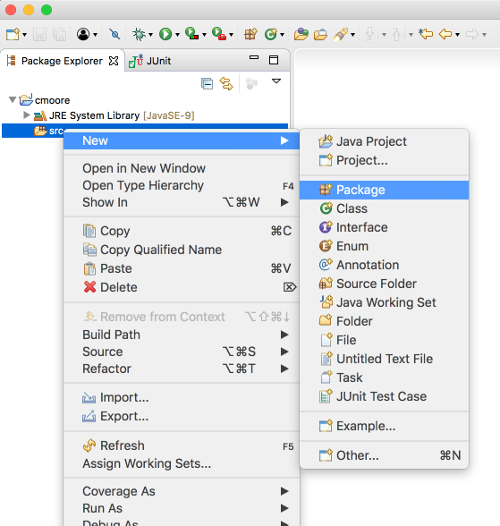
2. Create a package named edu.ics211.h01
To create a new package select the src directory then right mouse click. Choose New -> Package
Fill in the New Package Dialog with the name “edu.ics211.h01”.
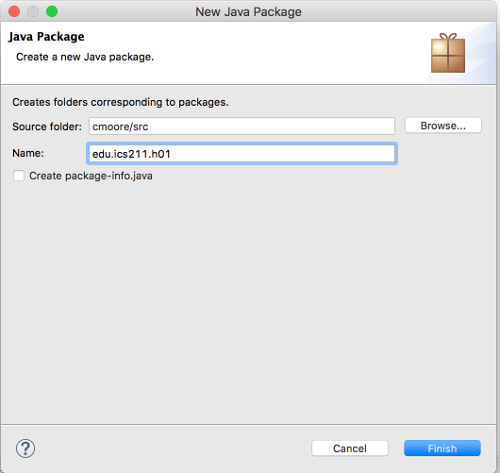
This is where we will put all our classes for homework 1.
3. Create a class named Translator that implements the Translate interface.
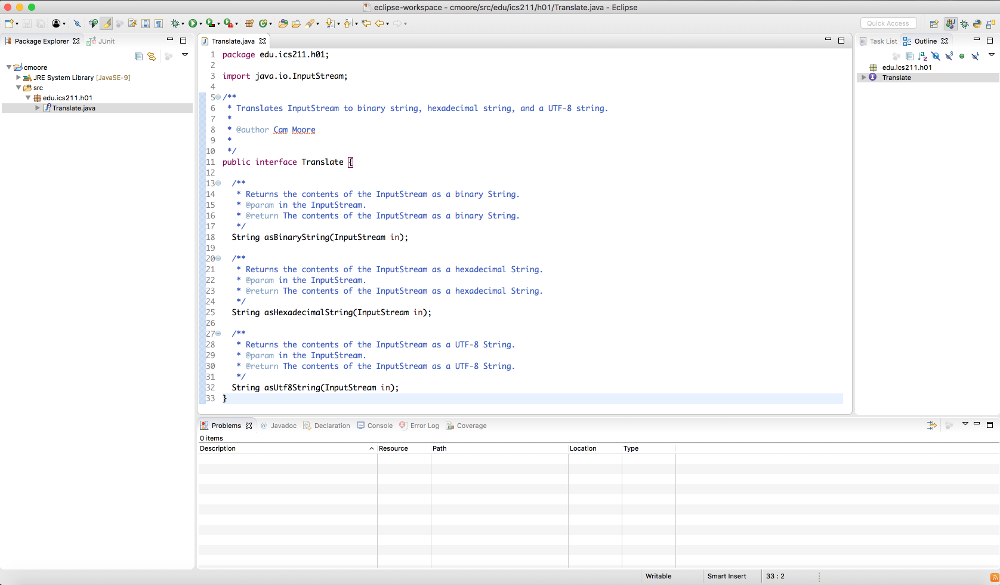
Copy the file Translate.java into your edu.ics211.h01 package.
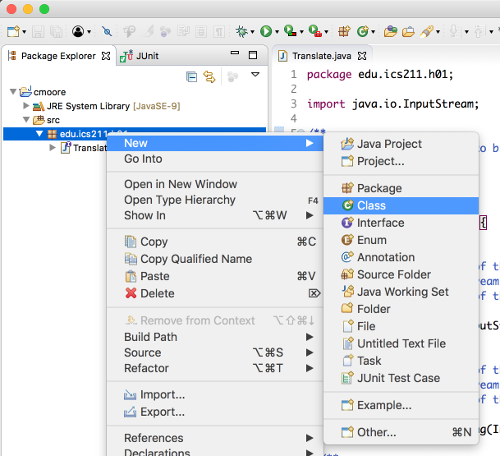
Create the Translator class. Right mouse click on the edu.ics211.h01 package and choose New -> Class
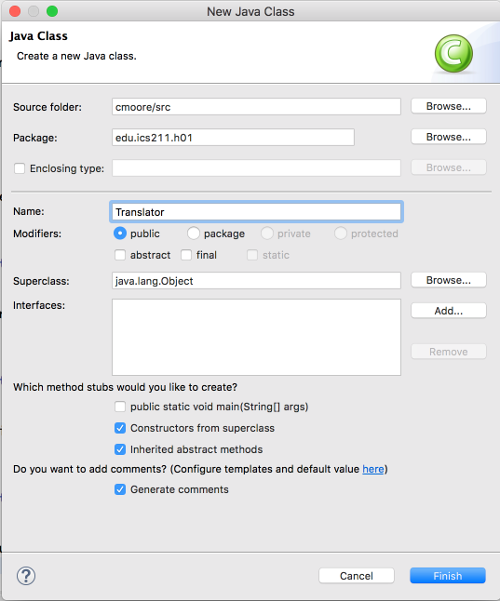
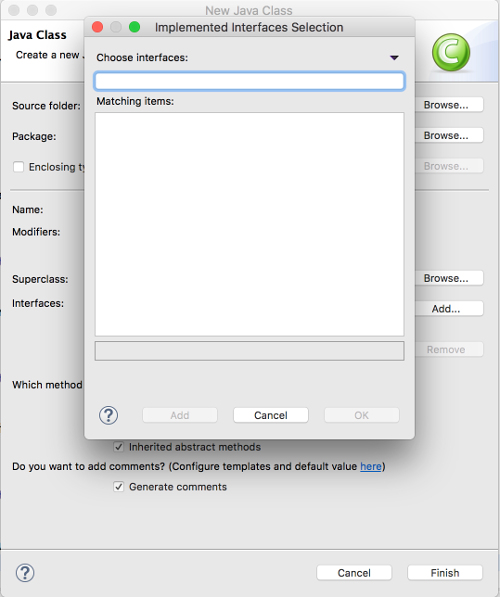
This will bring up the New Class Dialog box. Fill in the class name “Translator”.
Click the Interfaces: Add button.
Type in Translate and select the interface.
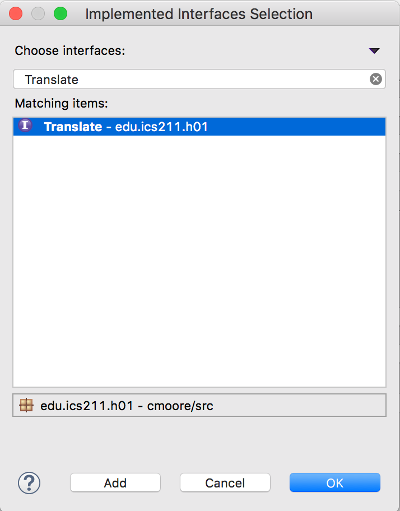
Select OK.
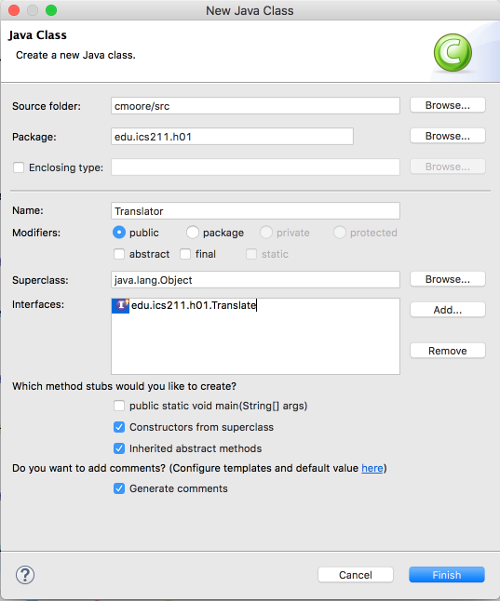
If you want a main method click the “public static void main(String[] args) checkbox. Having a main can help with testing your class. Make sure you click the other choices. This will make your life easier. Select Finish.
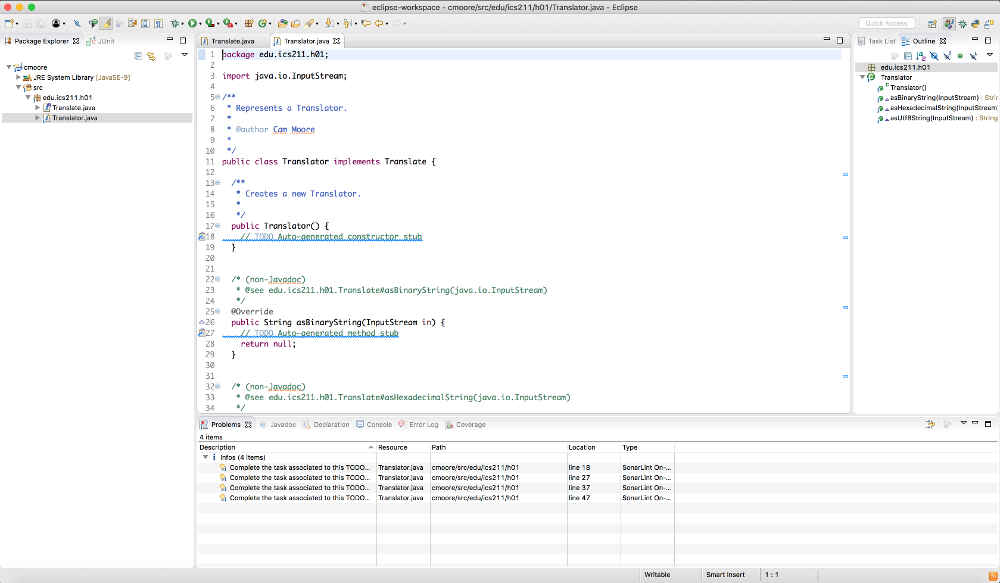
As you can see Eclipse filled in the missing methods bodies and the default constructor.
4. We will be using JUnit tests to validate your Translator class.
Create a new JUnit Test Case for your Translator class. Right mouse click on the Translator class and choose New -> JUnit Test Case
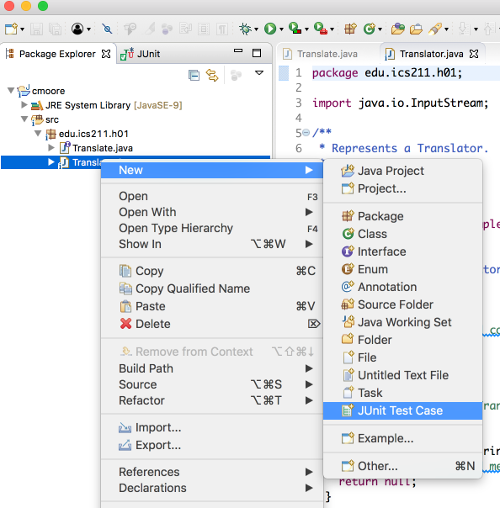
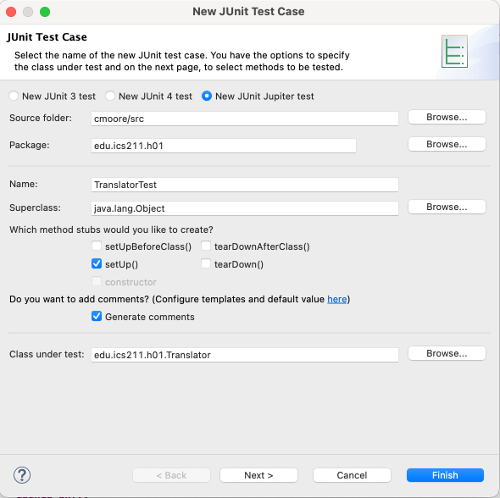
Make sure you click the “New JUnit Jupiter test” option. Then click Finish in the New JUnit Test Case Dialog.
Replace the code in the TranslatorTest.java with Translator Tests
You can run the tests by selecting the TranslatorTest.java class and using the Run -> Run from the Run menu. You should see something like
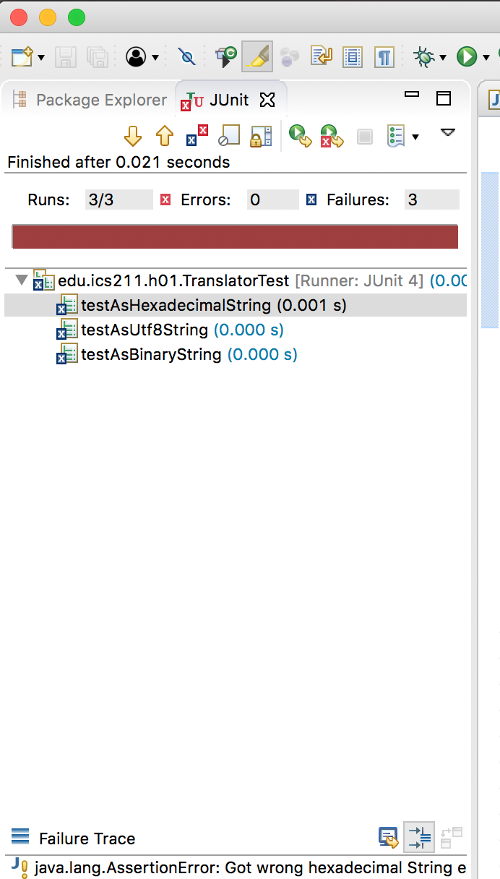
This indicates that all three tests failed. Of course this is true, we haven’t implemented any of the methods. Now we can start Task 5 implementing the first method.
5. Implement the asBinaryString method using the BitReader class
Think about the steps you need to do to implement this method. Don’t worry about the other methods, focus on the asBinaryString method. Using an instance of the BitReader class we need to read the InputStream bit by bit and append those bits to the String we are going to return. So the steps might be:
- Create an instance of the BitReader class. Create a BitReader class in edu.ics211.h01 and replace the contents with BitReader.java. You can create a BitReader instance from an InputStream.
- Create an empty String or even better use Java’s StringBuilder class.
- Loop until the BitReader is done appending the bits to the String or StringBuilder. The BitReader instance then will read the InputStream bit by bit. You can use the public boolean read() or the public int readAsInt() methods to read a single bit from the InputStream.
- Return the String or StringBuilder.toString().
Put the steps into your code using comments. Your asBinaryString method should look something like:
  @Override
  public String asBinaryString(InputStream in) {
    // create BitReader from InputStream
    // create StringBuilder
    // loop until BitReader is done
    //   append 0 or 1 from BitReader to StringBuilder
    // return StringBuilder.toString
    return null;
  }
Then add the Java code to accomplish the steps. Leave your step comments in the code.
After implementing the asBinaryString method you may want to run the JUnit tests to see if you got it right. Remember to focus on the problem at hand and not worry about the other methods until you get to them. Once the JUnit test passes you can move on to Task 6.
6. Implement the asHexadecimalString method
Now focus on solving the problem of building a Hexadecimal String from the InputStream. We don’t need to use the BitReader for this problem. The steps might be:
- Create an empty String or even better use Java’s StringBuilder class.
- Loop until the InputStream is done, reading in a byte at a time. We then need to convert that byte to a hexadecimal string. You can use the Integer.toHexString method to convert that byte to a hexadecimal string.
- Return the String or StringBuilder.toString().
Once the JUnit test passes we can move on to Task 7 the asUtf8String method.
7. Implement the asUtf8String method
To build a UTF-8 String we can use Java’s String class has a constructor that takes an array of bytes and an encoding scheme. You can create an array of bytes then fill it from the InputStream then return
return new String(bytes, "UTF-8");So the steps might be:
- Create an array of bytes.
- Fill the array from the InputStream.
- Return the newly constructed String.
One issue with this solution is how do we know how big an array to build?
Once all the JUnit tests pass and you have no checkstyle issues then you can confidently turn in your homework.
Grading Rubric
We will be using the following grading rubric to grade your solution.
| Criterion | Excellent (100%) | Satisfactory (75%) | Borderline (50%) | Unsatisfactory (25%) | Poor (0) |
|---|---|---|---|---|---|
| Adherence to standards - 2 points Does it conform to standards in every detail? |
No errors. | Minor details of the assignment are violated, or poor choices are made where the assignment is unclear. | Significant details of the assignment or the underlying program intent are violated, but the program still fulfills essential functions. | Significant details of the assignment or the underlying program intent are violated, but the program still fulfills some essential functions. | Misses the point of the assignment. |
| Breakdown (modular design) - 1 point Does it demonstrate good modular design? |
No errors. | 1-3 minor errors. | > 3 minor errors OR 1 major error. | 2 major errors | > 2 major error. |
| Correctness of code - 4 points Does it work? Does it pass JUnit? |
Passes all tests. | Works for typical input, may fail for minor special cases. | Fails for typical input, for a minor reason. | Fails for typical input, for a major reason. | No. |
| Documentation, and style - 2 points Is it clear and maintainable? Does it pass CheckStyle? Are your steps documented? |
No errors. | 1-3 minor errors. | > 3 minor errors OR 1 major error. | 2 major errors | > 2 major error. |
| Efficiency of code - 1 point Does it use the Java features well? |
No errors. | 1-3 minor errors. | > 3 minor errors OR 1 major error. | 2 major errors | > 2 major error. |
Turning in the Assignment
The assignment is due on Tuesday at 11:55pm. You may turn it in early.
- Does your code follow the Java Coding Standard and pass CheckStyle?
- Does your code pass the JUnit tests?
-
Export your ICS211-workspace project by choosing File -> Export. Under General choose Archive File.
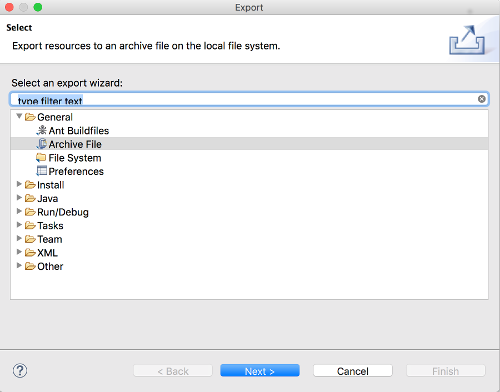
On the next dialog choose only the src directory in your project. Make sure the .checkstyle, .classpath, and .project files are selected.
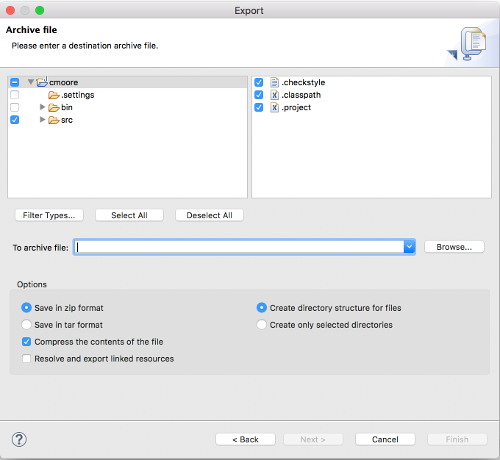
Name the zip file H01.
- Sign into Laulima, then navigate to the ICS211 site. In the left hand side of the site, there is an Assignments tab/link. Click on it and view all of the posted assignments. Select the assignment that you want to turn in and attach your H01.zip file and accept the honor pledge to submit the assignment. Yes, the pledge says you worked alone, but in ICS 211 you can work together as long as you give credit to you teammates. See the Giving Credit screen cast.