E49a: Experience BowFolios enhancement
For this experience, you will learn how to make your own copy of the BowFolios application and make a simple enhancement to it. This will help you also understand the sequence of steps involved with incremental web application development.
Prelude
Study BowFolios
Before starting this experience, please read the BowFolios documentation and study the BowFolios videos on the user interface, application structure, authentication and authorization, initialization, and unit testing.
Your investment of time studying these videos will pay off in time not spent being puzzled by the code when you have to understand, modify, or build upon it.
BowFolios enhancement walkthrough
To help you be oriented as you go through these steps, please watch the following walkthrough of me doing this enhancement. If your experience differs markedly from this, then be sure to post a question to the #meteor channel!
Set up your local copy of BowFolios
Once you have familiarized yourself with the BowFolios system and with the changes we will make to it, it’s time to do it yourself.
First, go to the BowFolios github repo. In the top right corner, there is a button labeled “Fork”. Click it, and (if prompted) select your home account as the target for the forking. When the fork finishes, you will have your own copy of the BowFolios repository in your own account to work with.
Second, clone your personal copy of BowFolios to your laptop. Click on the “Clone or Download” button in your copy’s GitHub page, select “Open in Desktop”, and then choose an appropriate local directory to store the repo in.
Third, install and run your local copy of BowFolios following the BowFolios Installation Instructions. You should be able to see the system at http://localhost:3000 and login using the test CAS server. If the login fails, then the test CAS server needs to be updated with your credentials. Please post a request to the Slack workspace.
Fourth, create an IntelliJ project for your local copy of BowFolios to support development. Follow the standard instructions to enable code formatting and ESLint. (Note that IntelliJ might take up to a minute to index the project when you first create it. That’s because the node_modules directory contains a great deal of library code. This delay in initial loading is fine; after the initial indexing, subsequent startup time will be fast.)
Implement the enhancement
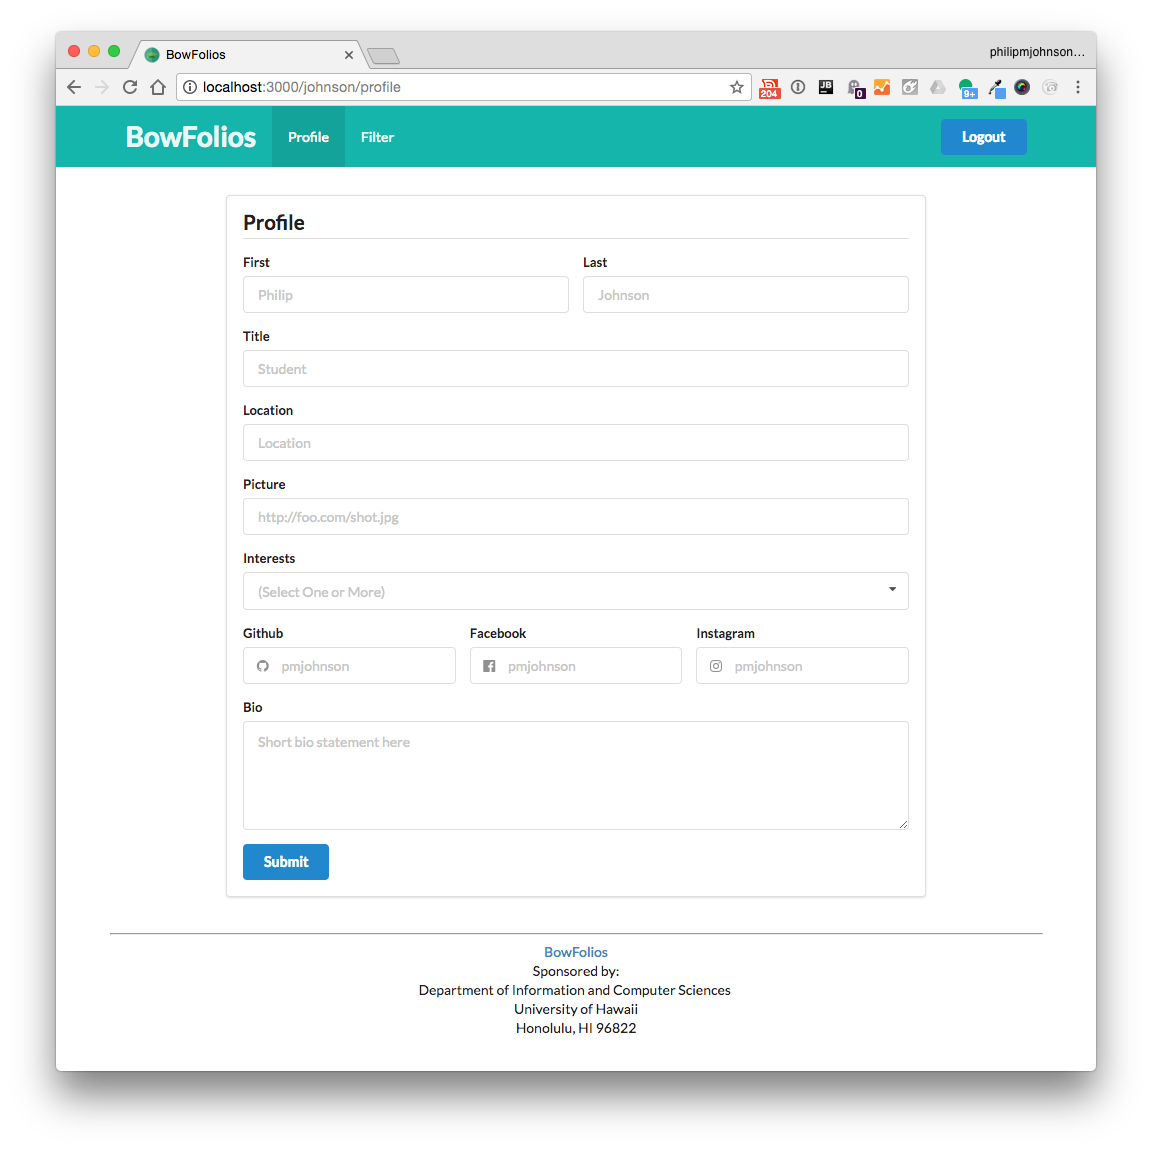
The required enhancement is the addition of a “Location” field to the profile, to the database, and to the presentation cards. When you’re finished, the Profile page will include a field for “Location”.
It should look like this:
And the filter page should show the location of the user if that data has been supplied. For example, the location for Lee Altenberg and Kyungim Baek are supplied below:

To make this happen, here’s the steps you should take.
1. Update database
First, add an optional “location” field to the ProfileCollection.
- Update ProfileCollection.js to add this field to the schema and update all of the methods in this collection to support the location field.
- Update ProfileCollection.test.js to test for this field,
- Update private/database/initial-collection-data.json so that the first two entries have location data.
Second, to check that you made these changes correctly, do the following:
- Run
meteor npm run lintto verify that the code has no ESLint errors. - Run
meteor npm run testand verify that the string5 passingappears. Then control-c to stop the test process. - Run
meteor reset(to clear out the database) andmeteor npm run start(to restart the system and reload the initial database containing the location data). Verify that the system comes up without errors. Nothing in the UI will be different at this point.
2. Update profile page
Now that the database supports a location field, the next step is to enable users to specify their location in their profile page.
- Edit imports/ui/pages/user/profile-page.html to display a location text field just below Title.
- Edit imports/ui/pages/user/profile-page.js to obtain this text field’s value and pass it along to be stored.
Once the system restarts, display the profile page and fill out the form, including a location. Then refresh the page to see that the location data is displayed (refreshing the page forces the system to retrieve the profile data from the database, which effectively checks to see if it was stored and retrieved).
3. Update display page
The final step is to display location data in the card associated with users. This turns out to be easy: just update the imports/ui/components/directory/directory-profile.html file to display the profile.location data.
My approach would be to create a second “meta” section for the location and display it right below the title. This means the location will always be displayed on its own line. If there is no location associated with a user, then nothing will appear.
4. Commit your code
When your enhancement is finished, commit your changes to your local repository.
Submission instructions
By the time and date indicated on the Schedule page, submit this assignment via Laulima.
Your submission should contain:
- A link to the GitHub repository created as a result of your latest attempt at this practice WOD. Make sure you include the complete URL so that I can click on it in my mailer. Note: the final commit to this repo must have been made before the submission time and date, otherwise you will not receive credit for this assignment.