E59: Deploy a Meteor App
For this experience, you will learn how to deploy a Meteor app in order to make it available for anyone to use who has access to the Internet and a browser. This will essentially involve two steps:
-
Creating a cloud-based MongoDB database to hold your data. For this, we will use the free tier of the MongoDB Atlas cloud service.
-
Deploying your application to a cloud-based application service provider. For this, we will Galaxy, a hosting service provided by Meteor Development Group. (There are other ways to deploy Meteor applications to the cloud, but Galaxy is particularly easy, and for you, free.)
Before starting, make sure your Digits app runs correctly on your laptop.
We will generally follow the instructions in the Galaxy Deploy Guide to do deployment, with some extensions and changes for this class.
1. Sign up with meteor.com
The first step is to sign up for a Meteor Developer Account at https://www.meteor.com/sign-up and create a username. Then, please post your username in the #deployment channel of our Slack workspace so that I can add you to the Galaxy ics314f19 organization. Note that you cannot do any of the following steps until I have received your username and added you.
2. Sign up with Galaxy
Review the Sign up for Galaxy section of the deploy guide for a general overview.
However, for this class, you do not have to sign up for Galaxy as an individual and provide your credit card for this class. Instead, you can just login to https://galaxy.meteor.com/ics314f19 with your Meteor developer account. That organization has been graciously provisioned by the Meteor Development Group (thank you MDG!) for this class with several free containers.
3. Sign up with MongoDB
For this class, we will take advantage of the free MongoDB databases available at https://www.mongodb.com/cloud/atlas.
Do do this, register for a new account at https://cloud.mongodb.com/user#/atlas/register/accountProfile if you don’t already have one.
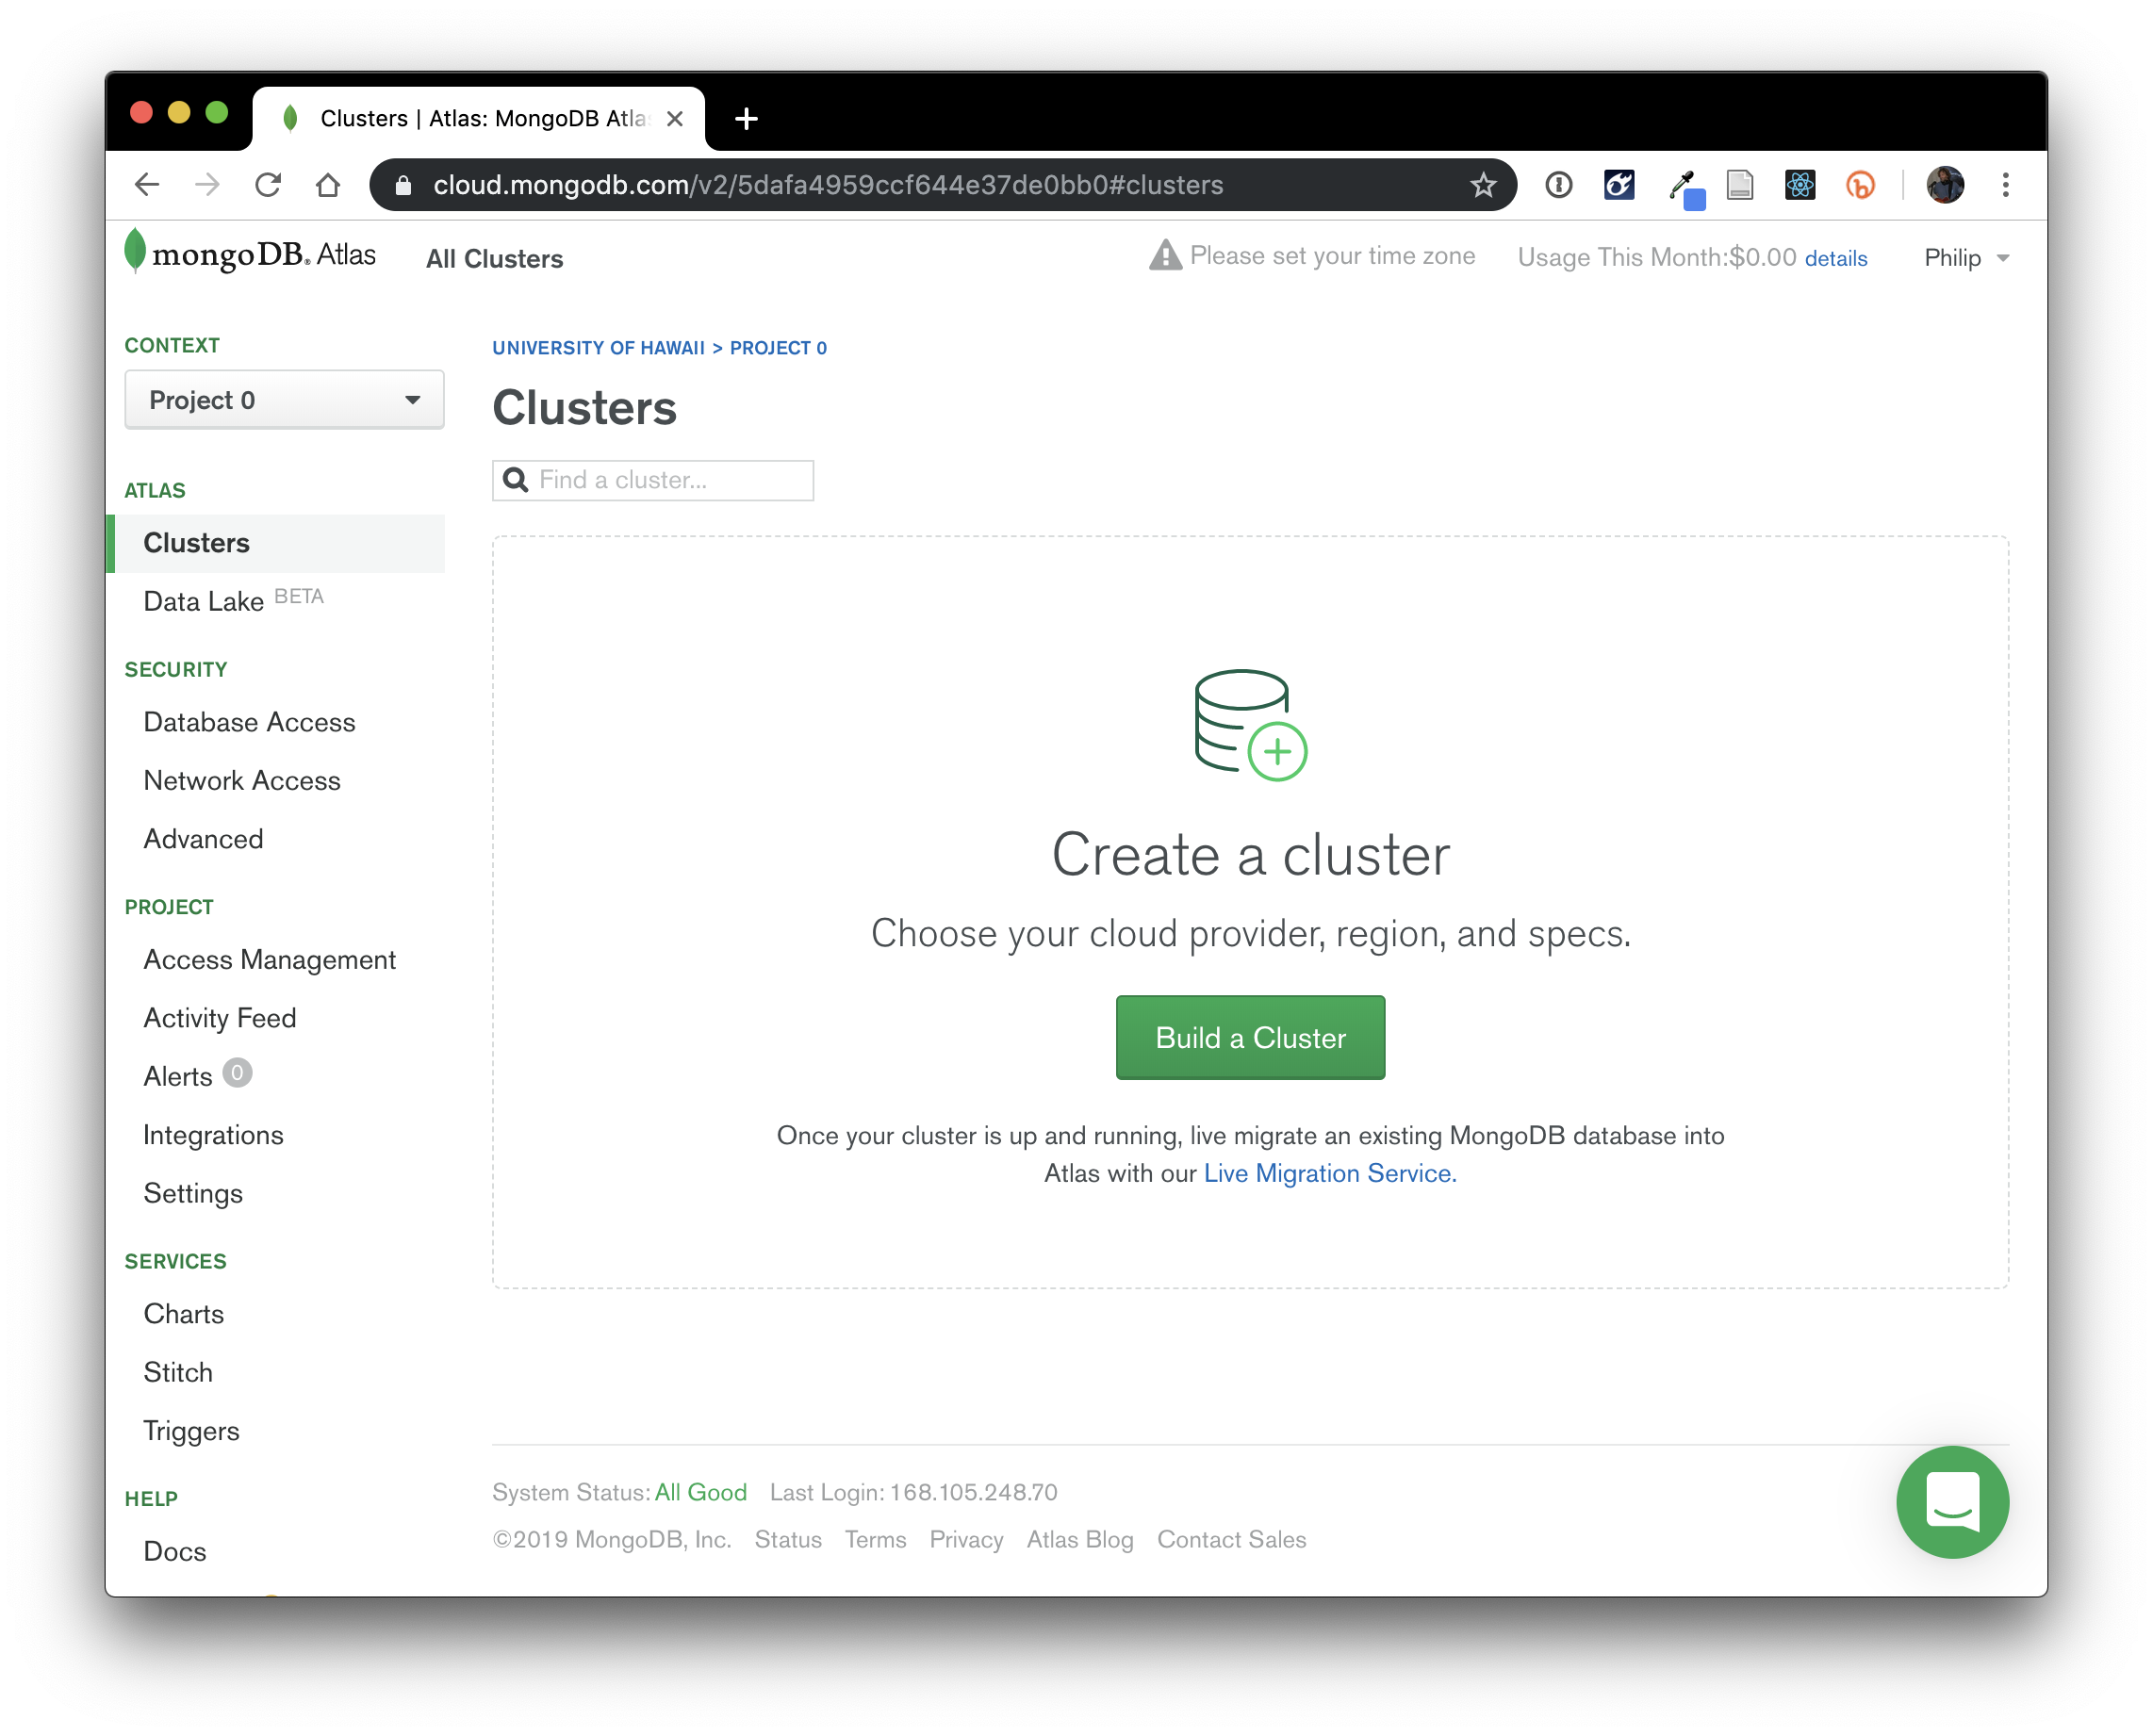
Next, create a new organization (say, “University of Hawaii”), and a new Project within it (say, “Project 0”).
After that, you should see a page like this:
4. Create a new cluster
Next, click the “Build a Cluster” button, then click the “Create a cluster” button for a free “Starter Cluster”.
Select “Oregon (us-west-2)” as the AWS region, the click the green “Create Cluster” button at the bottom of the page.
Atlas then brings up a new window and says it is provisioning a new cluster, which might take 7-10 minutes. It took mine just under 2 minutes. When you’re done, your window should look like this:
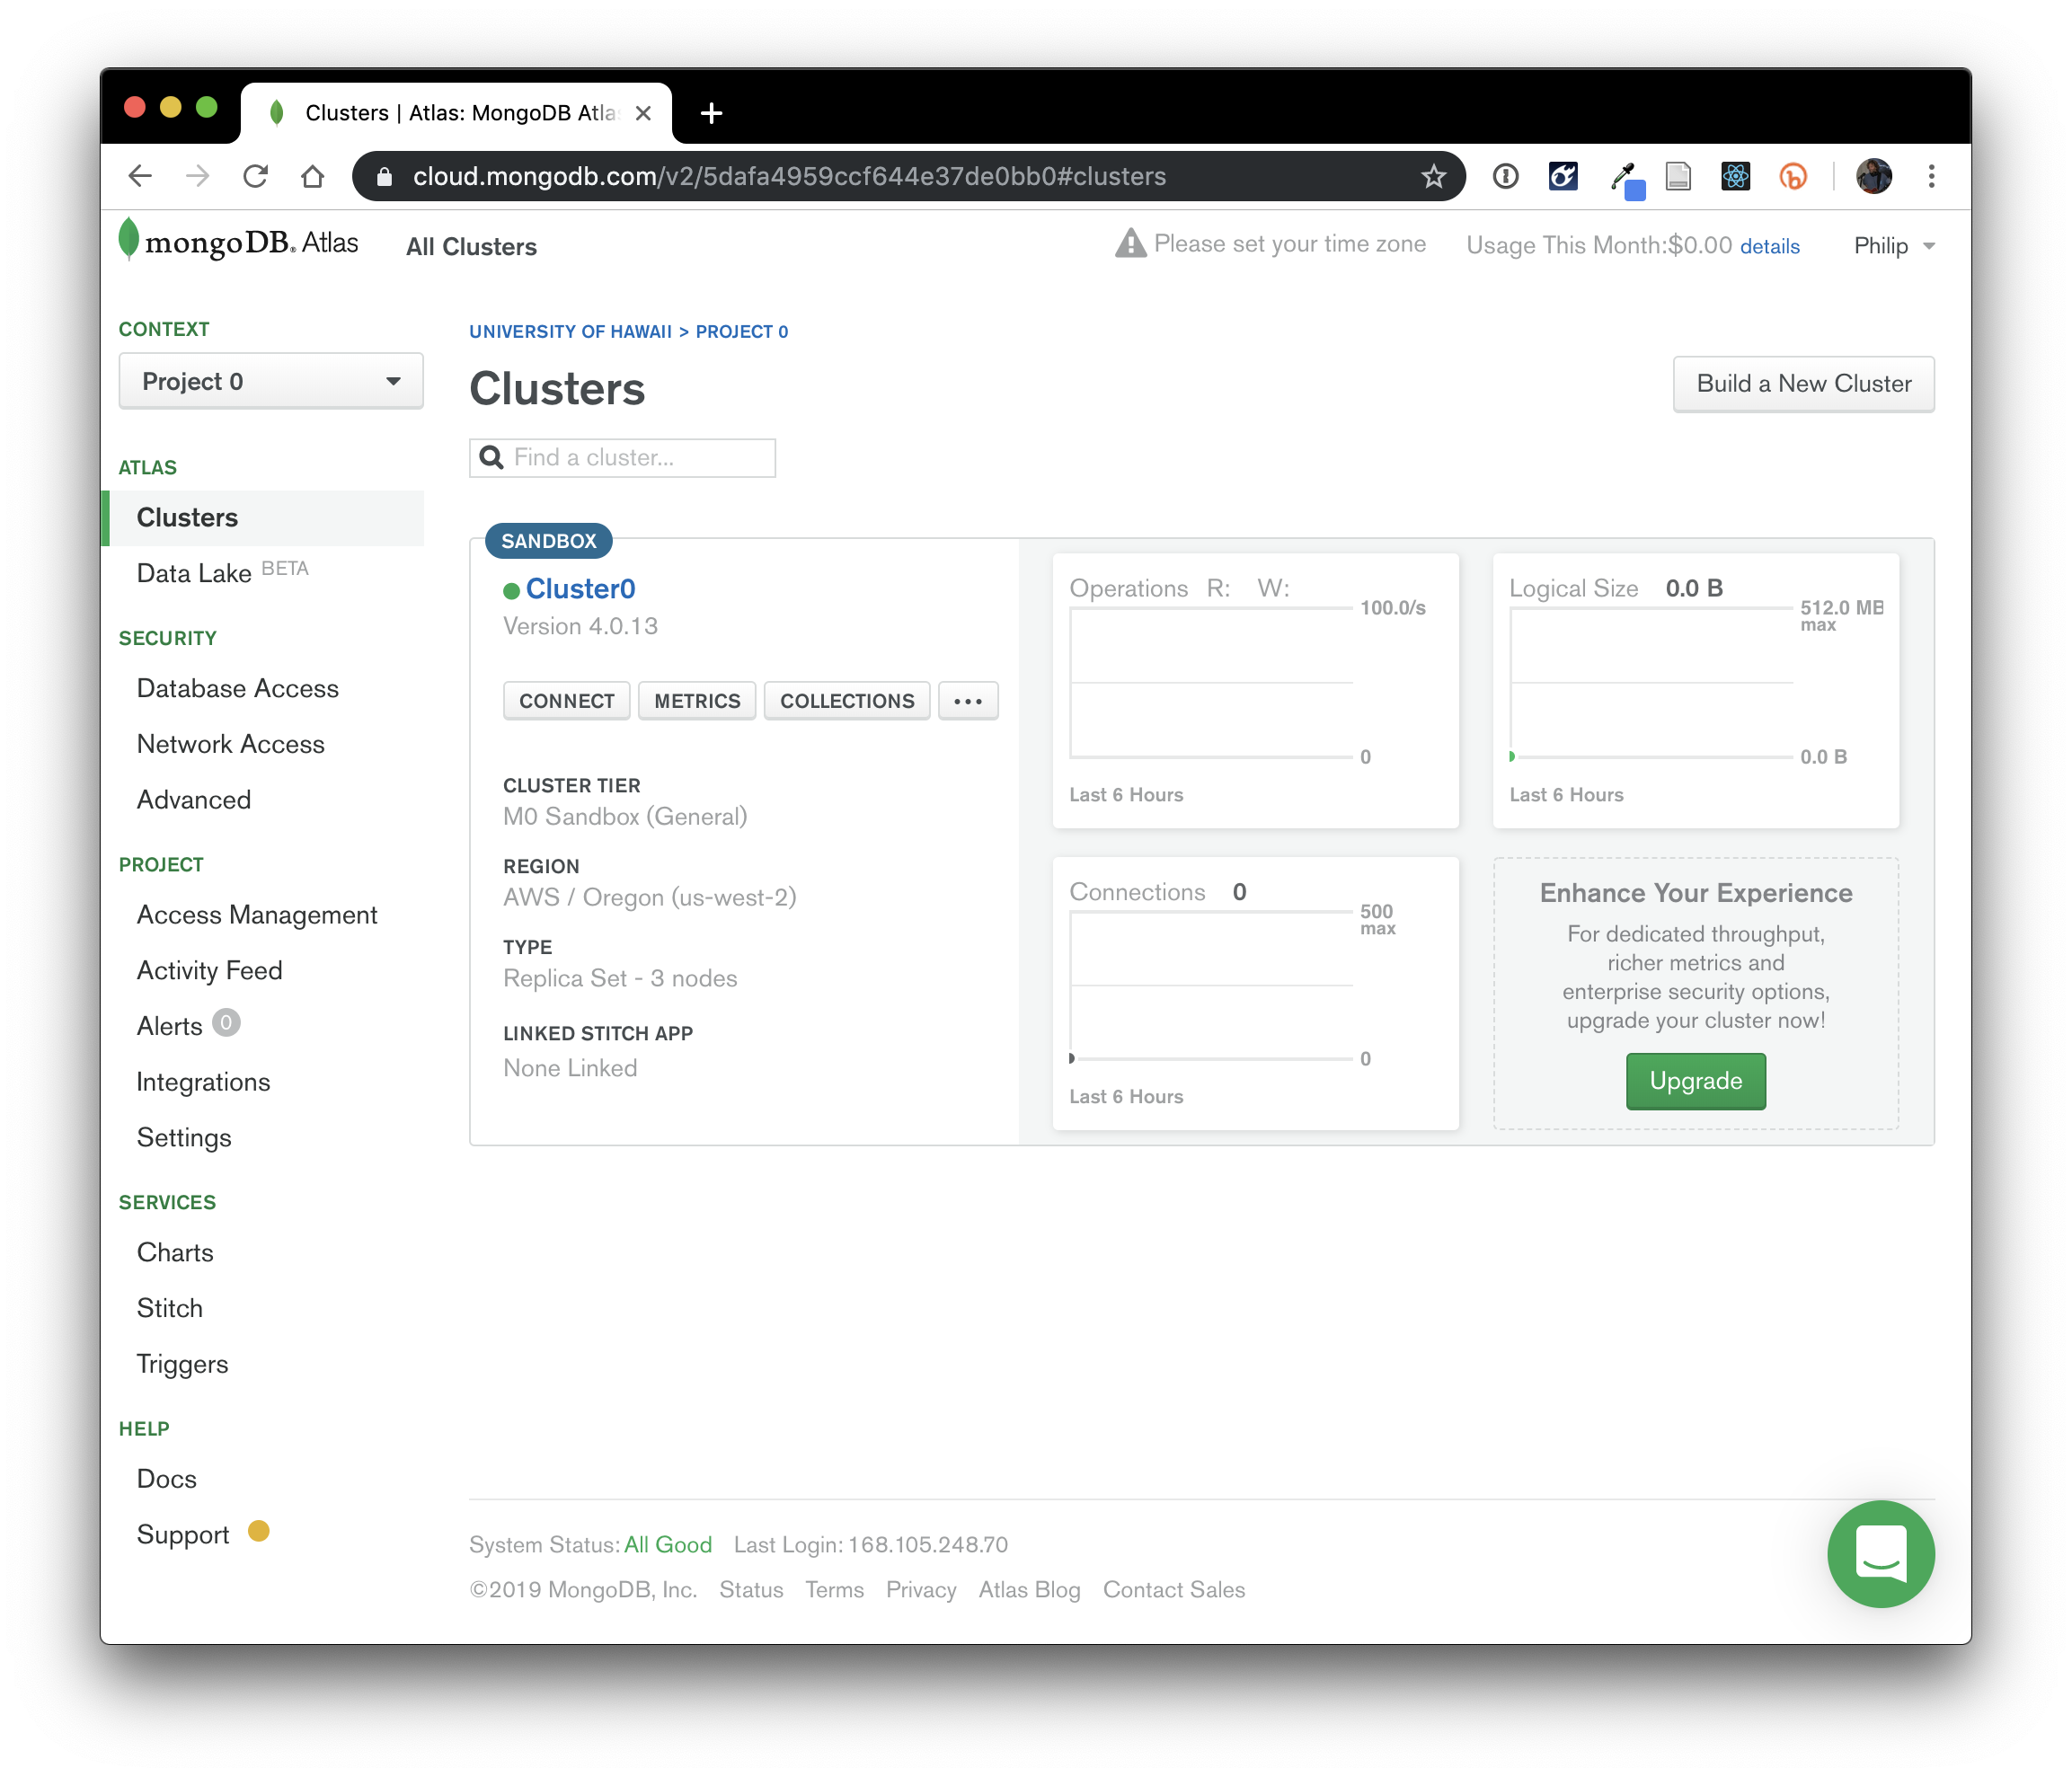
You now have a new, free cluster (i.e. MongoDB database) called “Cluster0”.
5. Create a user and password for accessing this database.
Next, create a user called “admin”. Click on “Database Access” in the left hand menu, then click the green “Add New User” button. You can let the system auto-generate the secure password, and specify that this user can read and write to any database. Note: you need to save the auto-generated password someplace, you will need it in a later step. Here’s what this window looks like right before creating the user:
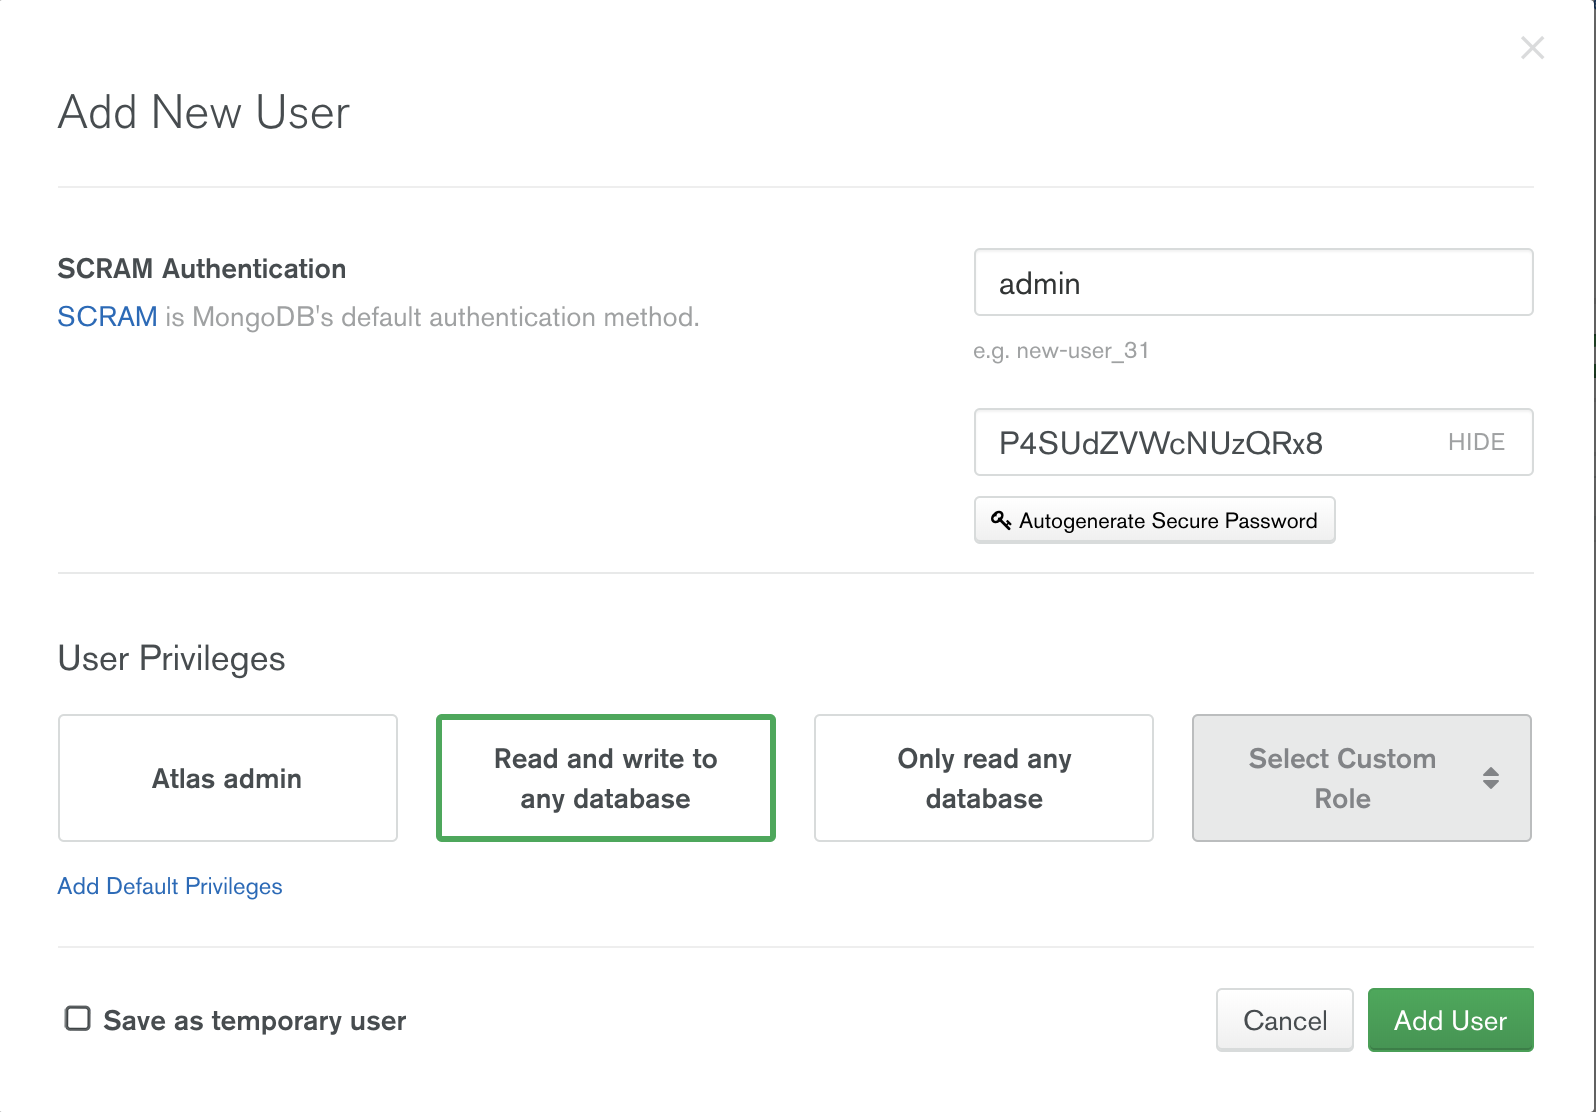
(Don’t worry, this password is no longer valid.)
6. Define the whitelist so that this database can be accessed from anywhere
Next, set up the white list. Click on the “Network Access” link in the left hand menu, the select the IP White list tab, click on “Add IP Address”, then click “Allow access from anywhere” button, which will add “0.0.0.0/0” as the white list entry. Here’s what the IP Whitelist page should look like after you’re done:

7. Get the connection string for use in your settings.production.json file.
Now, click on the “Clusters” link in the left hand menu to go back to the top-level page for this cluster. Click on the “connect” link to bring up a dialog box providing various connection options:
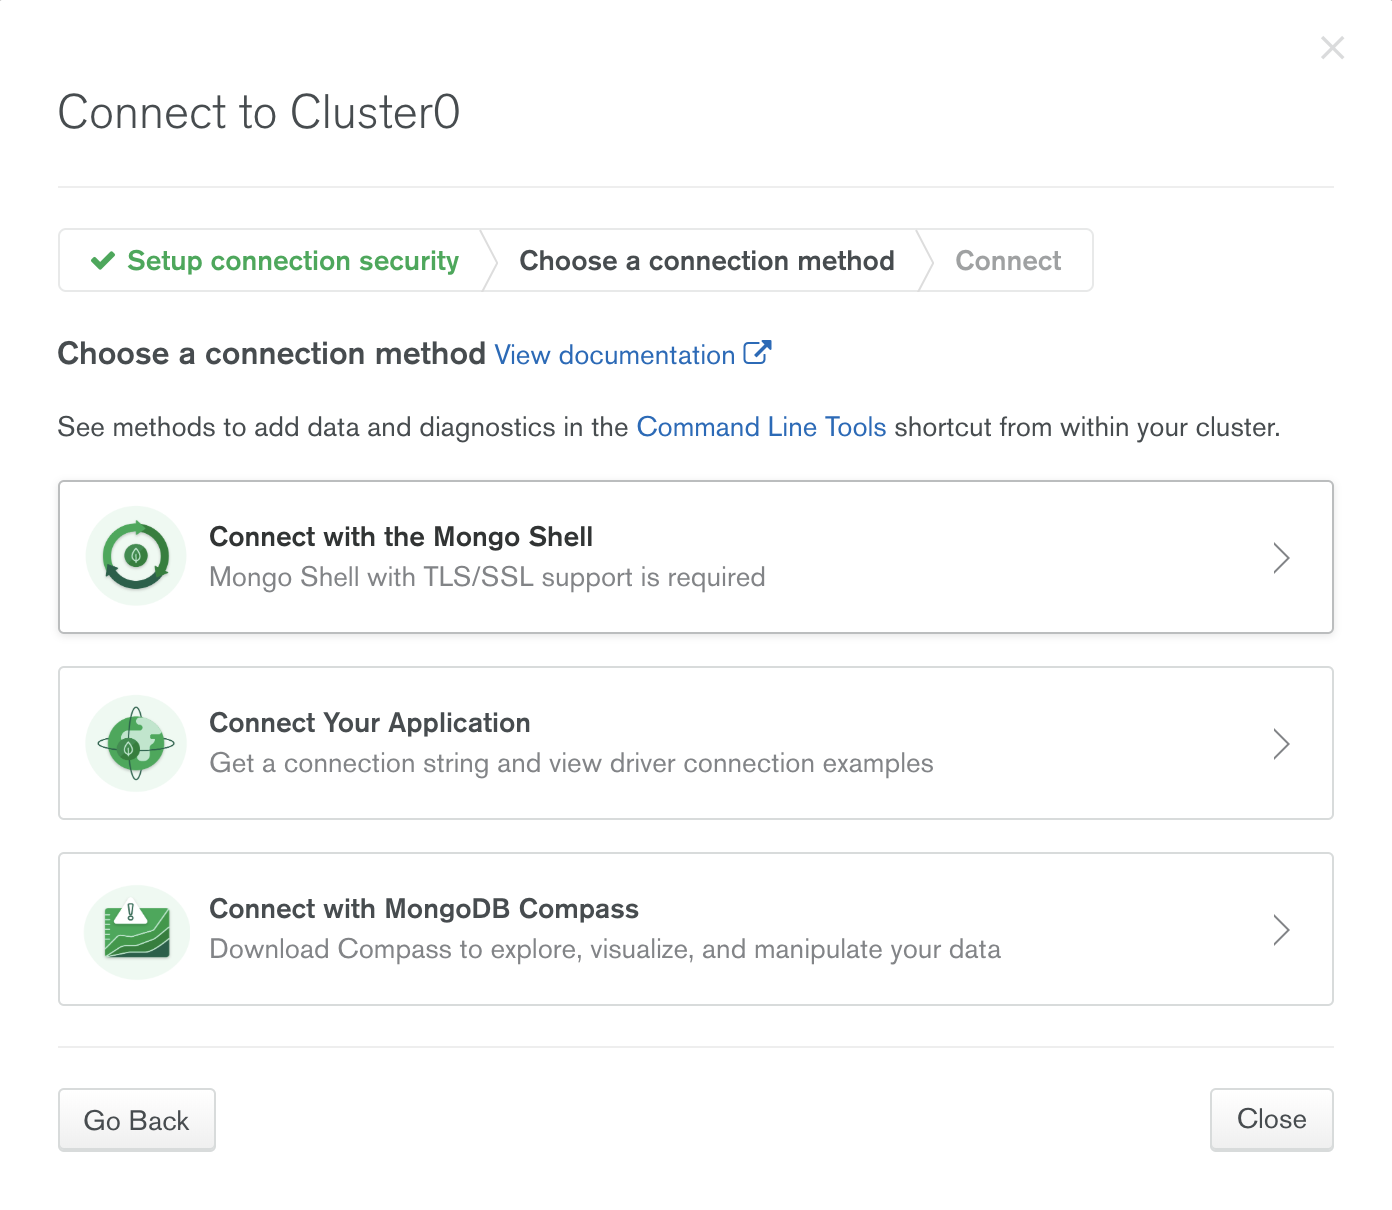
Choose the “Connect your application” link to get the following window:
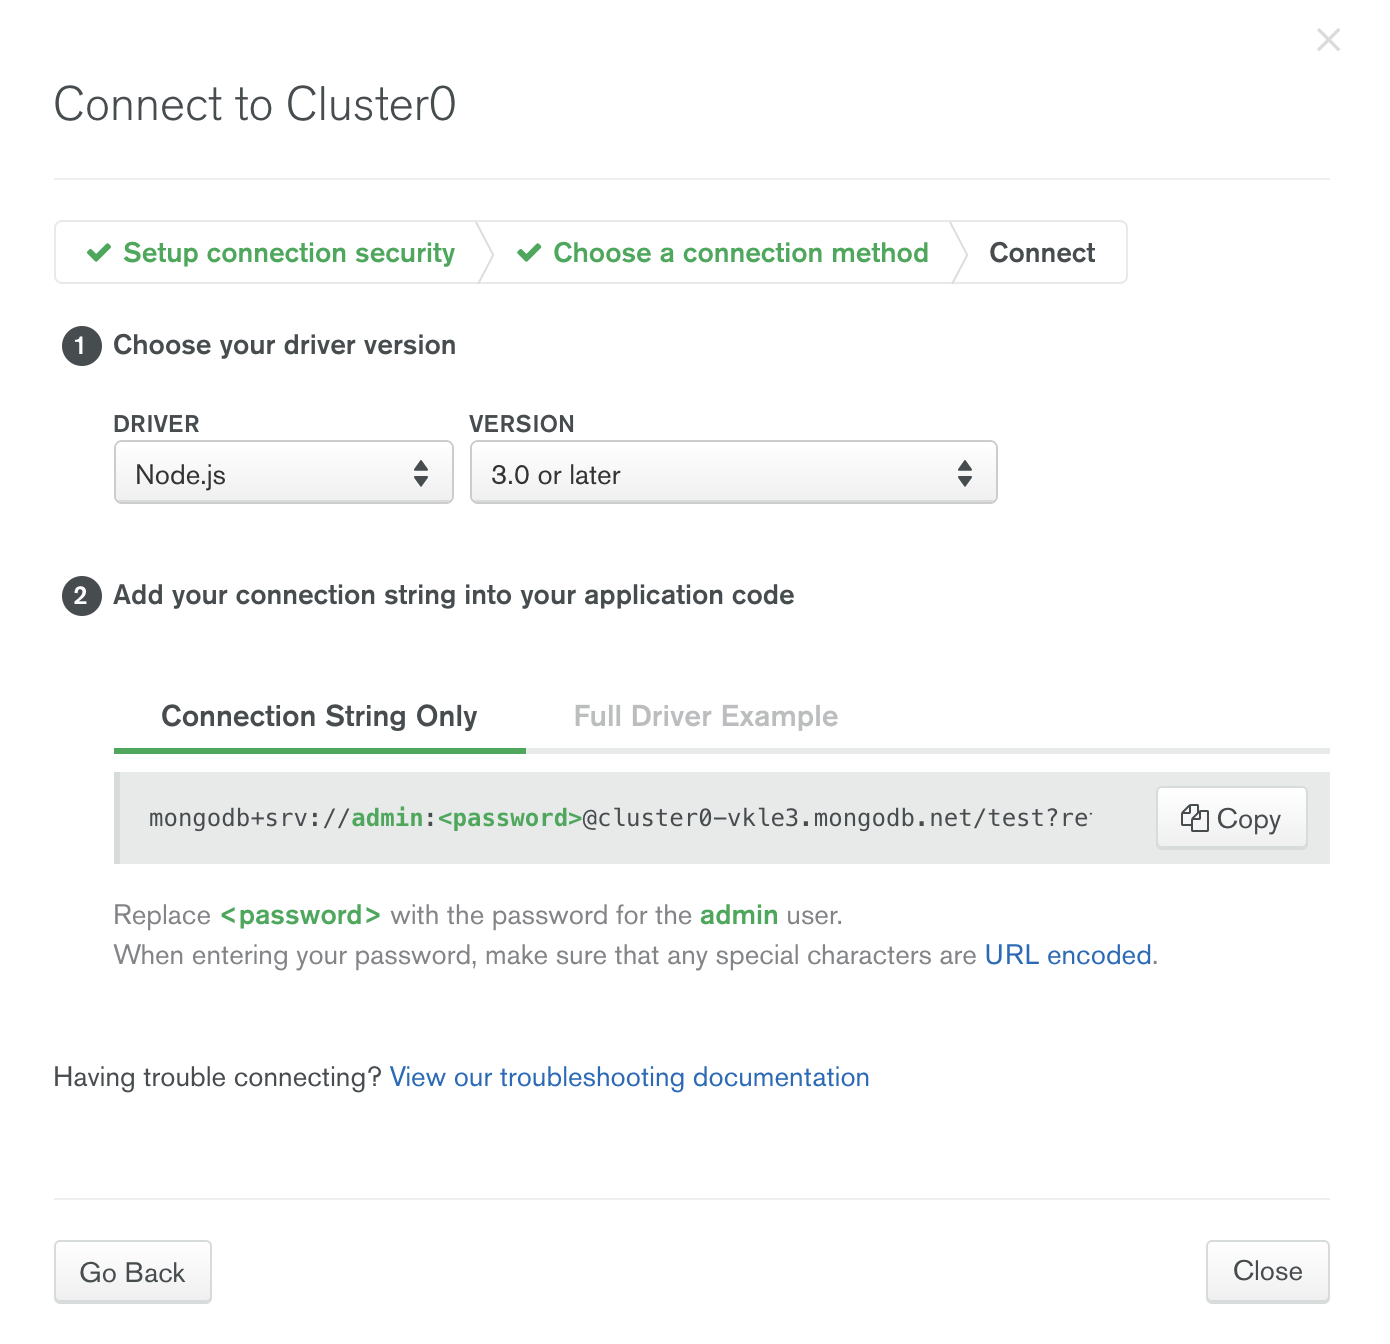
You want to press the “Copy” button to copy the connection string. It looks like this:
mongodb+srv://admin:<password>@cluster0-vkle3.mongodb.net/test?retryWrites=true&w=majority
8. Create a settings.production.json file for your digits application
You can briefly review the Create a settings file for Galaxy section of the deploy guide for general guidance.
In our case, note that Digits has a config/ directory containing a settings file called “settings.development.json”, which always gets committed to GitHub. We are going to create a file in that directory called “settings.production.json”, which includes that content, but in addition has some confidential data for Galaxy deployment. In particular, it will contain the Atlas username and password needed for your Galaxy-hosted digits application to communicate with your Atlas-hosted MongoDB database.
It is crucial that your settings.production.json file not get committed to GitHub, otherwise those credentials could become public. To prevent committing to GitHub, your .gitignore file provided with the template always excludes any files called settings.production.json. That means that you can create a file in the config/ directory called “settings.production.json” that contains sensitive information (i.e. the MongoDB username and password in clear text), and it will not be committed to GitHub. You’ll specify settings.production.json as your settings file when you actually deploy to Galaxy in Step 7.
So, to create your settings.production.json file, start by making a copy of settings.development.json called settings.production.json. Then add a section for galaxy. Your settings.production.json file should look similar to this, but use your own connection string (don’t just copy the string below!):
{
  "galaxy.meteor.com": {
    "env": {
      "MONGO_URL": "mongodb+srv://admin:<password>@cluster0-vkle3.mongodb.net/test?retryWrites=true&w=majority"
    }
  },
  "defaultAccounts": .....
  "defaultContacts": .....
}
9. Edit settings.production.json to include your password
Edit the string <password> to be the actual password associated with your Atlas cluster. Be sure to get rid of the angle brackets!
10. Decide on your hostname
Before deploying an app to Galaxy, you have to decide what its hostname is going to be.
Briefly review the Select a hostname section of the deploy guide.
For this class, your hostname will always be “foo.meteorapp.com”, where “foo” is replaced by your application name. Note that you’ll have to come up with an application name that has not already been deployed at meteorapp.com.
For this specific exercise, please choose a hostname consisting of “testdeploy” plus your initials plus a number so that the resulting hostname is unique. In my case, an example hostname might be “testdeploypmj2”.
11. Initiate your Digits application deployment on the command line
Briefly review the Deploy your application to Galaxy section of the deploy guide.
An important change for this class is that you must add --owner ics314f19 to the deploy command. This results in your app being deployed to our class organization, not to your personal account. That way you will not be charged for your deployment.
Here’s what the deployment command looks like for me on Unix, using settings.production.json as the settings file:
DEPLOY_HOSTNAME=galaxy.meteor.com meteor deploy testdeploypmj2.meteorapp.com --owner ics314f19 --settings ../config/settings.production.json
On windows, it will look like this:
$ SET DEPLOY_HOSTNAME=galaxy.meteor.com
$ meteor deploy testdeploypmj2.meteorapp.com --owner ics314f19 --settings C:\path\to\config\settings.production.json
Everyone will need to edit the above command to refer to their own hostname and path.
If this command completes successfully, you’ll see a message like this in your console when it’s done:
Talking to Galaxy servers at https://galaxy.meteor.com
Preparing to deploy your app...
app/node_modules/semantic-ui-css/semantic.css: warn: There are some @import rules in the middle of a file. This might be a bug, as imports are only valid at the beginning of a file.
Browserslist: caniuse-lite is outdated. Please run next command `npm update caniuse-lite browserslist`
Uploaded app bundle for new app at testdeploypmj2.meteorapp.com.
Galaxy is building the app into a native image.
Building app image...
Deploying app...
You have successfully deployed the first version of your app.
For details, visit https://galaxy.meteor.com/app/testdeploypmj2.meteorapp.com
Don’t worry about the semantic ui and caniuse-light warnings.
Step 12: Monitor your deployment at Galaxy
Once your command line finishes, that means your application has been successfully uploaded to the Galaxy service.
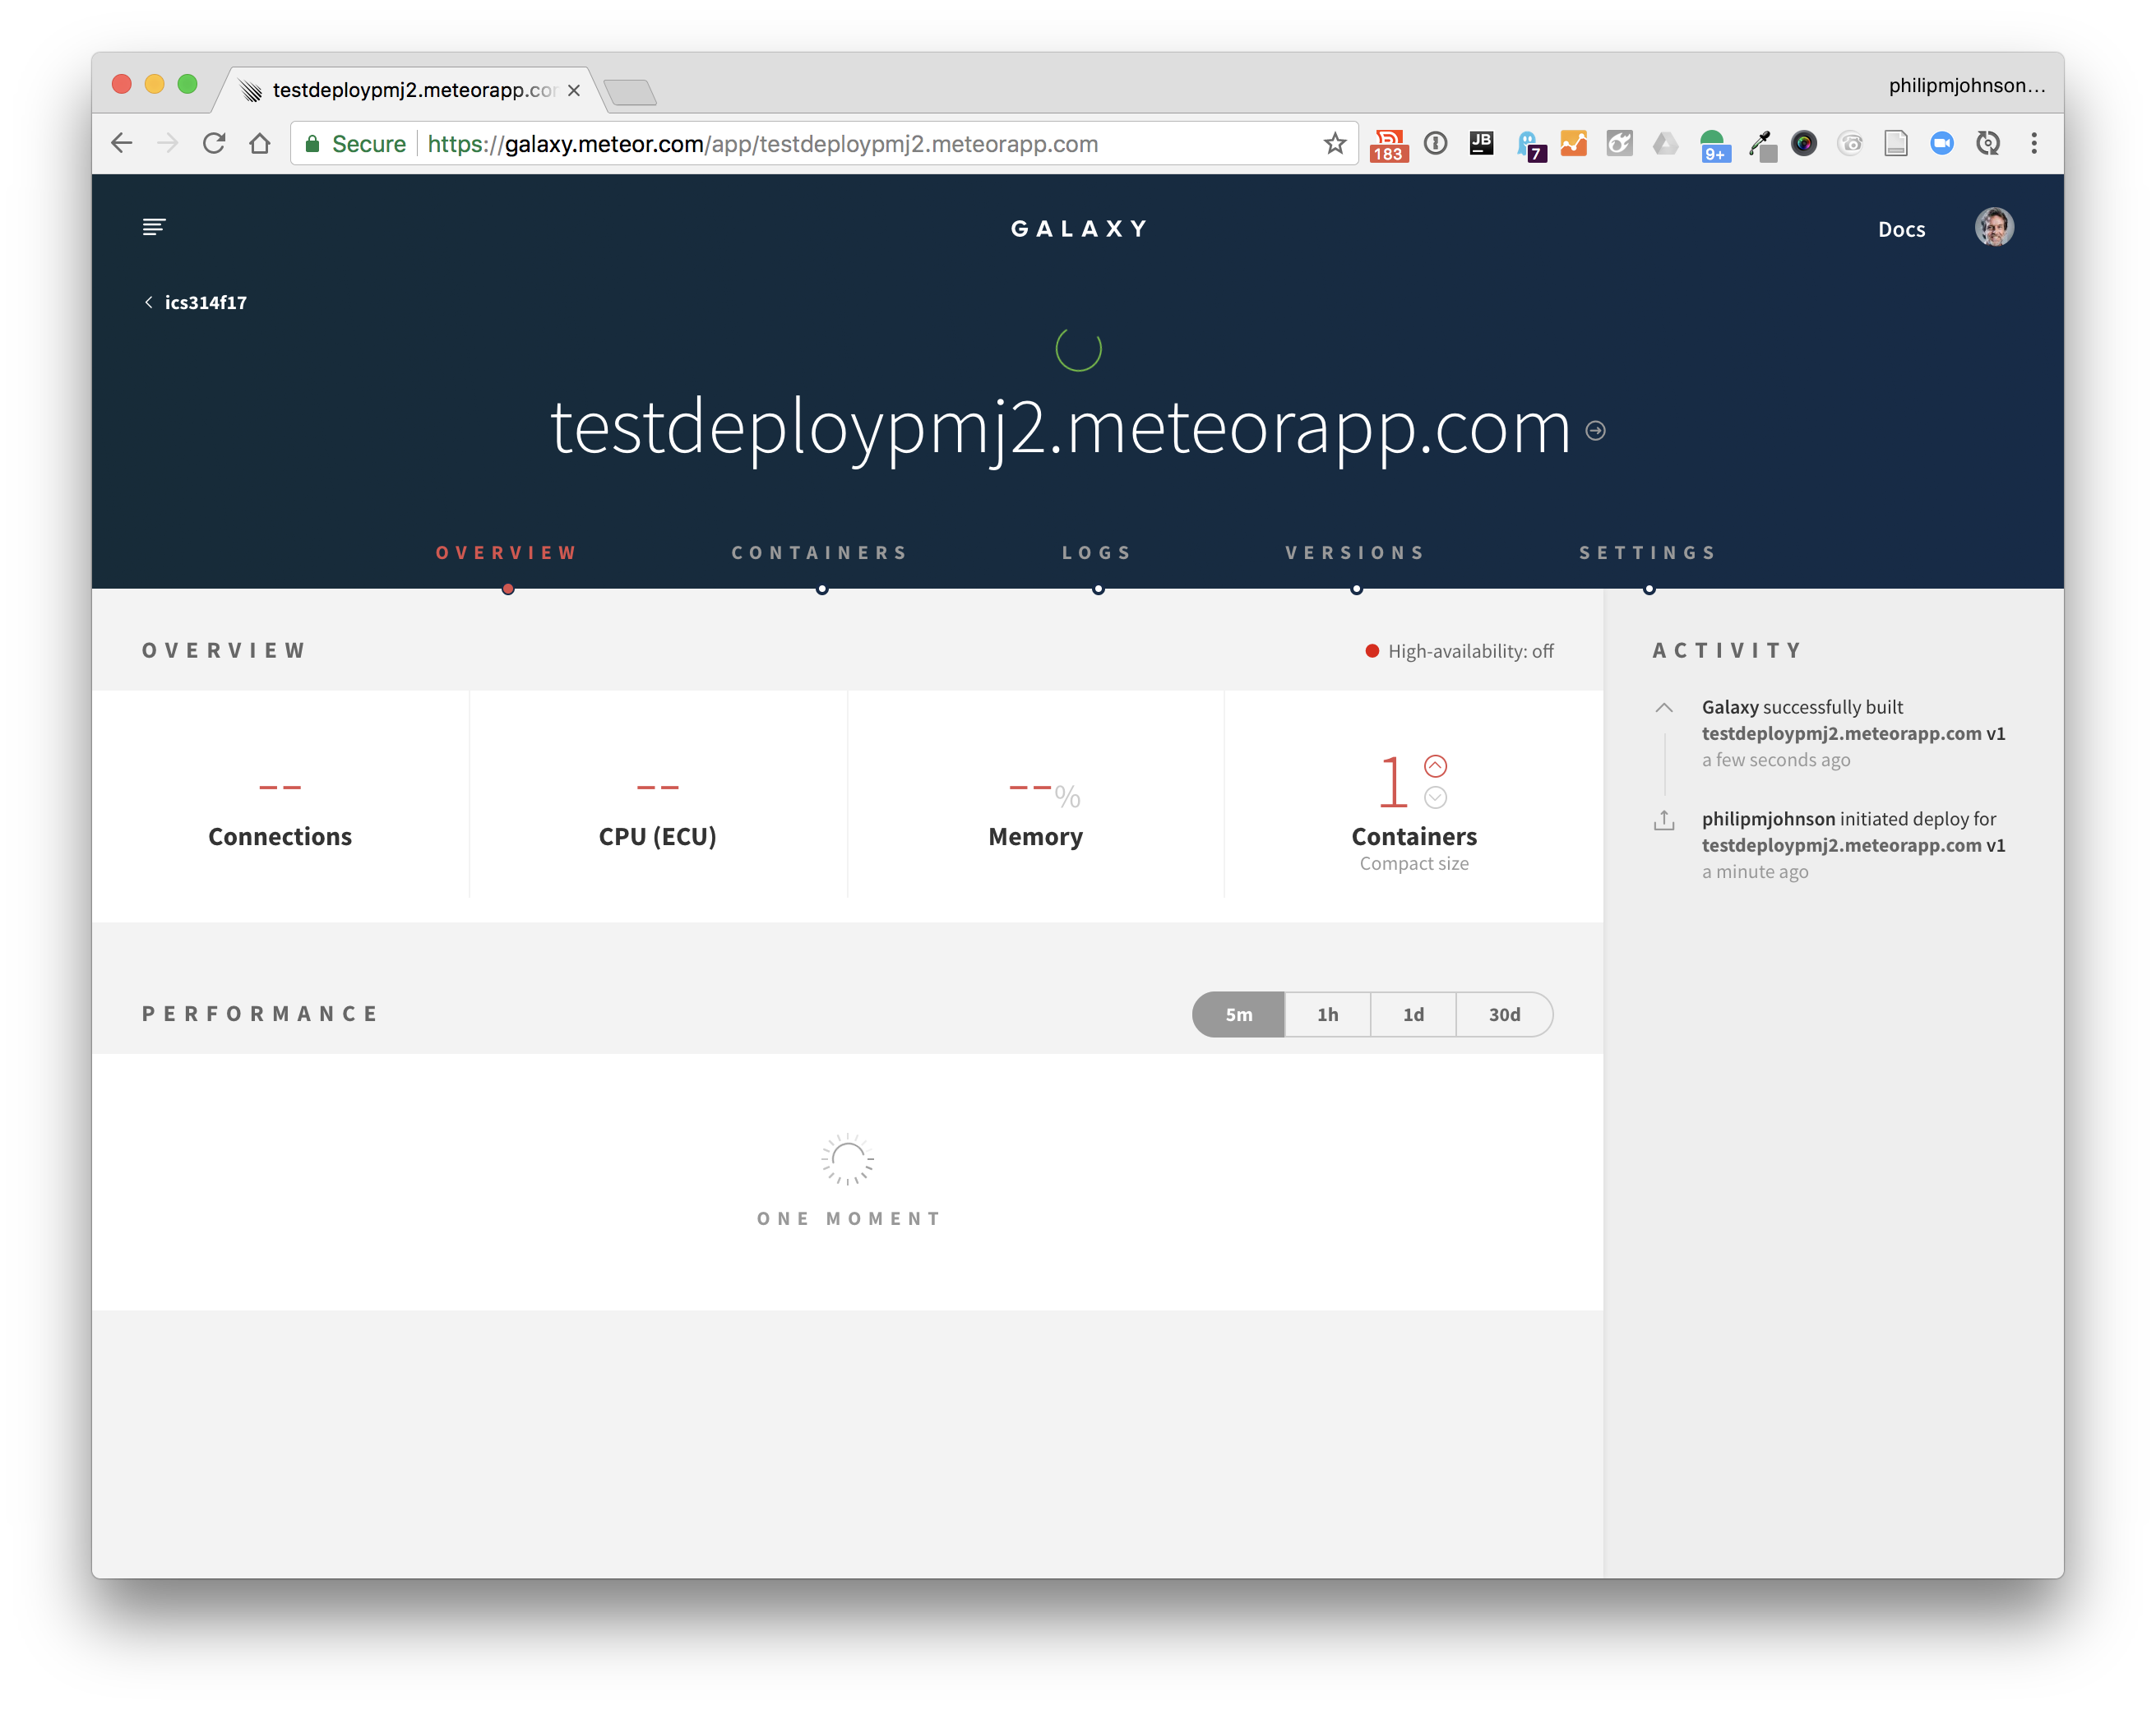
The next step is to go to the URL displayed on the last line of your console (in my case, it was “https://galaxy.meteor.com/app/testdeploypmj2.meteorapp.com”). You should see a dashboard with a spinning green circle near the top. The spinning green circle means Galaxy is in the process of deploying your application. Here’s what that might look like:
Important note: this part of deployment should take less than 10 minutes.
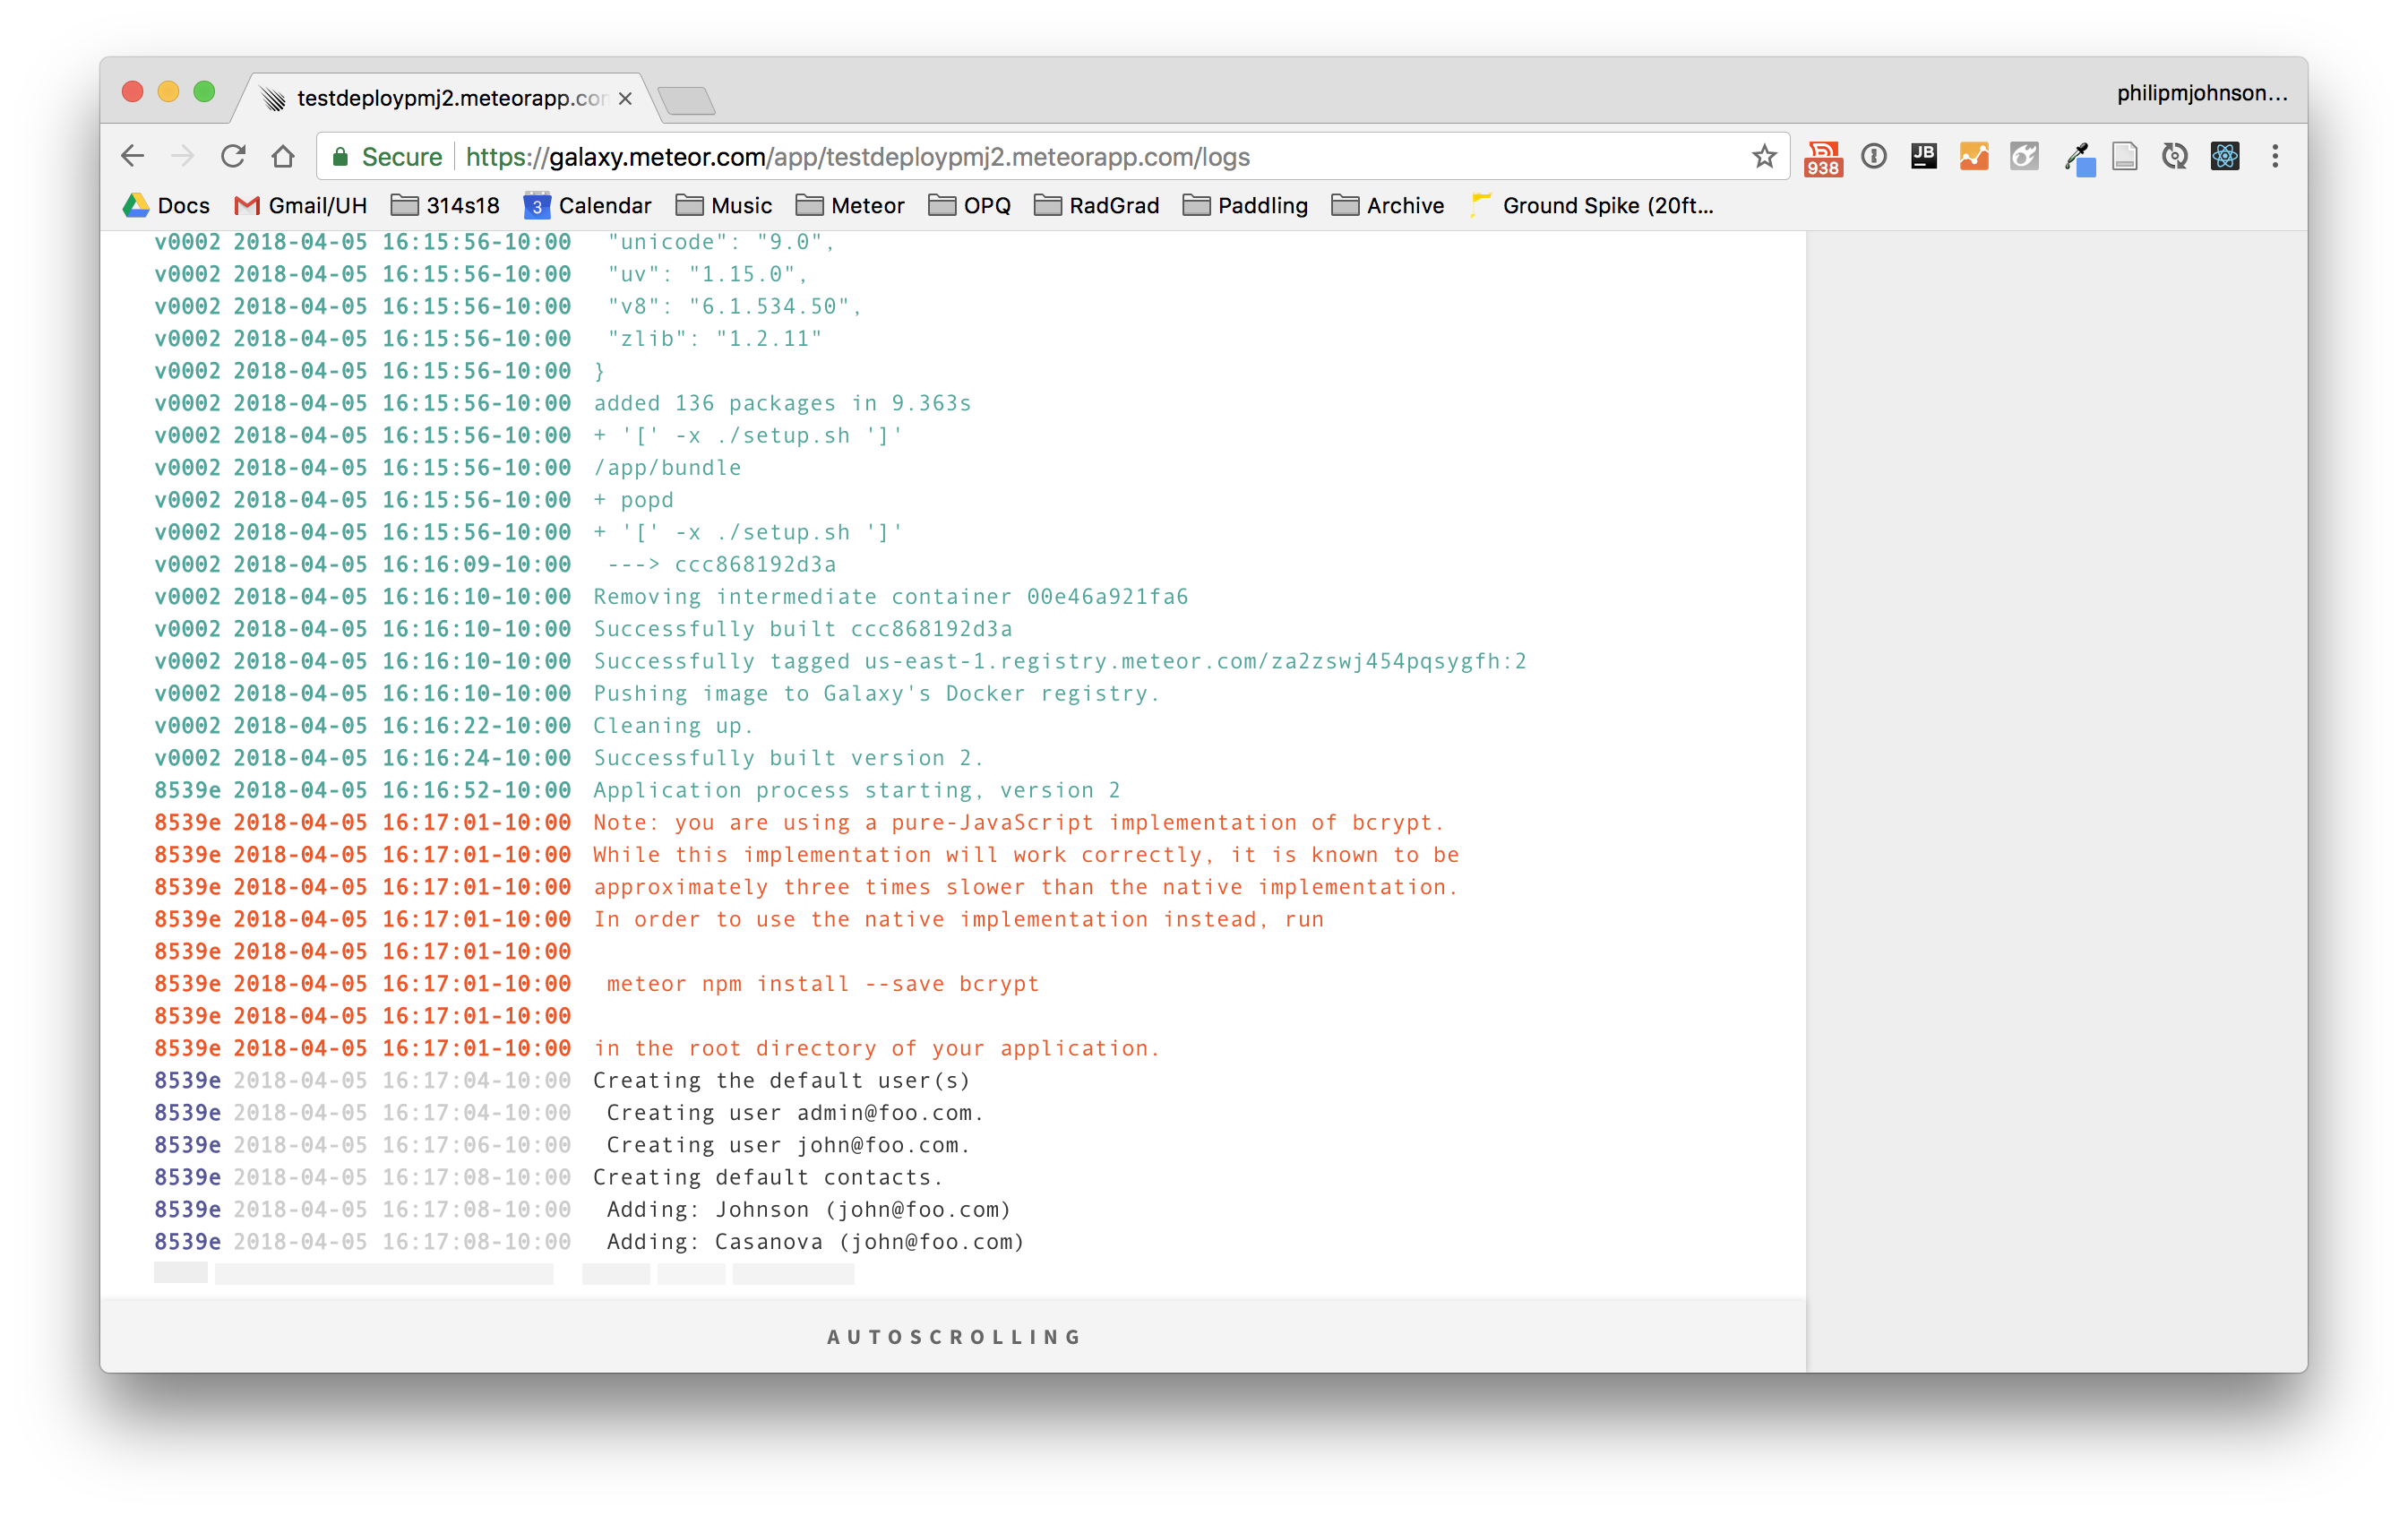
You should monitor the progress of the deployment to see if any errors occur. To do this, click on the “Logs” menu item and select “View New Logs” at the bottom of the page.
There will be many lines of green text. Eventually, the log will say “Application process starting, version 1”, along with some red text about the pure Javascript version of bcrypt, followed by the loading of the sample data. Here’s what the logs look like after a successful deploy:
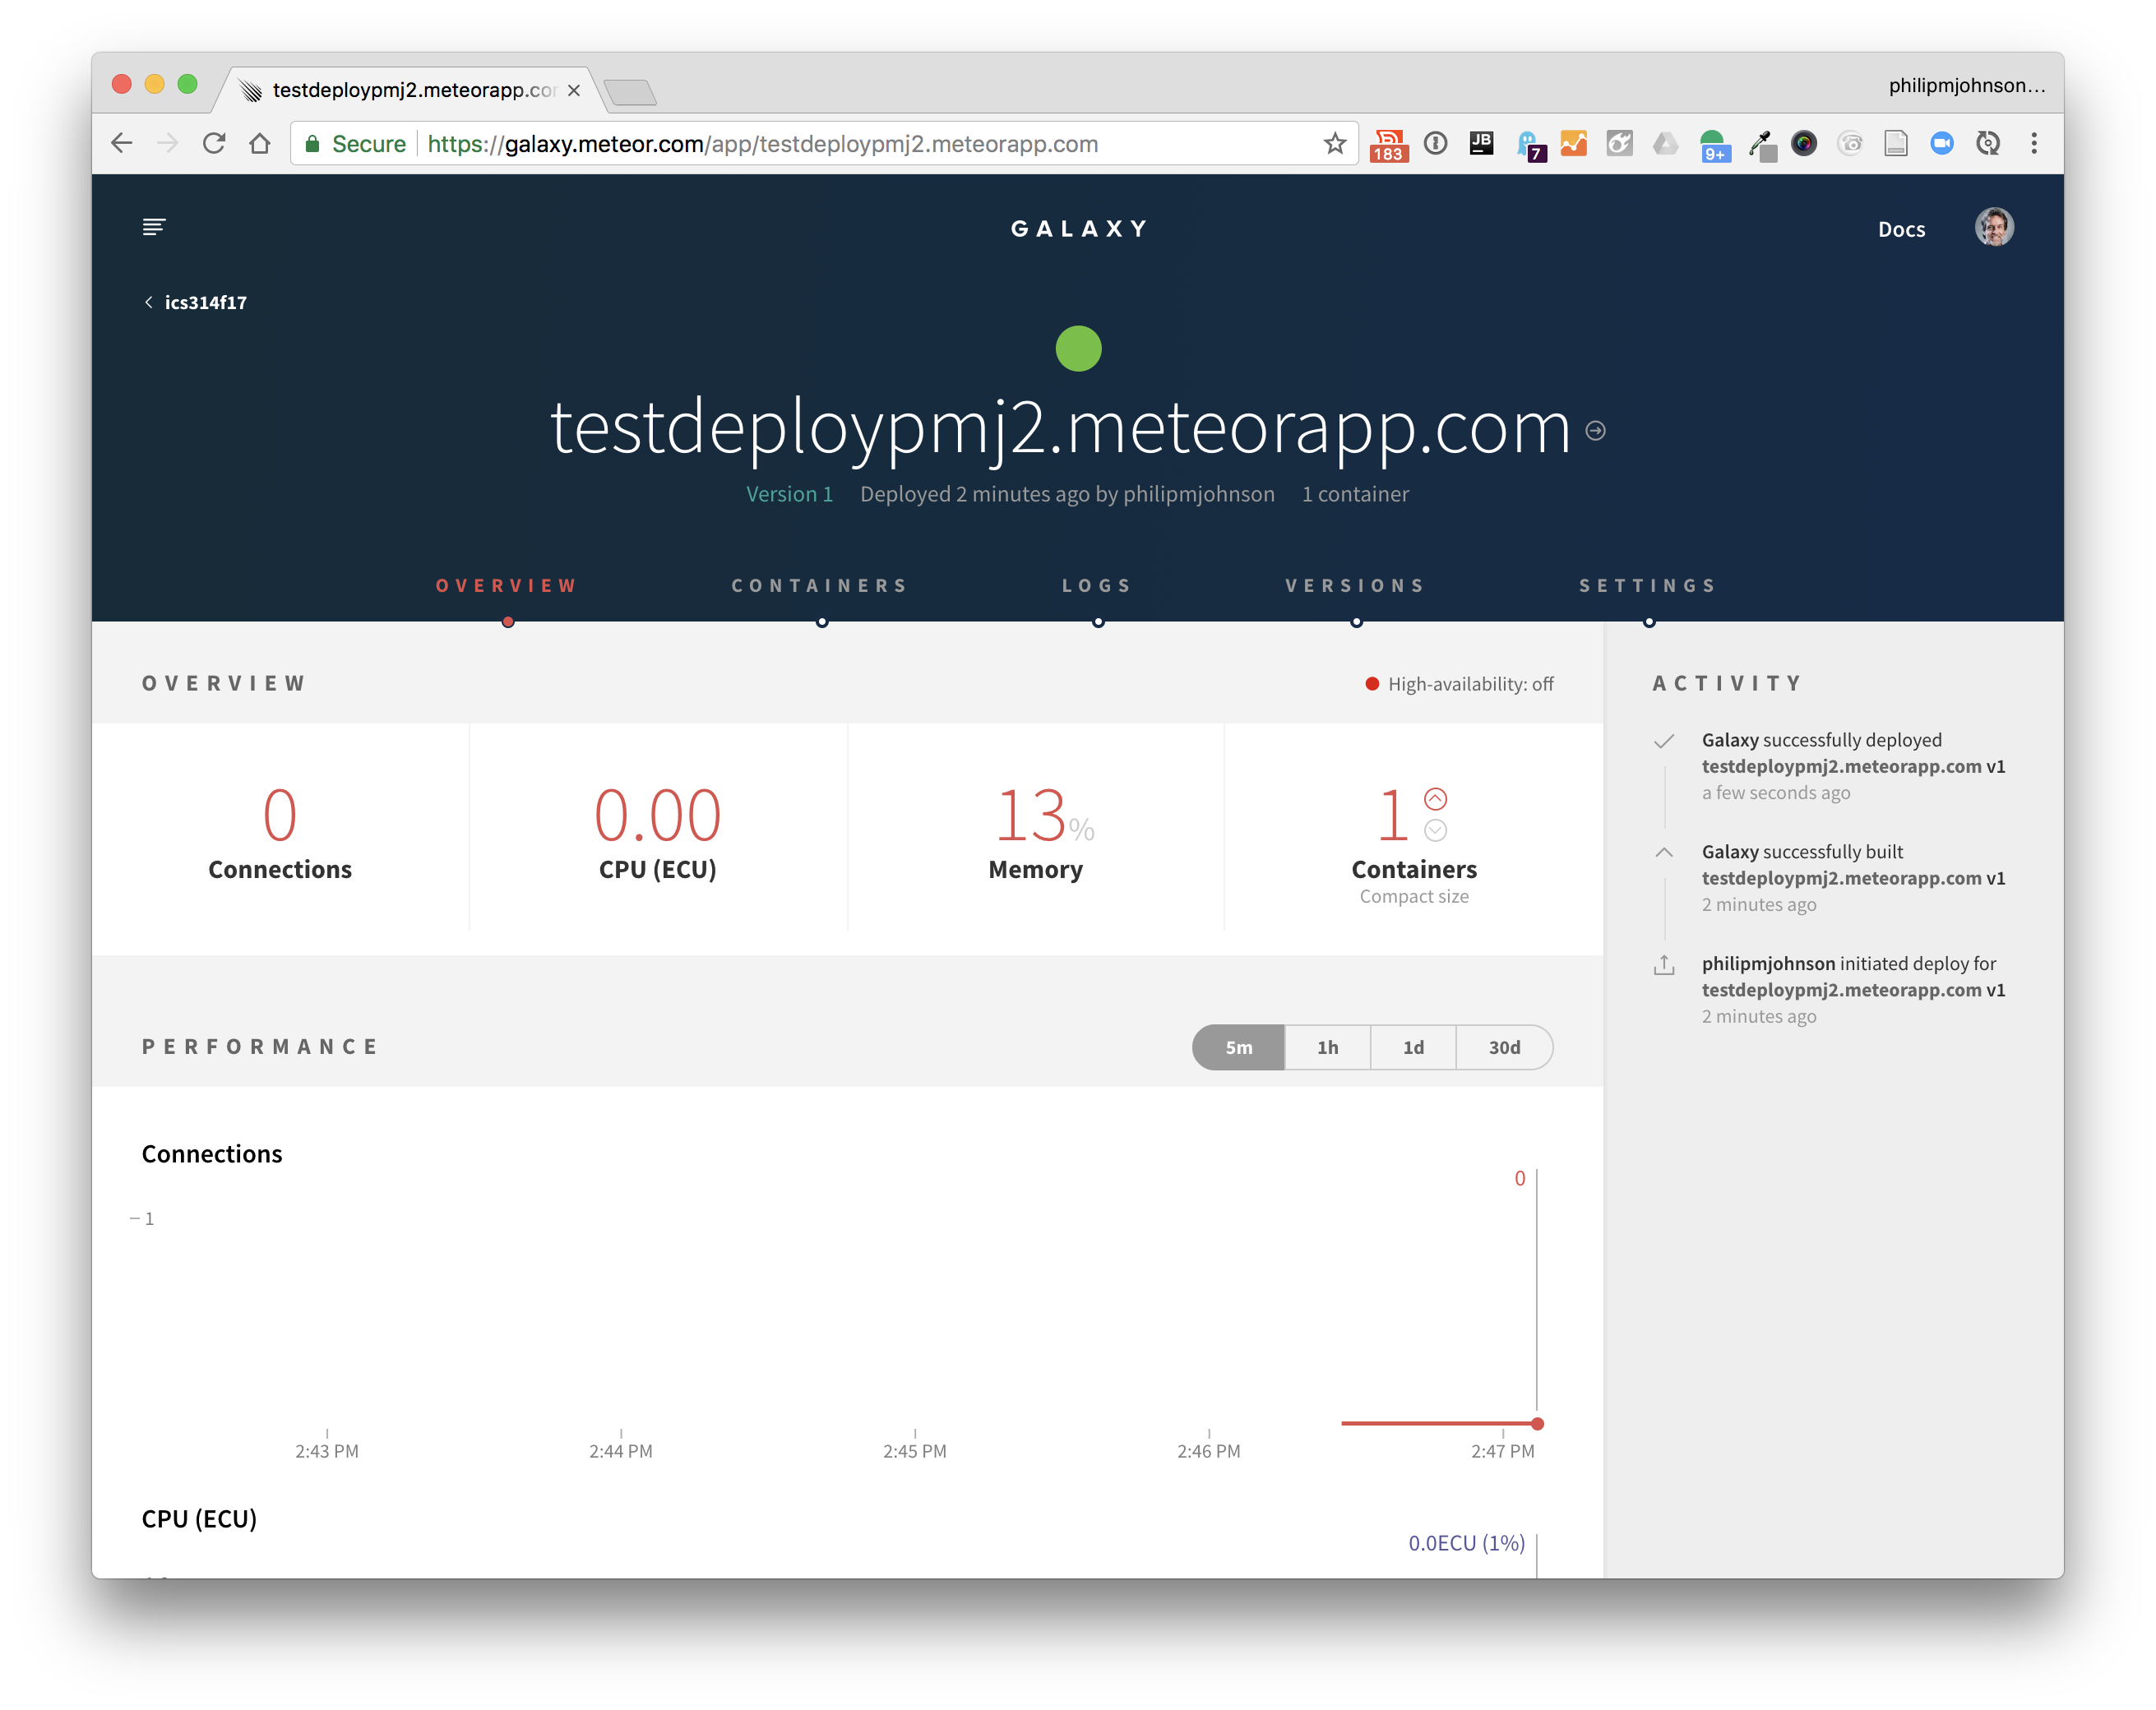
Once the logs say this, then the spinning green circle will be replaced in a few seconds by a solid green circle. For example, here is my dashboard after successful deployment:
Once you get the solid green disk (not the spinning green circle), take a screenshot and post this to the #deployment channel to show you have completed deployment.
Step 13: Test your deployed application
Bring up your sample app in a web browser to verify that it works as expected. (Click on the arrow on the right side of the app’s hostname).
Login as john@foo.com with his password, and then click on List Contacts. You should see a screen like this:
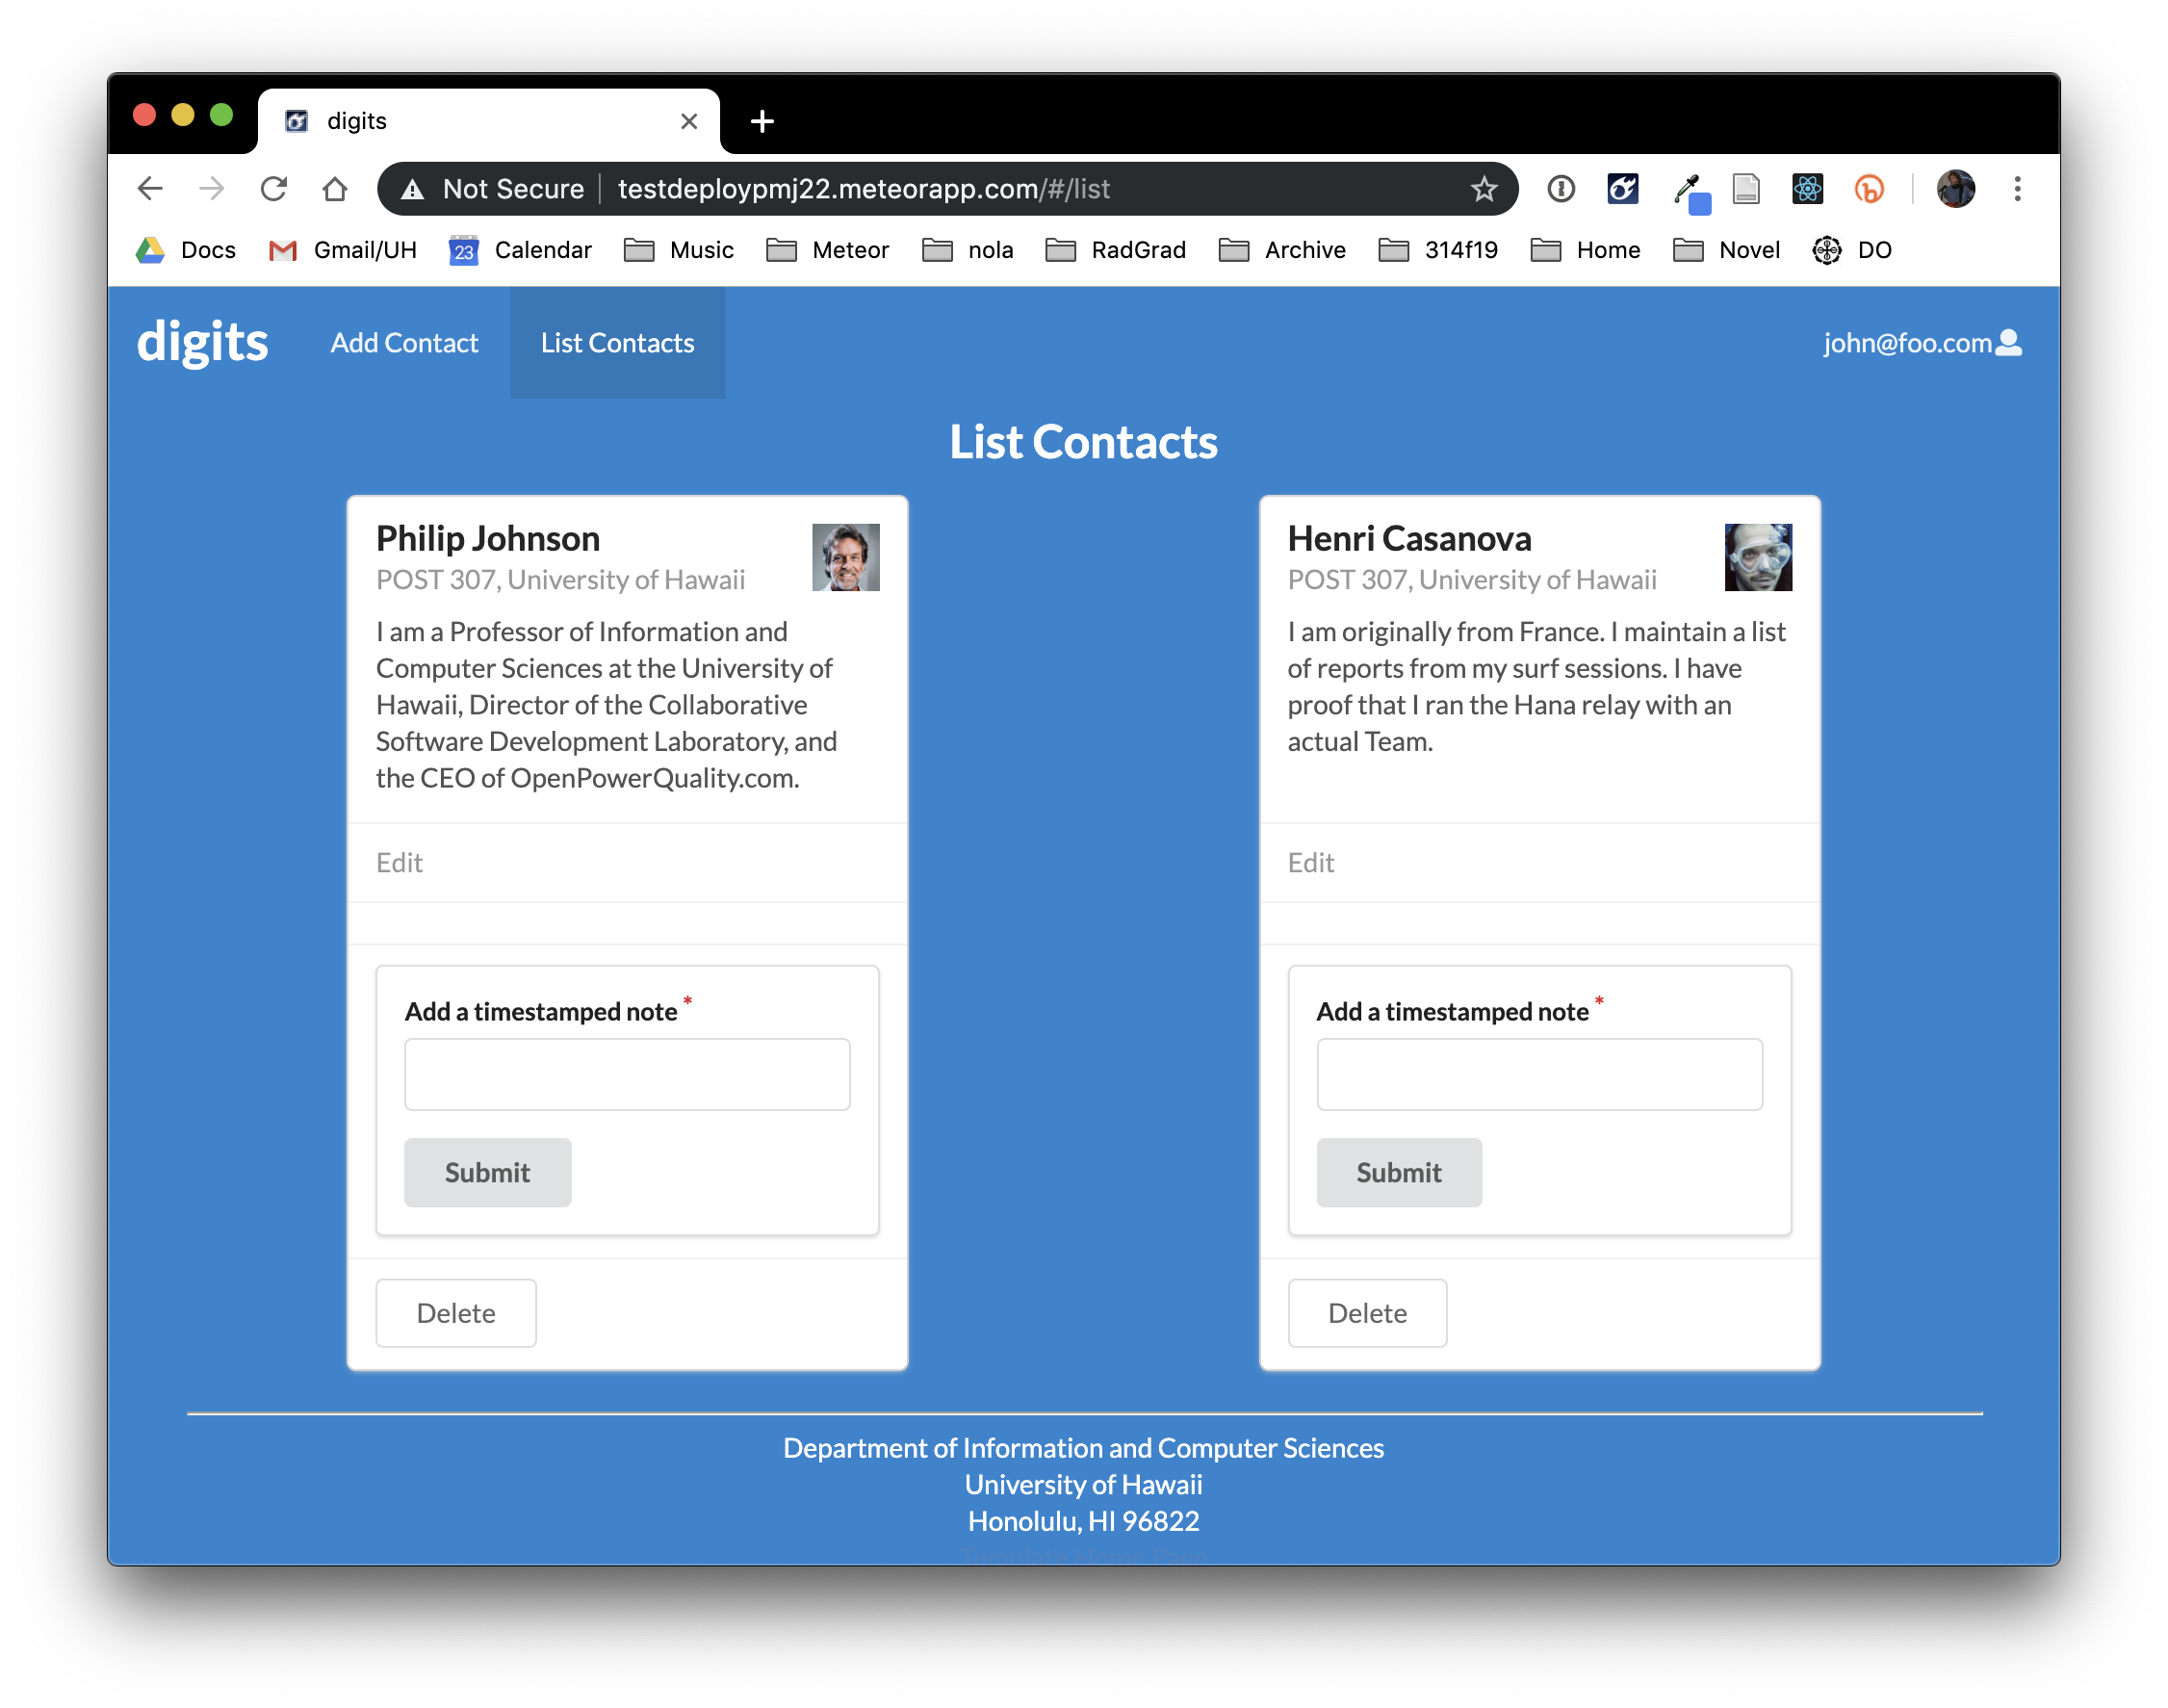
This shows that your application (running on Galaxy) is succesfully retrieving data (from Atlas).
Take a screenshot of this page of your Digits app and proudly post it to the #deployment channel.
If you are getting errors in the logs that you don’t understand how to resolve, feel free to post them to the #deployment channel to get help.
Step 14: Delete your app
Our organization does not have unlimited containers, so you can’t leave your test deployment hanging around. Instead, once you’ve created your screenshot, you should delete your test deployment app from Galaxy.
To do this, go to your deployment dashboard, click on the Settings menu item, then scroll down to the “Danger Zone”:
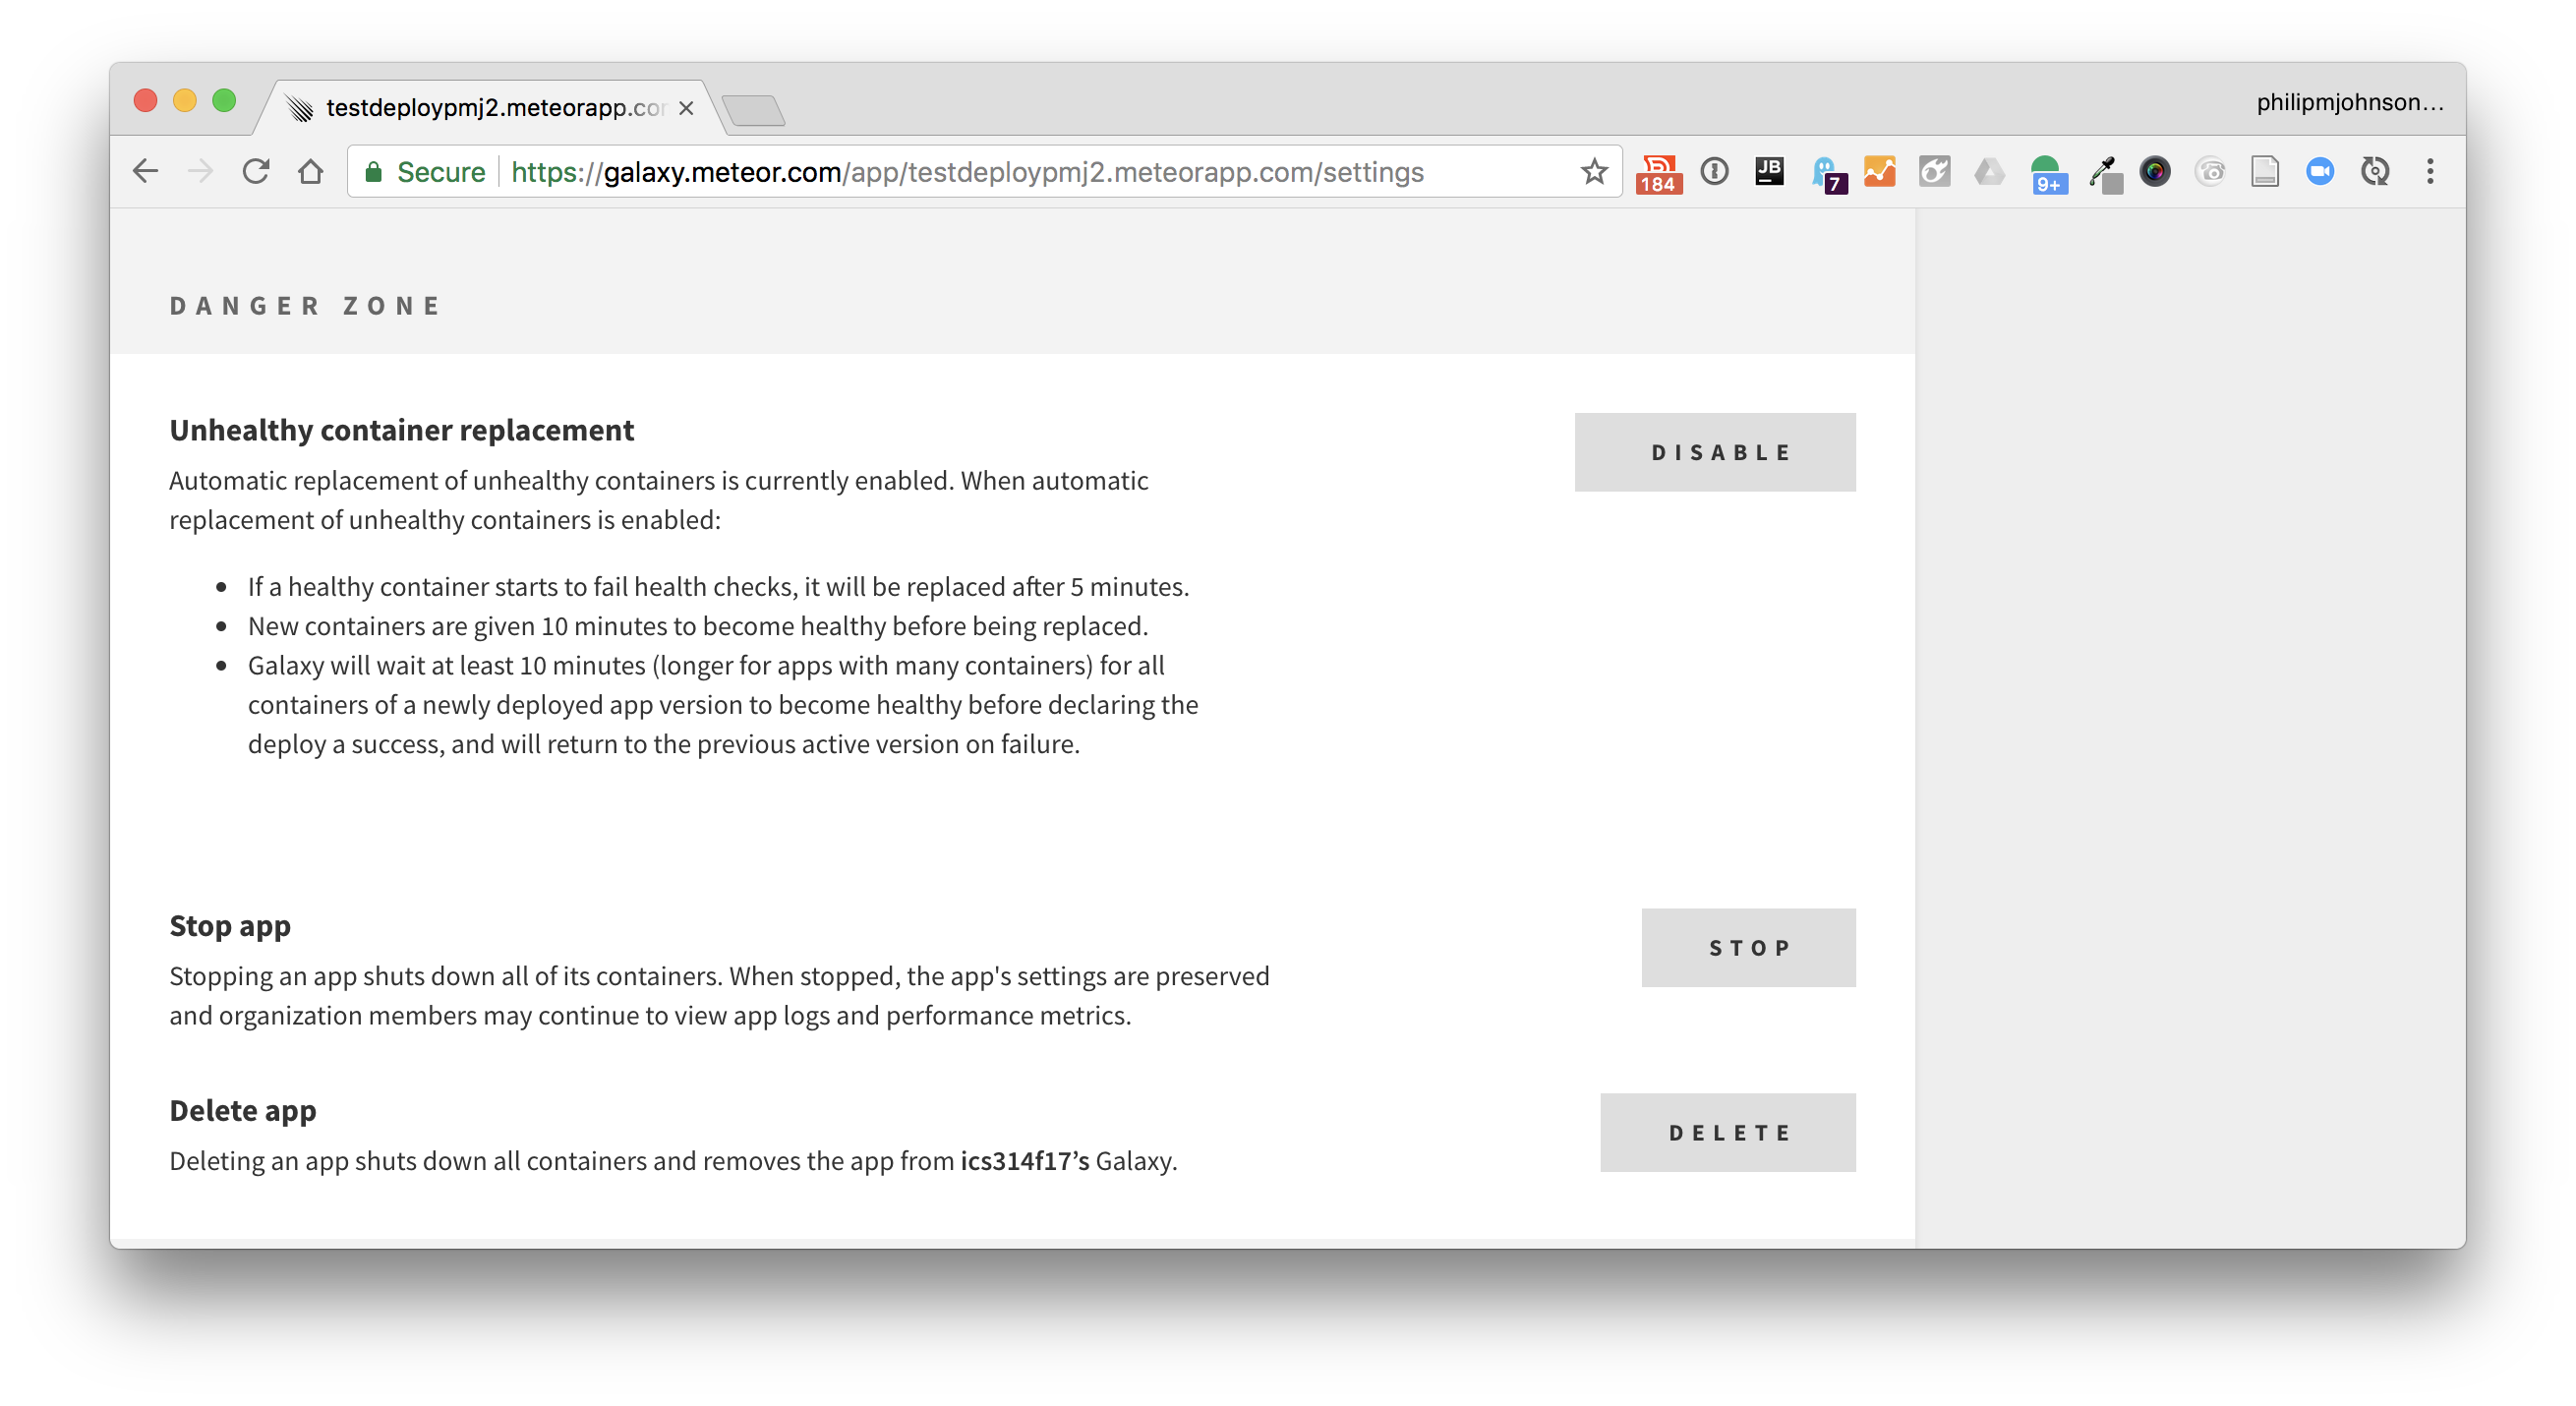
Go ahead and click the “DELETE” button to delete your test app. It will ask you to confirm the deletion. Click the second button to actually complete the deletion.
Submission
By the date and time indicated on the Calendar page, please finish all of these steps. Make sure to post your two screenshots to the #deployment channel.