E48A: meteor-application-template-react
For this experience, you will download and make a simple enhancement to meteor-application-template-react, so that you feel comfortable using it as a basis for future projects. Specifically, you will add the ability to remove items from the “Stuff” collection. When you’re done, the List Stuff page will look like this:
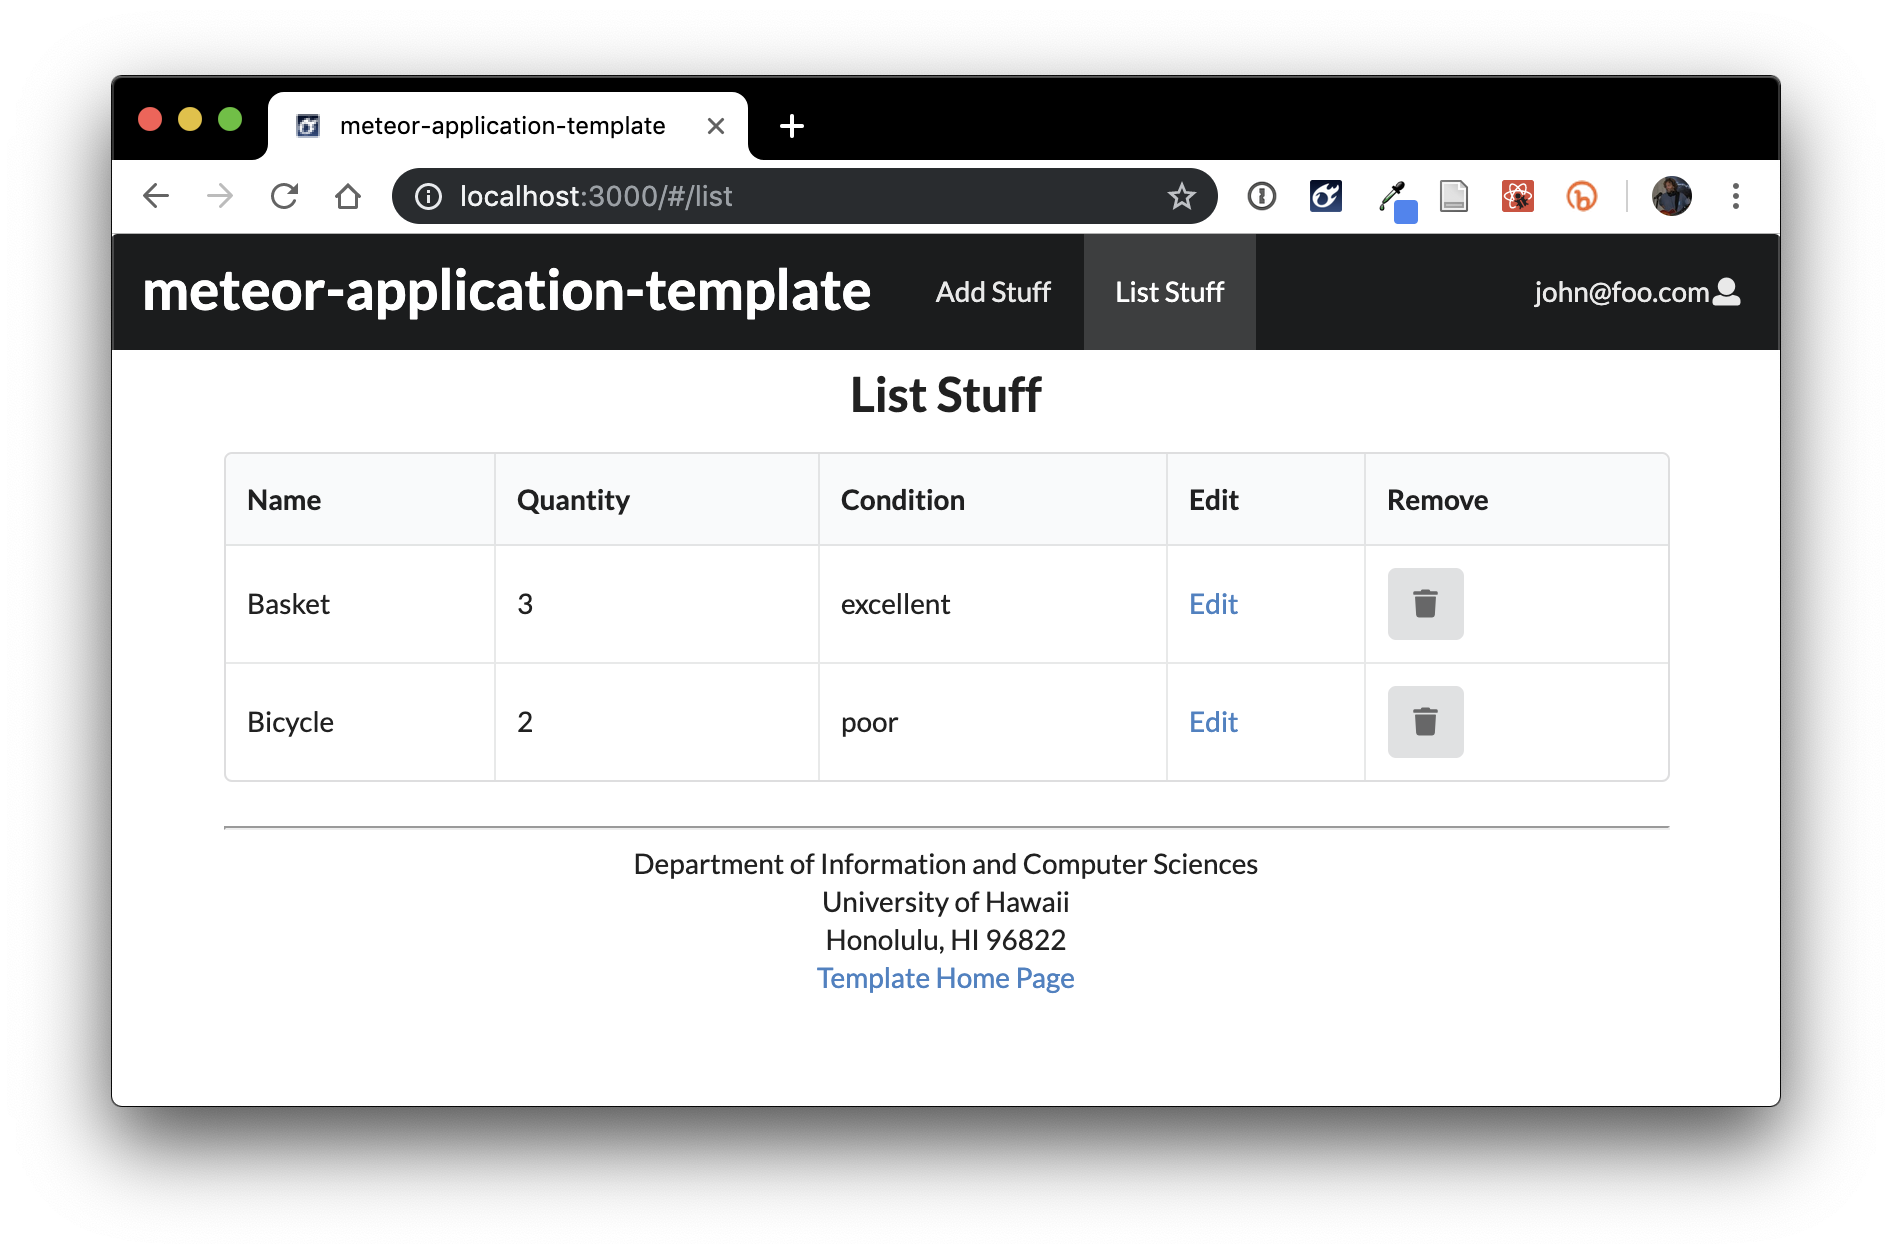
And clicking on the trash icon will remove the corresponding item from that row and refresh the page to show the remaining set of items.
Prelude, Part 1: Familiarize yourself with the template
Before starting this WOD, you should take some time to familiarize yourself with the template documentation.
First, read through the meteor-application-template-react home page.
Second, if you haven’t already, watch all five meteor-application-template-react screencasts, totalling around 80 minutes. These screencasts are important for helping you to quickly understand the user interface, the data model, navigation, forms, authorization, and authentication. Don’t try to watch all 80 minutes in a single sitting!
Prelude, Part 2: Install the template
Go to https://github.com/ics-software-engineering/meteor-application-template-react, and click the “Use this template” button. Complete the dialog box to create a new private repository called “my-meteor-template” that you own that is initialized with this template’s files.
From your newly created repository, and click the “Clone or download” button to download your new GitHub repo to your local file system. Using GitHub Desktop is a great choice if you use MacOS or Windows.
Fourth, cd into the app/ directory of your local copy of the repo, and install third party libraries with:
$ meteor npm install
Run the system with:
meteor npm run start
I suggest you ignore the warning: Note: you are using a pure-JavaScript implementation of bcrypt.. Many folks on Windows find it difficult to install the native implementation successfully. I suggest you use the pure Javascript implementation.
Go to http://localhost:3000 to see the app. If you’ve done these steps correctly, the application template should now appear.
Prelude, Part 3: Setup IntelliJ and ESLint
Create an IntelliJ project called “my-meteor-template” that points to your repo.
Make sure that ESLint is configured correctly. Open a Javascript file such as imports/startup/client/startup.jsx. To test that ESLint is working, add 3-4 blank lines to the bottom of the file. An ESLint error should now be displayed in the right margin in red. Now delete them, and a green checkmark should reappear. (If it doesn’t reappear immediately, then click on the red circle in the upper right side of the window, which should force re-inspection and generate the green checkmark.)
ESLint might complain “Error: Failed to load plugin meteor: Cannot find module ‘eslint-plugin-meteor’. Don’t worry: just click the “ESLint Settings” link and ensure that Automatic ESLint configuration is selected as you did in the Coding Standards module. The error should then disappear.
The WOD
If Meteor is running, exit it, invoke meteor reset to clear the database, then meteor npm run start to bring up a fresh instance of the application.
Start your timer.
Create a branch called my-meteor-1 using GitHub Desktop, and publish this branch to GitHub.
Login as the test user ‘john@foo.com’, and go to their List Stuff page.
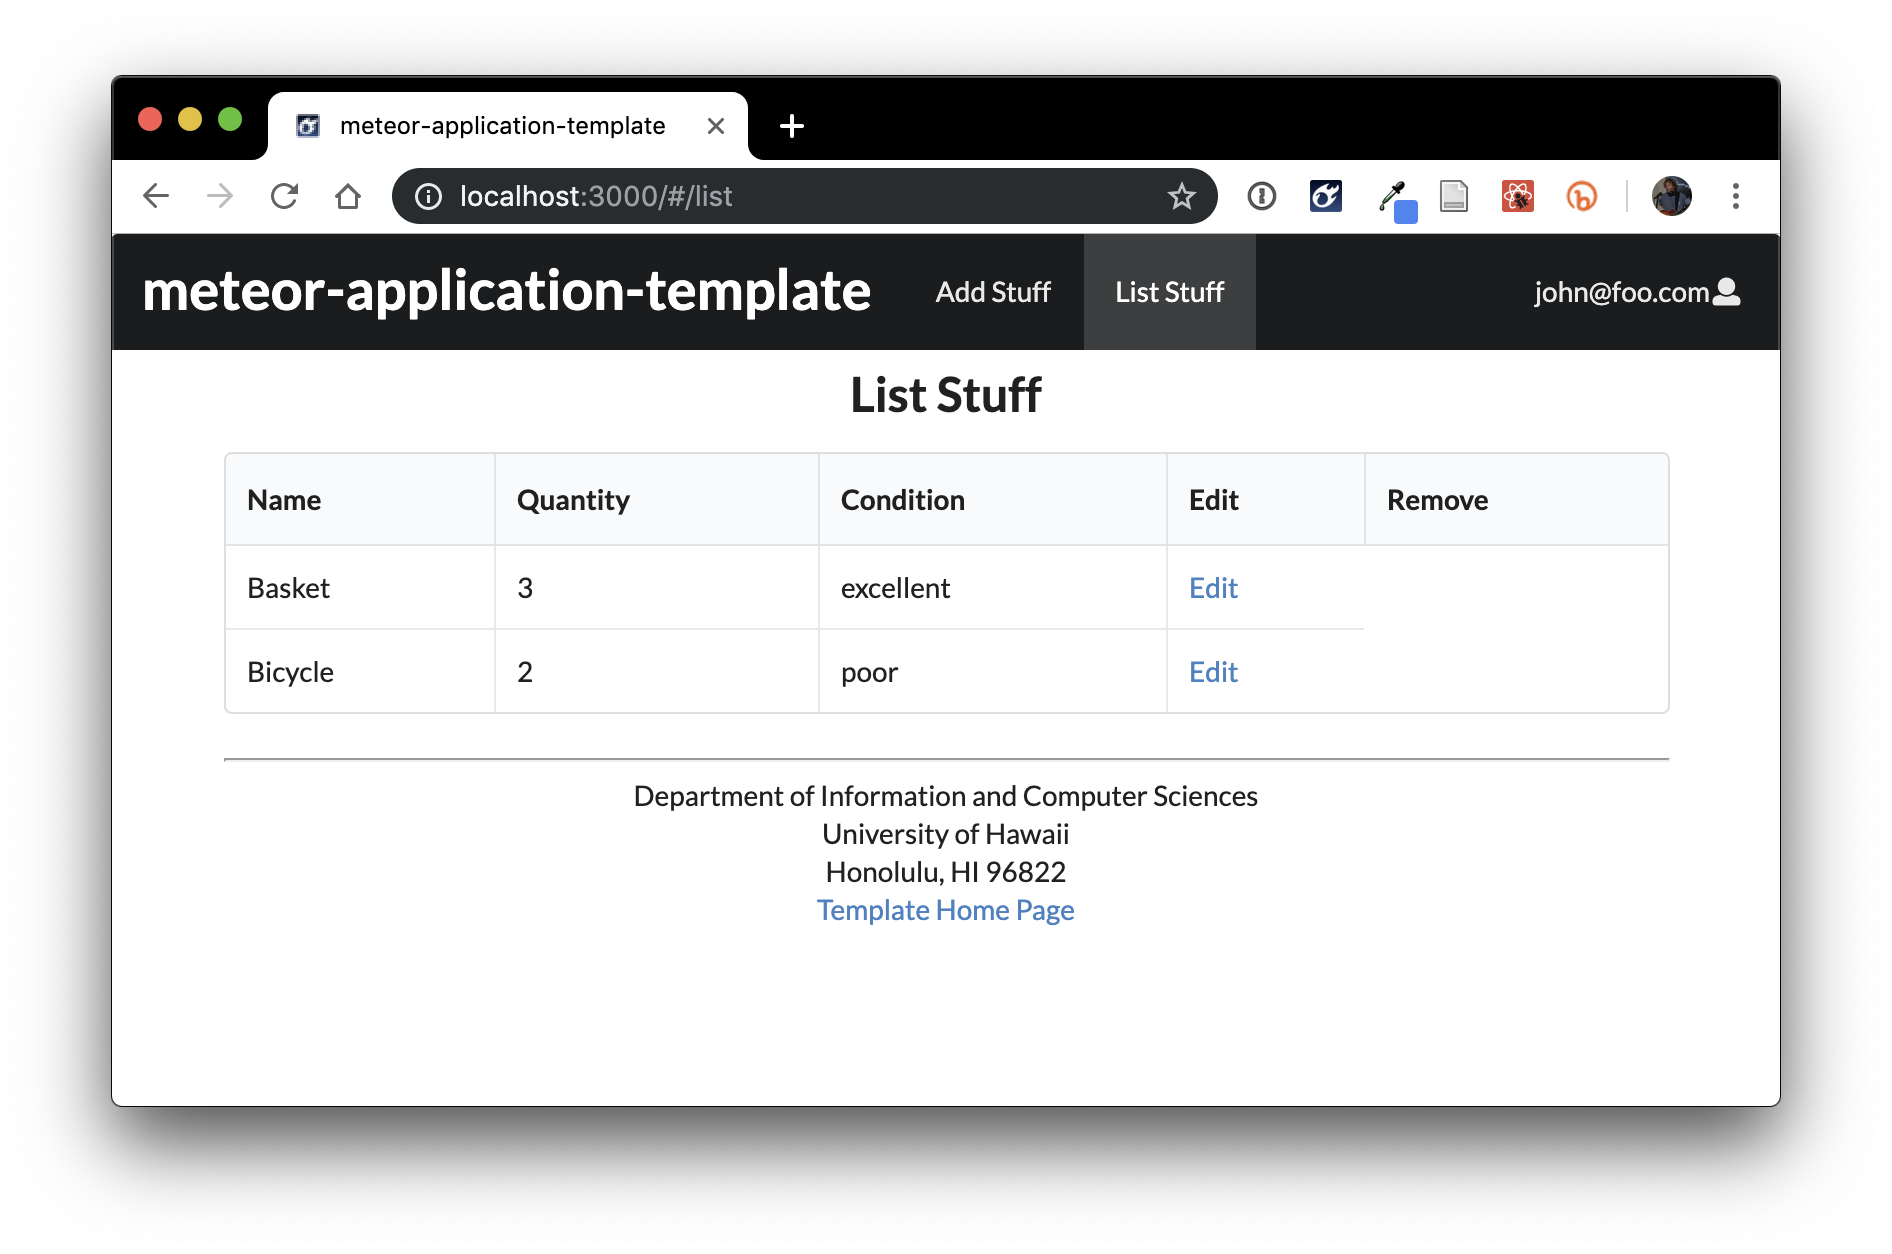
Next, add a new column to the List Stuff page table called Remove. When you’re done, the page should look like this:
Next, edit the StuffItem component to add a Button that is displayed as an trash Icon in each cell of the Delete column. When you’re done, the page should look like this:
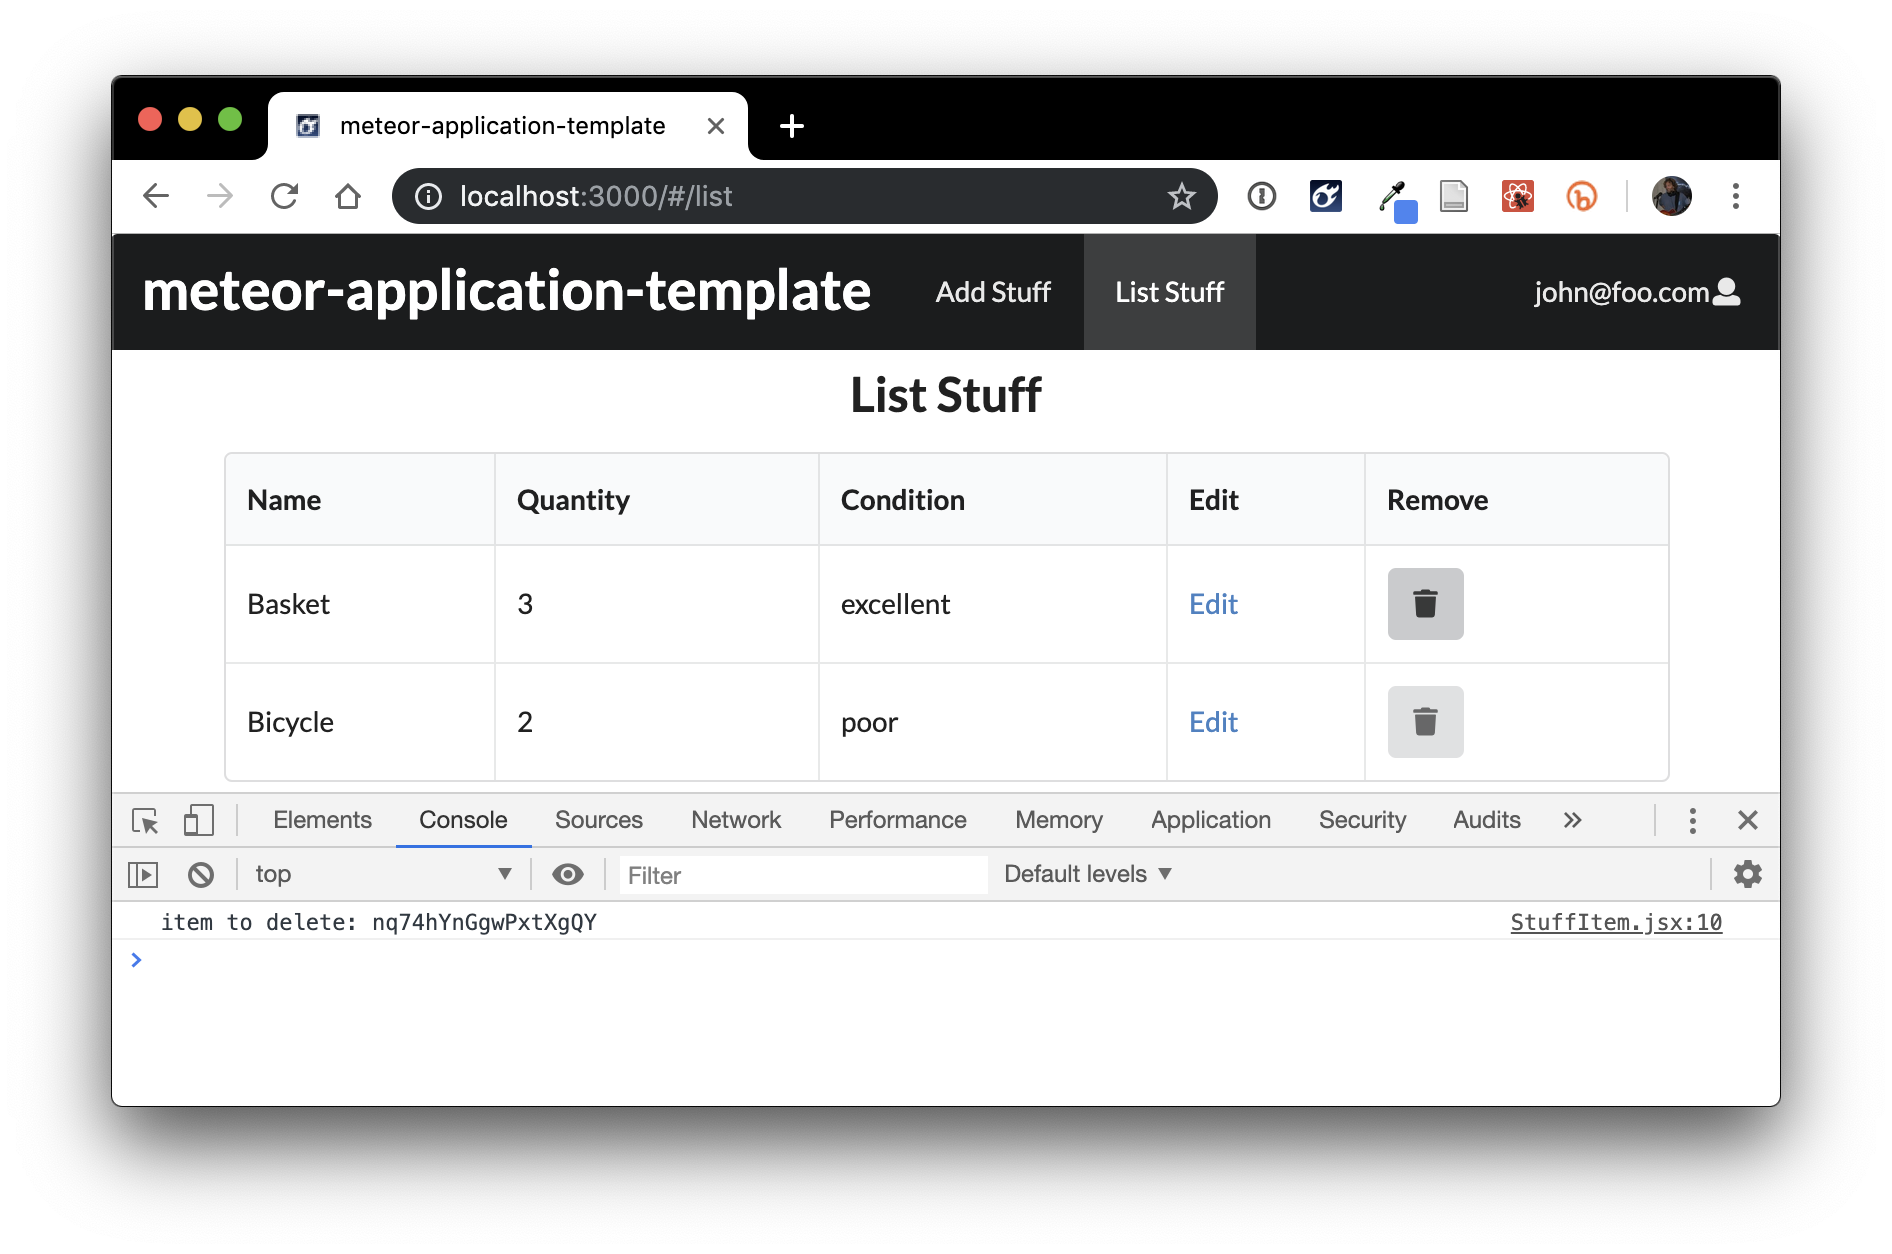
Next, attach an onClick handler that invokes a removeItem function that accepts the docID of the stuff item associated with that row of the table. Have the function call console.log on the passed value so you can check to see that it is getting the right value. When you’ve done it correctly, then the console window should look like this after pressing the delete button for a given row:
To complete the WOD, we need to replace the console log with code to actually remove the item from the collection. What you’ll notice at this point is that the StuffItem component does not have collection object to call remove() on.
One way to fix this is to pass the collection instance as a property into the component. Edit the ListStuff.jsx file to pass a new parameter called “Stuffs” into the StuffItem component invocation. This parameter passes the Stuffs collection object. Then edit the StuffItem component to declare that property as required. Now you have a collection object to manipulate in your removeItem function within StuffItem.
You might find Meteor API Docs on Collections to be of interest.
After you’ve finished implementing the remove operation, clicking the Trash icon associated with a row will delete that time, and the row will be instantly removed from the list of items through the magic of Meteor Reactivity.
As a last step, quit out of Meteor, and run meteor npm run lint to ensure that there are no ESLint errors.
When you’re done:
- control-c to stop Meteor.
- Stop your timer and note your time.
- Commit and push your my-meteor-1 branch to GitHub with the message ‘remove button implemented in NN minutes.’, where NN is the number of minutes it took you to do it according to your timer.
If you want to practice the WOD again, exit Meteor, then switch back to the master branch (which reverts all your changes) and create a new branch called my-meteor-2. Then invoke meteor reset to clear the database, then start up Meteor with meteor npm run start and follow the instructions again.
Rx: < 16 min Av: 16-20 min Sd: 20 - 25 min DNF: 25+ min
Demonstration
Here’s a screencast of me working through this problem. You can watch this prior to attempting it for the first time yourself.
Submission instructions
By the time and date indicated on the Schedule page, submit this assignment via Laulima.
Your submission should contain:
-
A link to the GitHub repository created as a result of your latest attempt at this practice WOD. Make sure you include the complete URL so that I can click on it in my mailer. Note: the final commit to this repo must have been made before the submission time and date, otherwise you will not receive credit for this assignment.
-
The number of times you have attempted this practice WOD so far, and for each time, how long it took you.
You will receive full credit for this practice WOD as long as you have attempted it at least once and submitted the email with all required data before the due date. Your code does not have to run perfectly for you to receive full credit. However, if you do not repeat each practice WOD until you can finish it successfully in at least AV time, you are unlikely to do well on the in-class WOD. To reduce the stress associated with this course, I recommend that you repeat each practice WOD as many times as necessary to achieve at least AV before its due date.