E39: React Tic-Tac-Toe Tutorial
In this experience, you will build a GitHub repo containing the code to implement the React Tic Tac Toe Tutorial.
The tutorial indicates that there are two ways to do the tutorial: writing the code in a browser using CodePen, or settings up a local development environment on your machine.
For this experience, you’ll do the latter, but in a slightly different way than suggested, because we’ll take advantage of our knowledge of GitHub and IntelliJ.
Note that to get credit for this experience, you need to commit your code at the completion of each part with the specified message. That will allow the TA to easily “retrace your steps” and see that you worked your way through the tutorial.
Task 1: Set up your development environment.
For this task, you’ll set up a private GitHub repo.
- Create a private GitHub repo called react-tic-tac-toe and initialize it with a README.
- Clone it to your local workspace (preferably using GitHub Desktop).
- Create an IntelliJ IDEA project called “react-tic-tac-toe” that points to your local repo.
- Create a .gitignore directory, and ignore
node_modules,*.imland.idea. That prevents node library files and your IntelliJ project files from being committed to the repo, which is a good habit to get into prior to starting group work.
When you have this working, commit and push your code to GitHub with the message “Task 1”. The TA will be checking for the presence of this commit with this message. There should be only two files in your repo: .gitignore and README.md.
If you’ve made a mistake, fix it and recommit using the same message (“Task 1”). If the TA sees a sequence of commits, all with the label Task 1, the TA will check the last one only. You are not penalized for multiple commits of Task 1, only if the final one does not conform to these instructions.
Task 2: How to Follow Along
Now you are finally ready to follow the tutorial. Read through until you get to the section Setup Option 2: Local Development Environment. In this section, follow the instructions regarding “Optional: Instructions for following along locally using your preferred text editor” by clicking on the dropdown arrow. Here’s a summary of the six steps (consult the React tutorial for the precise instructions):
- Make sure you have a recent version of Node.js installed. (You should already have done this!)
- Follow the instructions to create a new react app called my-app using
npx create-react-app my-app. - Delete the src/ folder contents. You will keep the node_modules and other files in the my-app directory.
- Add an index.css file to src/.
- Add an index.js file to src/. Please disable ESLint in IntelliJ for this project.
- Add three lines to the top of index.js.
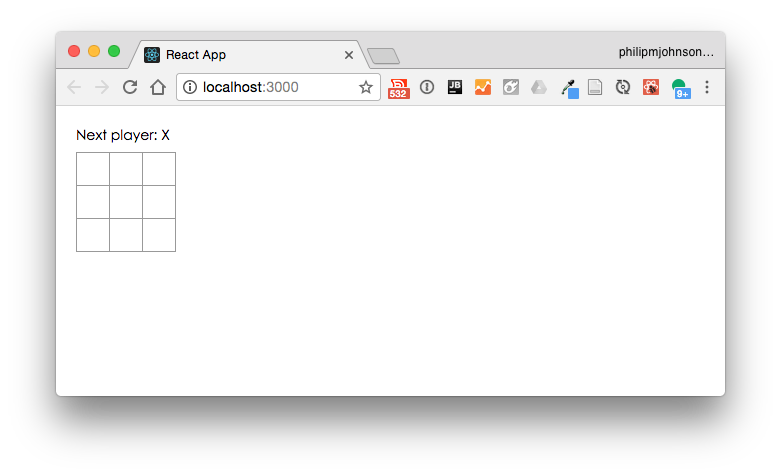
Then invoke npm start and check to see that http://localhost:3000 shows an empty tic-tac-toe field:
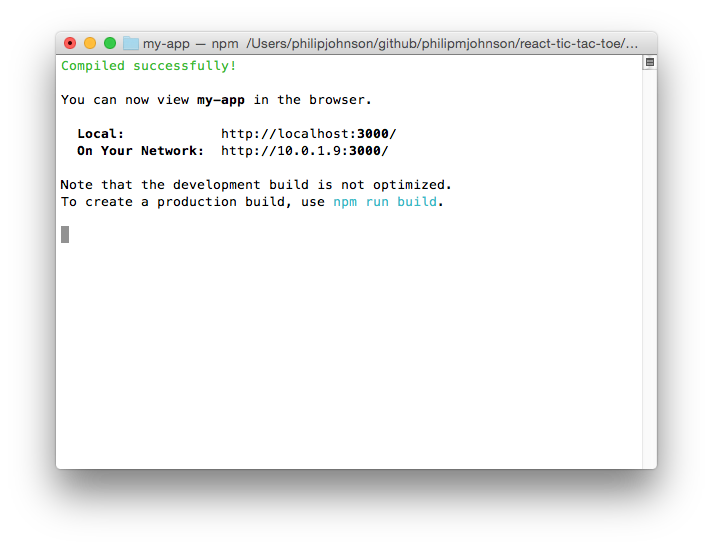
Your shell window should now look like this:
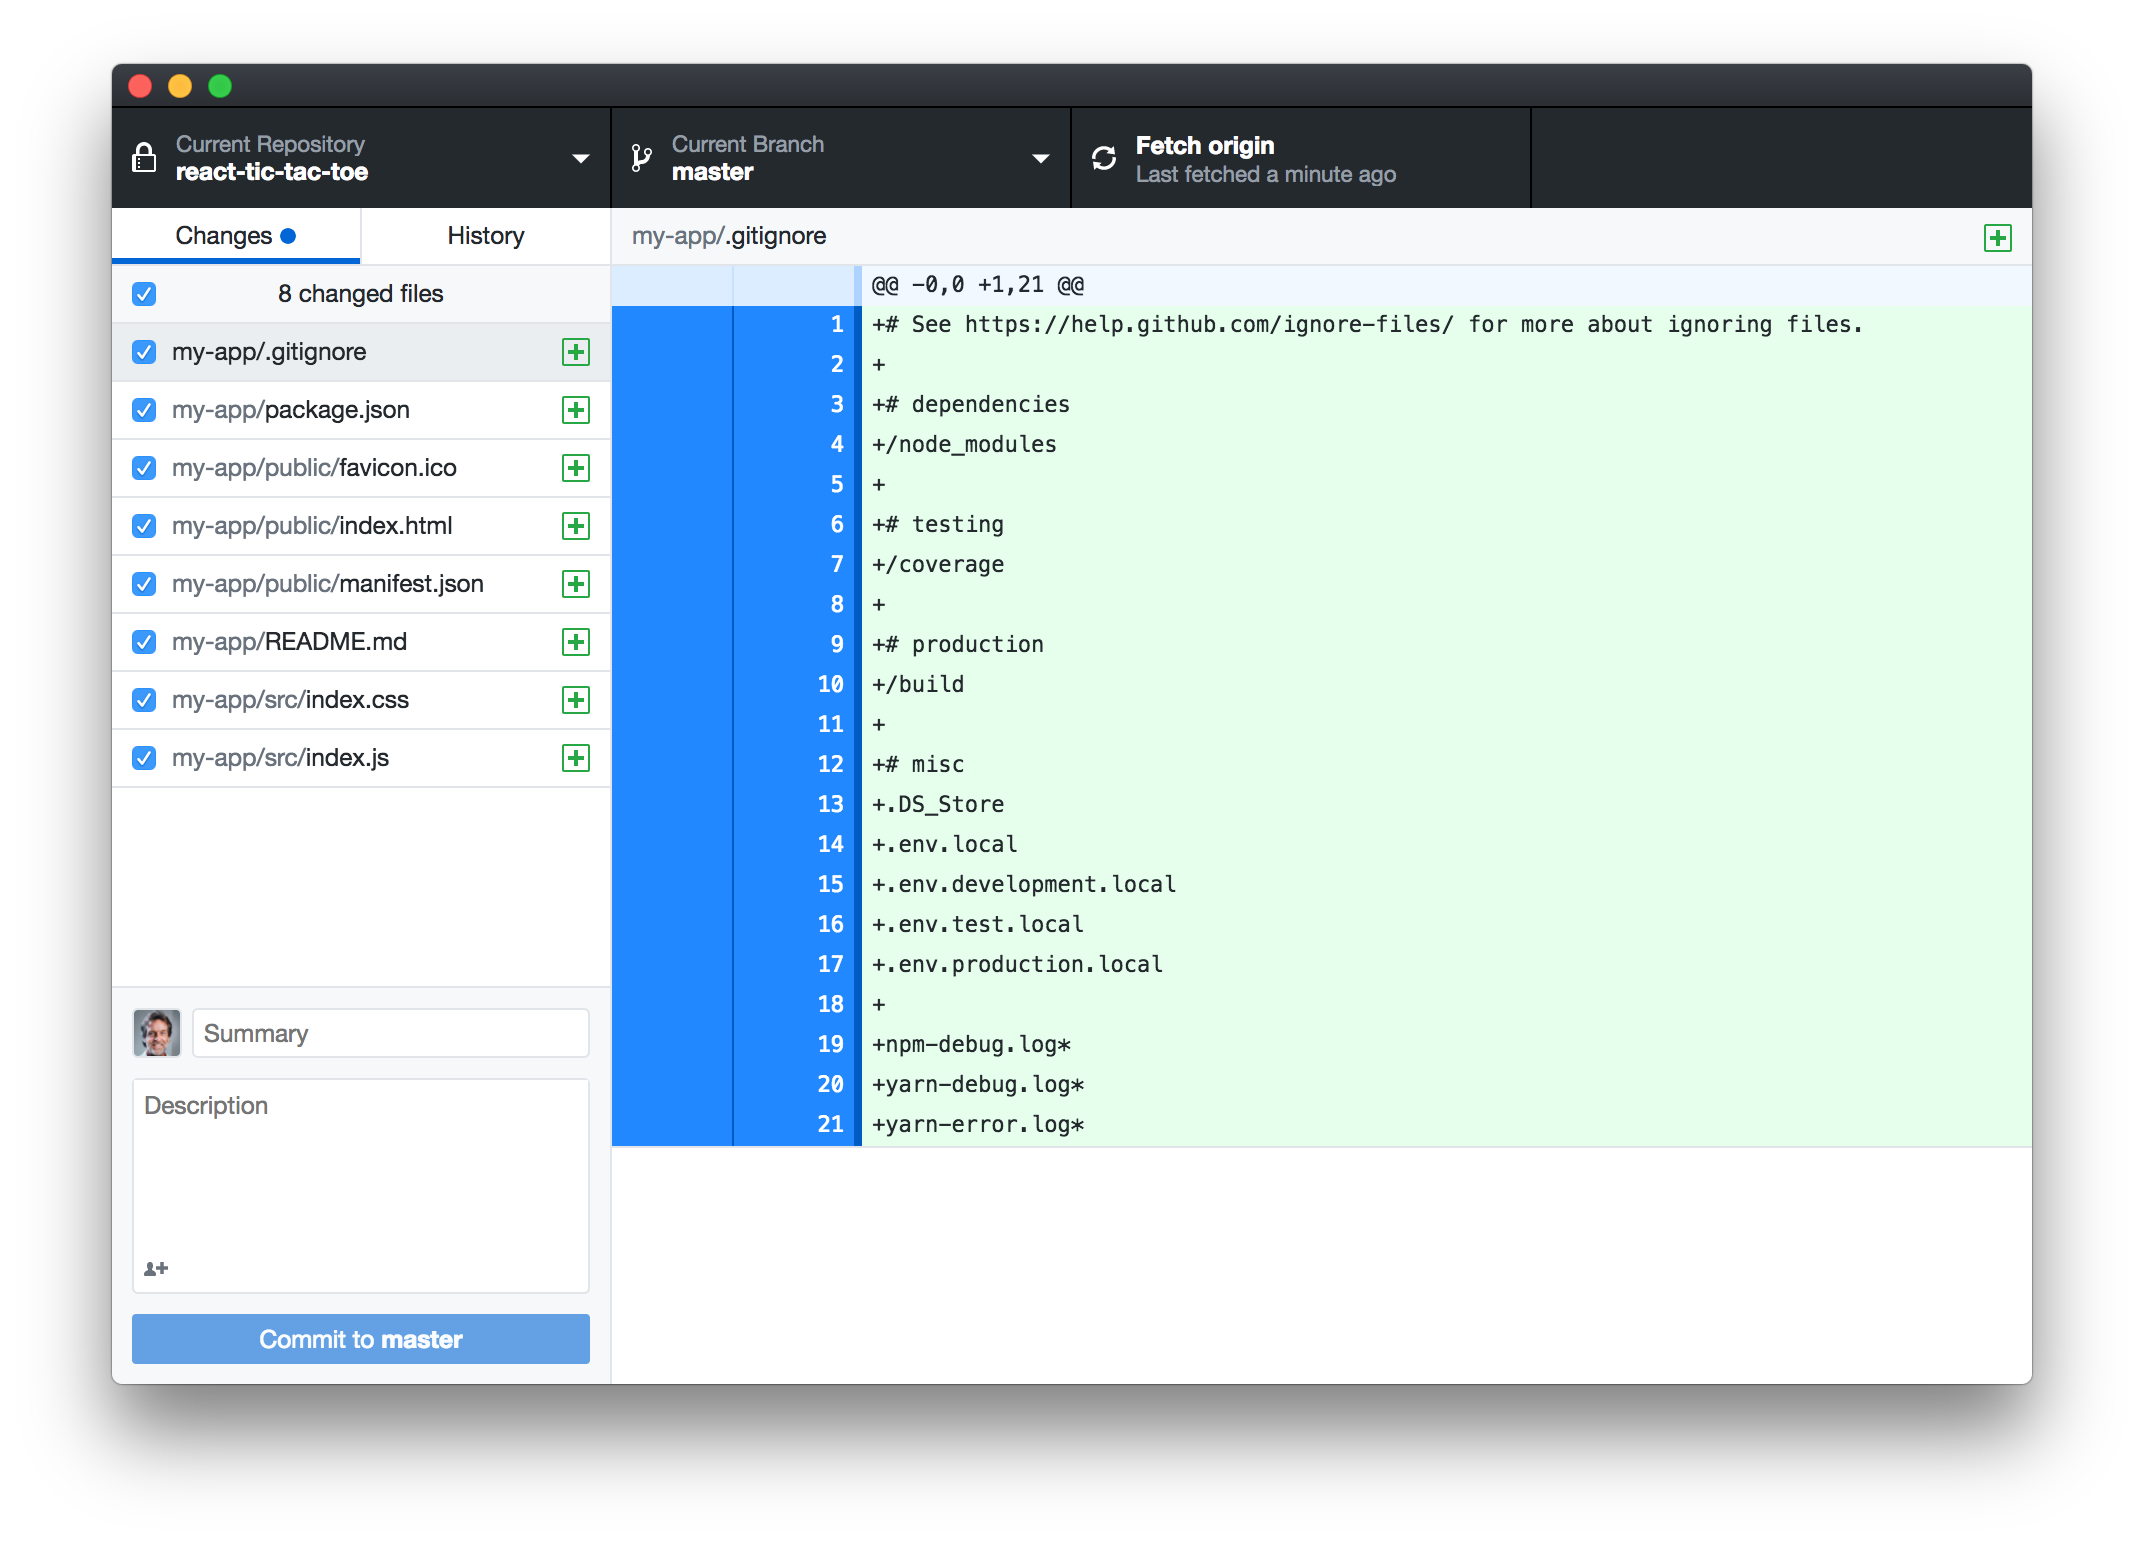
Now you are ready to commit and push your repo to GitHub with the message “Task 2”. There should only be 8 files to commit:
If you are not committing the correct files, then fix it.
Task 3: All the way to Developer Tools
Keep following the tutorial, trying to understand the code, until you get to the end of the Developer Tools section. Note that your browser window should automatically refresh with the changed code base as you move along.
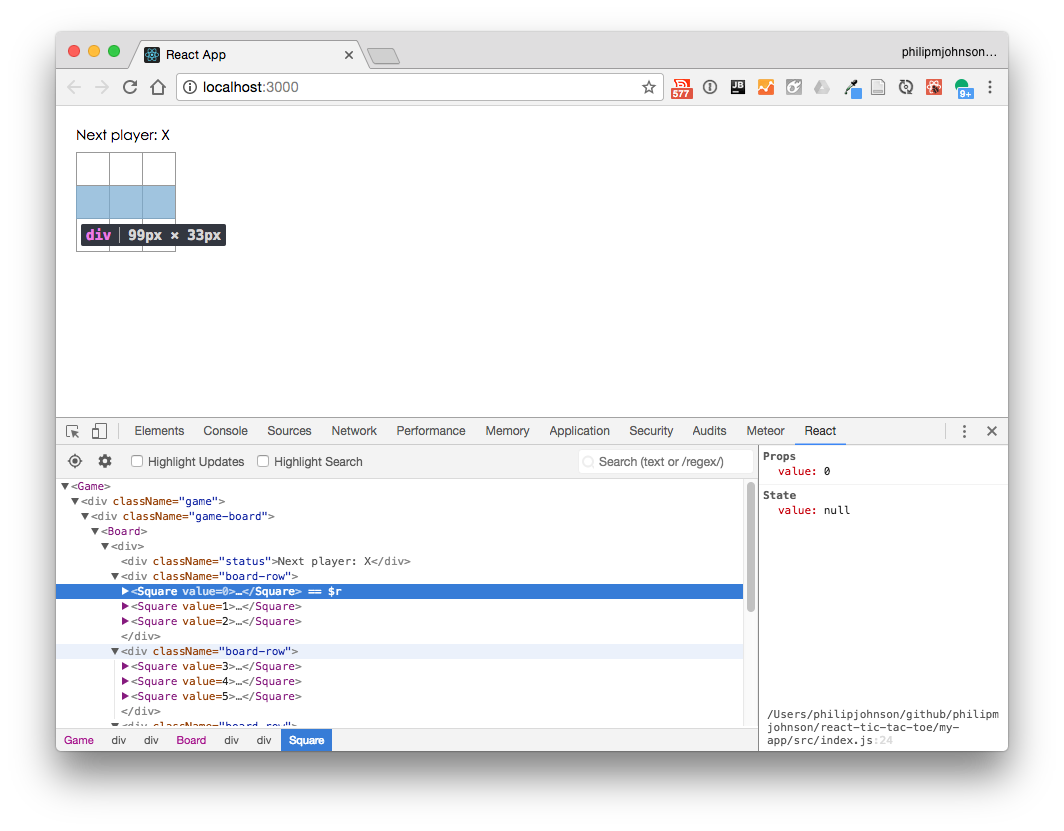
Once you’ve finished the Developer Tools section and have installed the React Chrome Developer Tools, you should be able to display the React pane in Chrome Developer Tools, which provides a wealth of information about your application. For example, here’s what my React pane looks like:
Once you’ve gotten to this point, commit and push your code to GitHub with the message “Task 3”.
Task 4: Completing the Game
For this task, go through the section Completing the Game.
Once you’ve completed the “Declaring a Winner” section, commit and push your code to GitHub with the message “Task 4”.
Task 5: Adding Time Travel
Now go through the section Adding Time Travel.
You should now have a working tic-tac-toe game, but more importantly, have an initial understanding of basic React principles.
Once you’ve completed this section, commit and push your code to GitHub with the message “Task 5”.
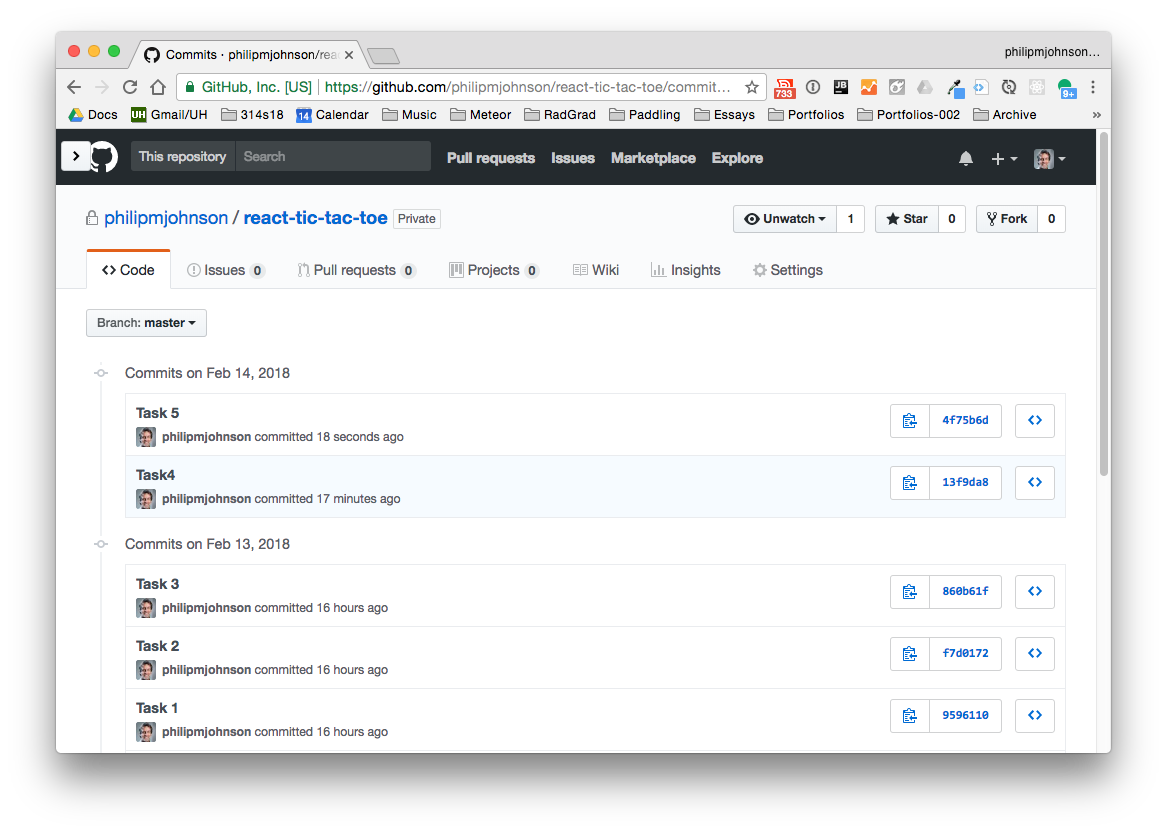
When you’ve finished, your commit history on GitHub should look something like this:
Task 6: Extra Credit!
The Wrapping Up section contains six ideas for improvements.
If you want, you can implement one or more of these improvements for extra credit.
Commit and push your code with the message “Task 6 (N)”, where “N” is a number from 1 to 6 indicating the improvement that you implemented.
If you want to implement more than one improvement, make multiple commits. So, if you start with Improvement 1, your commit message with that code would be “Task 6 (1)”. If you then decided to implement improvement 3, your next commit message would be “Task 6 (3)”.
Submission instructions
By the time and date indicated on the Schedule page, submit this assignment via Laulima.
Your submission should contain a link to the GitHub repository you created. Make sure you include the complete URL so that I can click on it in my mailer. Note: the final commit to this repo must have been made before the submission time and date, otherwise you will not receive credit for this assignment.