E54: Test deploy to Galaxy
For this experience, you will learn how to deploy a Meteor app to Galaxy in three steps.
Step 1: Deploy digits to Galaxy
You will deploy your digits app to Galaxy. Before starting, make sure your digits app runs correctly on your laptop.
Now follow the instructions in the Galaxy Deploy Guide to run your app in the cloud. Here is a step-by-step walkthrough of the guide with some important variations for this class:
A. Sign up for Galaxy.
Read the Sign up for Galaxy section of the deploy guide.
Note that you do not have to sign up for Galaxy as an individual and provide your credit card for this class. Instead, you can just login to https://galaxy.meteor.com/ics314s17 with your Meteor account. That organization has been provisioned by the Meteor Development Group (thank you MDG!) for this class with several free containers.
In order to login to that organization, you must have provided your meteor.com username in the #meteoraccountnames channel so that I can add you to the ics314s17 organization.
B. Configure your MongoDB Database.
Read the Configure your MongoDB database section of the deploy guide.
Follow the instructions to create a free “sandbox” account at mLab.
C. Create a settings file for Galaxy
Read the Create a settings file for Galaxy section of the deploy guide.
Note that your app uses the default directory structure (app/, doc/, and config/) as in meteor-application-template. So, create your settings.json file in the config/ directory. Because the settings.json file contains sensitive information (i.e. the MongoDB username and password in clear text), you should immediately add that file name to your .gitignore to make sure it does not get committed to GitHub.
D. Select a hostname.
Read the Select a hostname section of the deploy guide.
For this class, your hostname will be “foo.meteorapp.com”, where “foo” is replaced by your application name. Note that you’ll have to come up with an application name that has not already been deployed at meteorapp.com.
For the purposes of this exercise, I suggest a hostname consisting of “testdeploy” plus your initials so that the resulting hostname is unique. In my case, that would be “testdeploypmj”. (You can actually pick anything not already deployed since you’ll delete your application from Galaxy in a few minutes.)
E. Deploy your application to Galaxy.
Read the Deploy your application to Galaxy section of the deploy guide.
An important change to this section is to add --owner ics314s17 to the deploy command so that the app is deployed to our class organization, not to your personal account. That way you will not be charged for your deployment.
Here’s what the full command looks like for me on Unix:
DEPLOY_HOSTNAME=galaxy.meteor.com meteor deploy testdeploypmj.meteorapp.com --owner ics314s17 --settings ../config/settings.json
On windows, it will look like this:
$ SET DEPLOY_HOSTNAME=galaxy.meteor.com
$ meteor deploy testdeploypmj.meteorapp.com --owner ics314s17 --settings C:\path\to\settings.json
Everyone will need to edit the above command to refer to their own hostname.
If this command completes successfully, you’ll see a message like this in your console when it’s done:
Talking to Galaxy servers at https://galaxy.meteor.com
Deploying your app...
App starting at testdeploypmj.meteorapp.com in ics314s17's account in us-east-1.
Visit https://galaxy.meteor.com/app/testdeploypmj.meteorapp.com to check the status of your app.
Step 2: Document your deployment
Once you have successfully deployed your app, go to the URL displayed in your console (in my case, it was “https://galaxy.meteor.com/app/testdeploypmj.meteorapp.com”). You should see a dashboard with a spinning green circle near the top. The spinning green circle means Galaxy is in the process of deploying your application.
Deployment should take less than 5 minutes.
You should monitor the progress of the deployment to see if any errors occur. To do this, click on the “Logs” menu item and select “View New Logs” at the bottom of the page.
There will be many lines of green text. Eventually, the log will say “Application process starting, version 1”, or else some red text will be printed that indicates an error occurred. Here’s what the logs look like after a successful deploy:
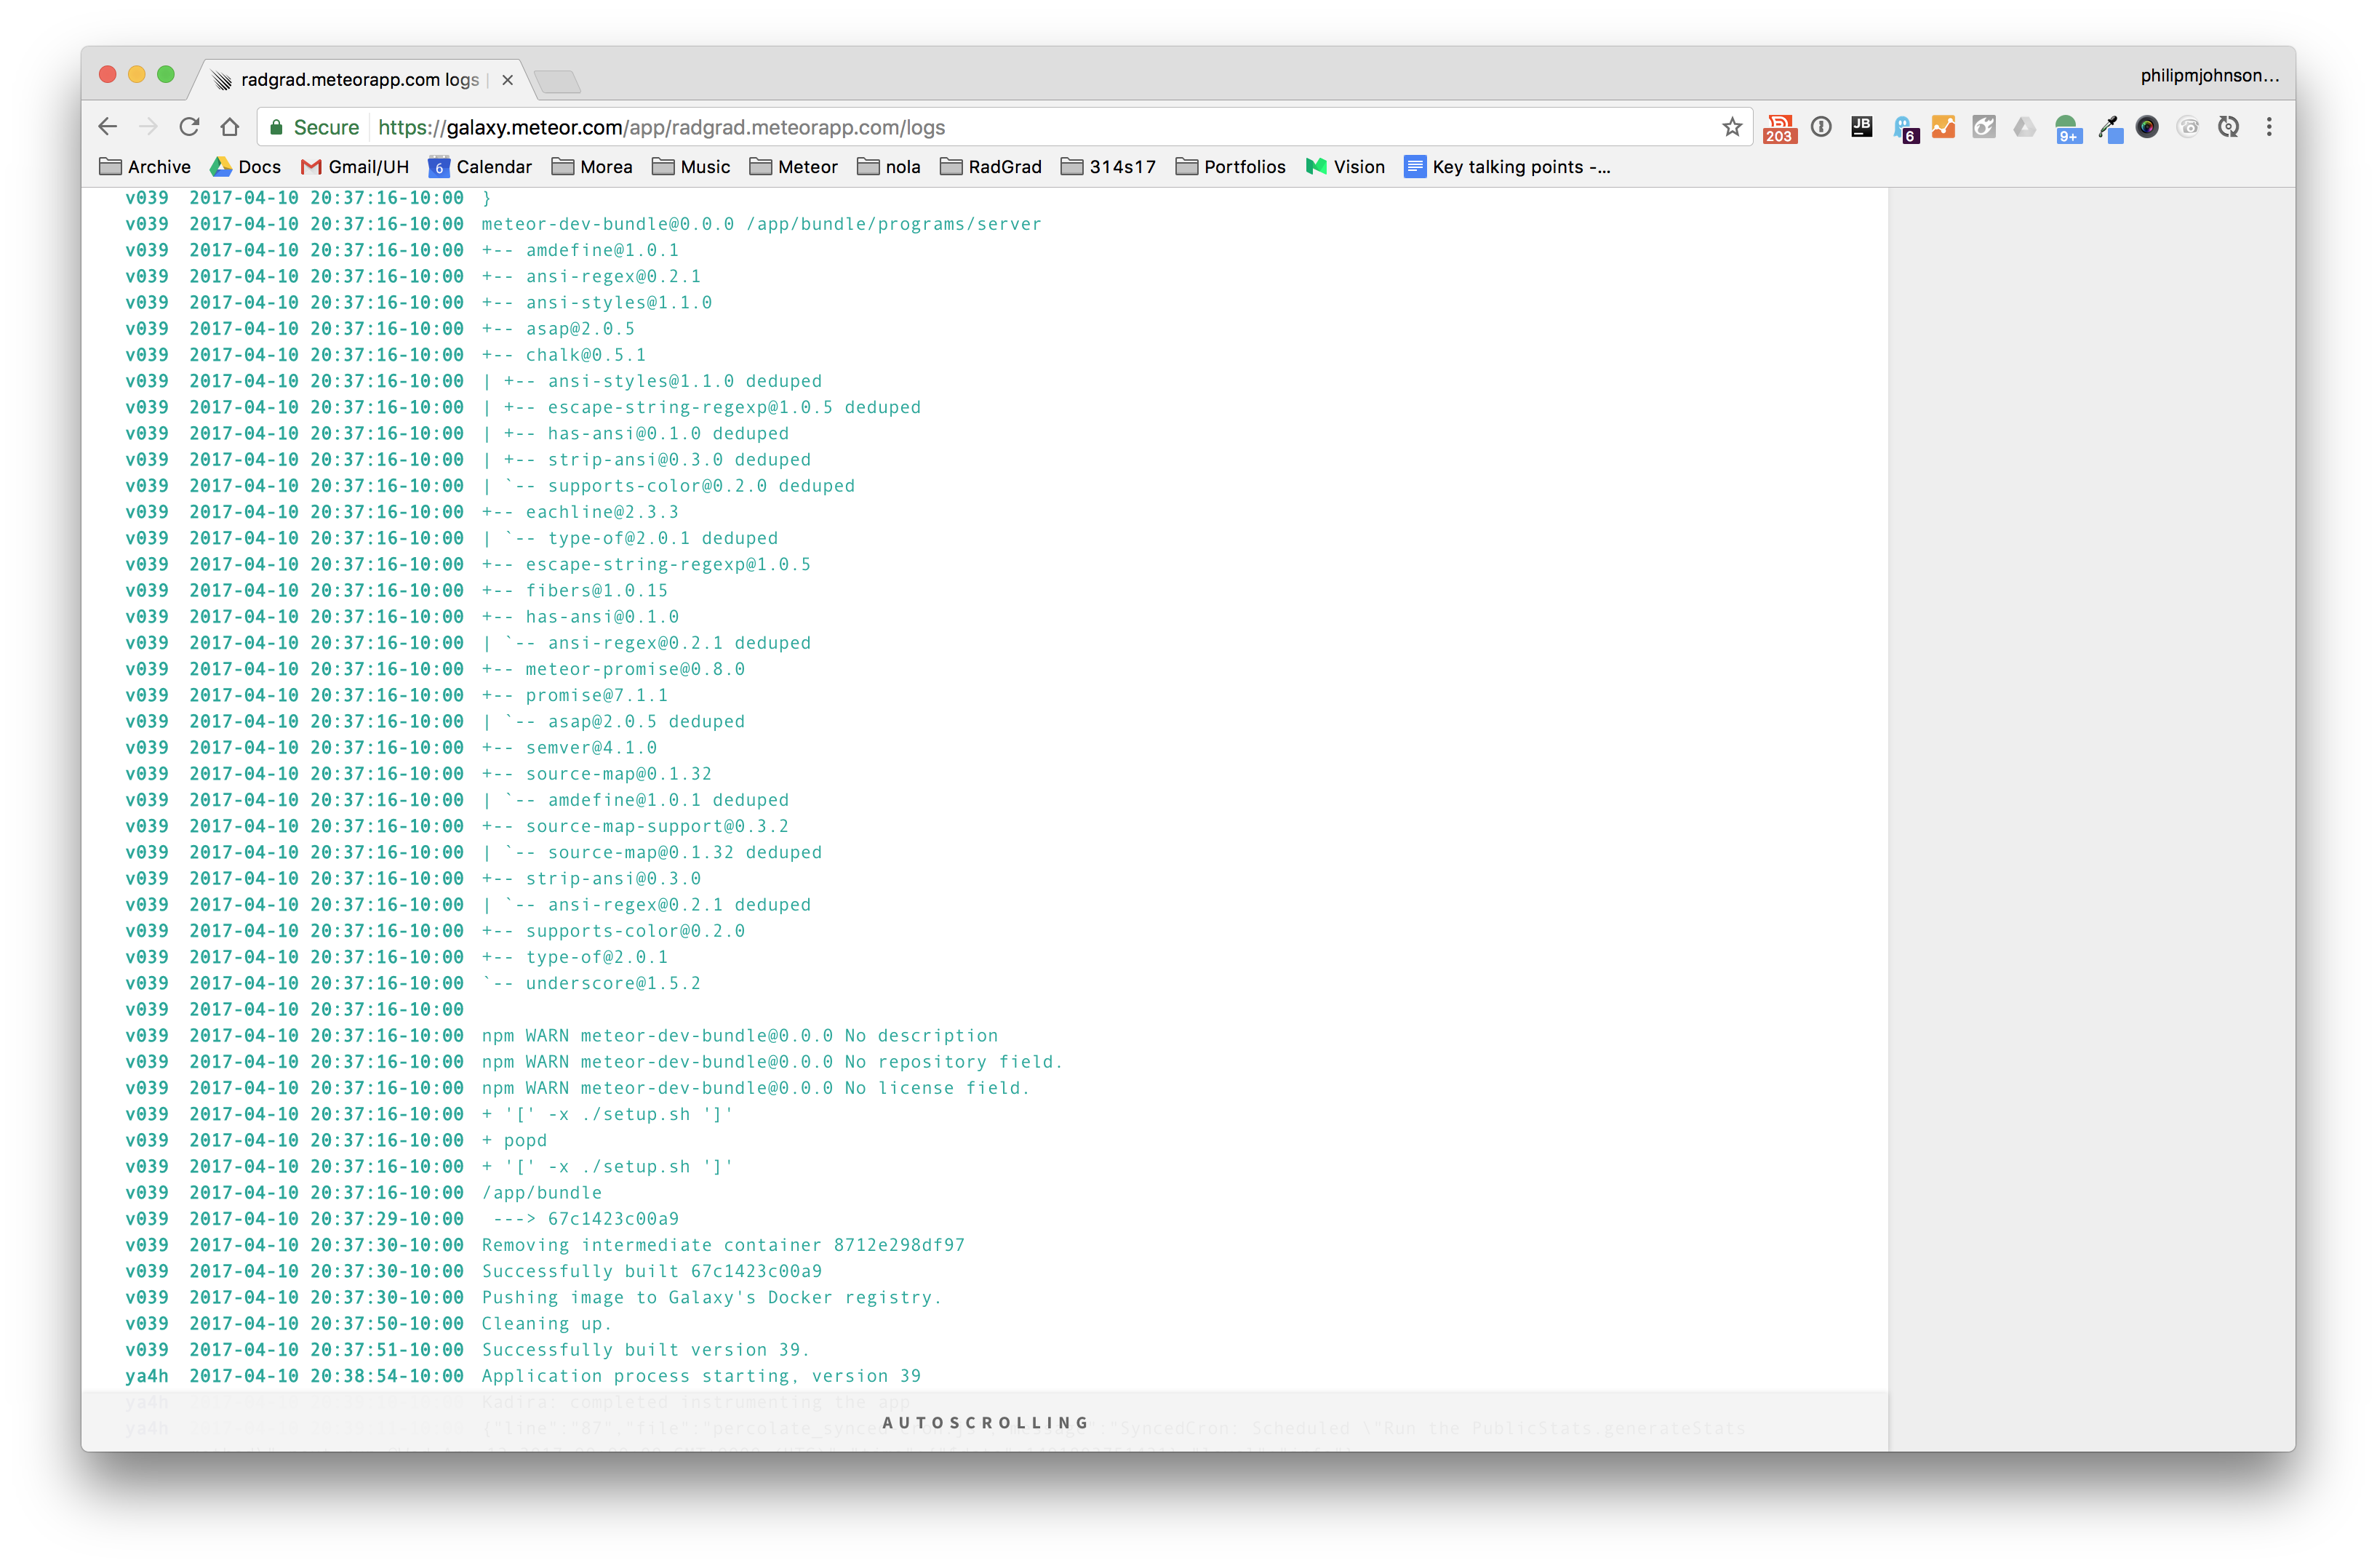
Once the logs say this, then the spinning green circle will be replaced in a few seconds by a solid green circle. For example, here is my dashboard after successful deployment:
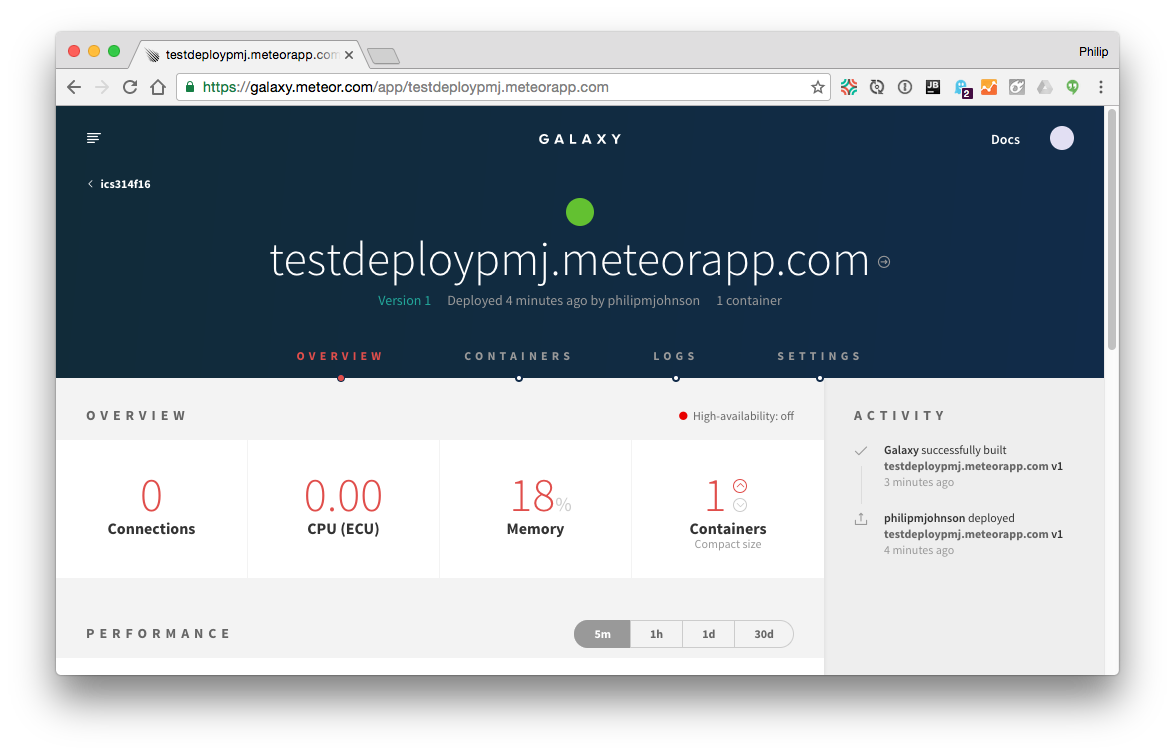
Once you get the solid green disk (not the spinning green circle), take a screenshot of this page to verify that you have successfully deployed your app, and post it to the #deployment Slack channel.
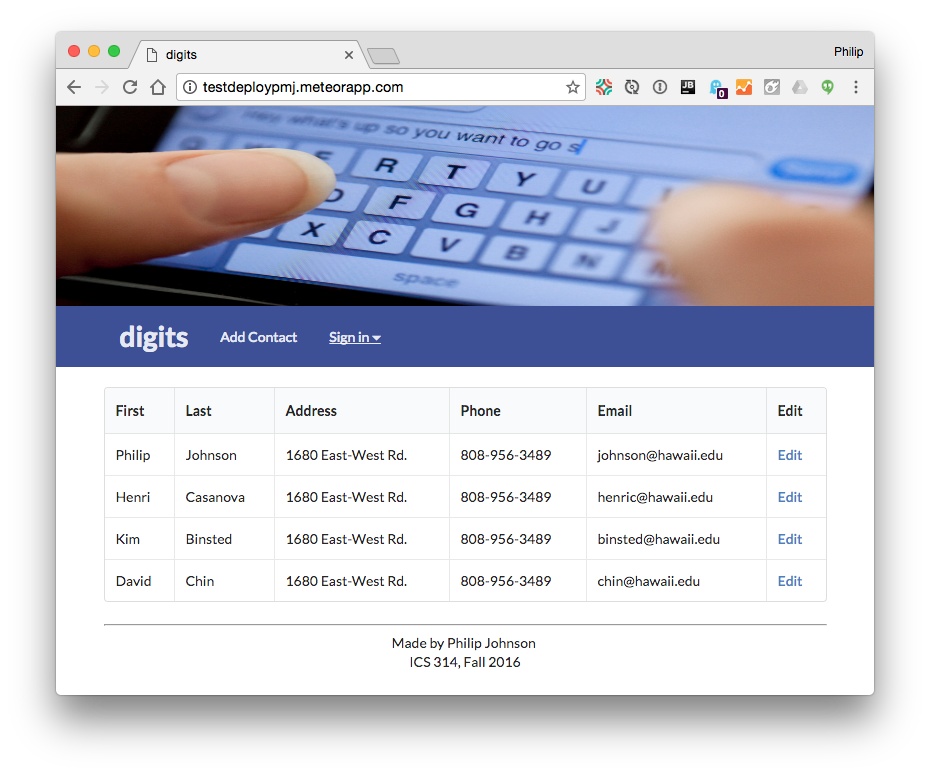
Finally, bring up your sample app in a web browser to verify that it works as expected. (Click on the arrow on the right side of the app’s hostname). Here is my Digits app running on meteorapp.com:
If you are getting errors in the logs that you don’t understand how to resolve, feel free to post them to the #deployment channel to get help.
Step 3: Delete your app
Our organization only has a few containers, so you can’t leave your test deployment hanging around. Instead, once you’ve created your screenshot, you should delete your test deployment app from Galaxy.
To do this, go to your deployment dashboard, click on the Settings menu item, then scroll down to the “Danger Zone”:
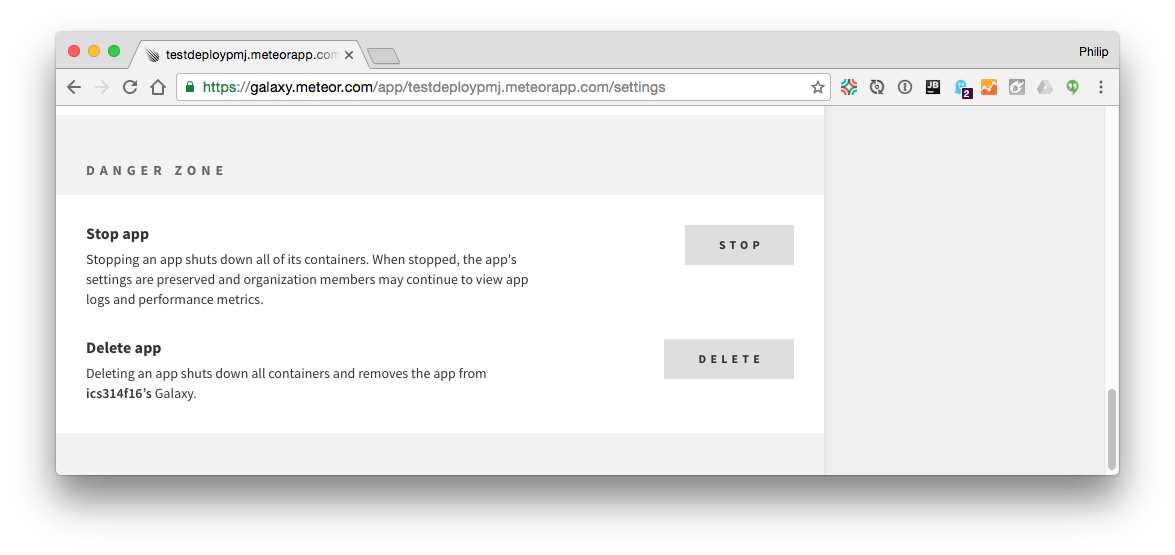
Go ahead and click the “DELETE” button to delete your test app. It will ask you to confirm the deletion. Click the second button to actually complete the deletion.
Submission
By the date and time indicated on the Calendar page, please finish all three steps. Make sure to post your screenshot to the #deployment channel.