E40: Meteor Blaze Tutorial
For this experience, you’ll go through the Meteor Blaze Tutorial and create a GitHub repo that contains your copy of this system.
You will see that this app is very similar to the one you created in Experience 39, although the code is organized differently. My hope is that a second exposure to the same type of application will help you start to understand how Meteor works more easily than if it was a completely different application.
You should allocate a couple of hours for this experience as well.
Important Note: The Thursday WOD this week will be based upon this code base, so be sure to have completed this experience by Thursday!
Task 1: Initial setup
Do the following to set yourself up for development:
-
Create a GitHub repo called “simple-todos”.
-
Clone it to your local file space.
-
cd into your local simple-todos directory.
-
Use
meteor create simple-todosto create an app called “simple-todos” inside your repo. -
Change the name of the simple-todos subdirectory to app/.
-
cd into the app/ directory, run ‘meteor npm install’ and ‘meteor run’ to run the app. Go to http://localhost:3000 to see the app.
-
Create an IntelliJ project called “simple-todos” that points to your repo.
-
If IntelliJ tries to run ESLint and fails, click on “Settings” in the failure dialog and uncheck the “Enable” box to disable ESLint. (Don’t worry: We’ll configure ESLint next week.)
-
Edit the top-level template and check to see that Meteor restarts and refreshes the page automatically.
-
Commit your project to GitHub. Use the commit message: “Step 1: Initial setup”.
-
Check to see that your project is saved on GitHub. (Note that when grading this project, we’ll check that this initial commit was made, so don’t skip this step!)
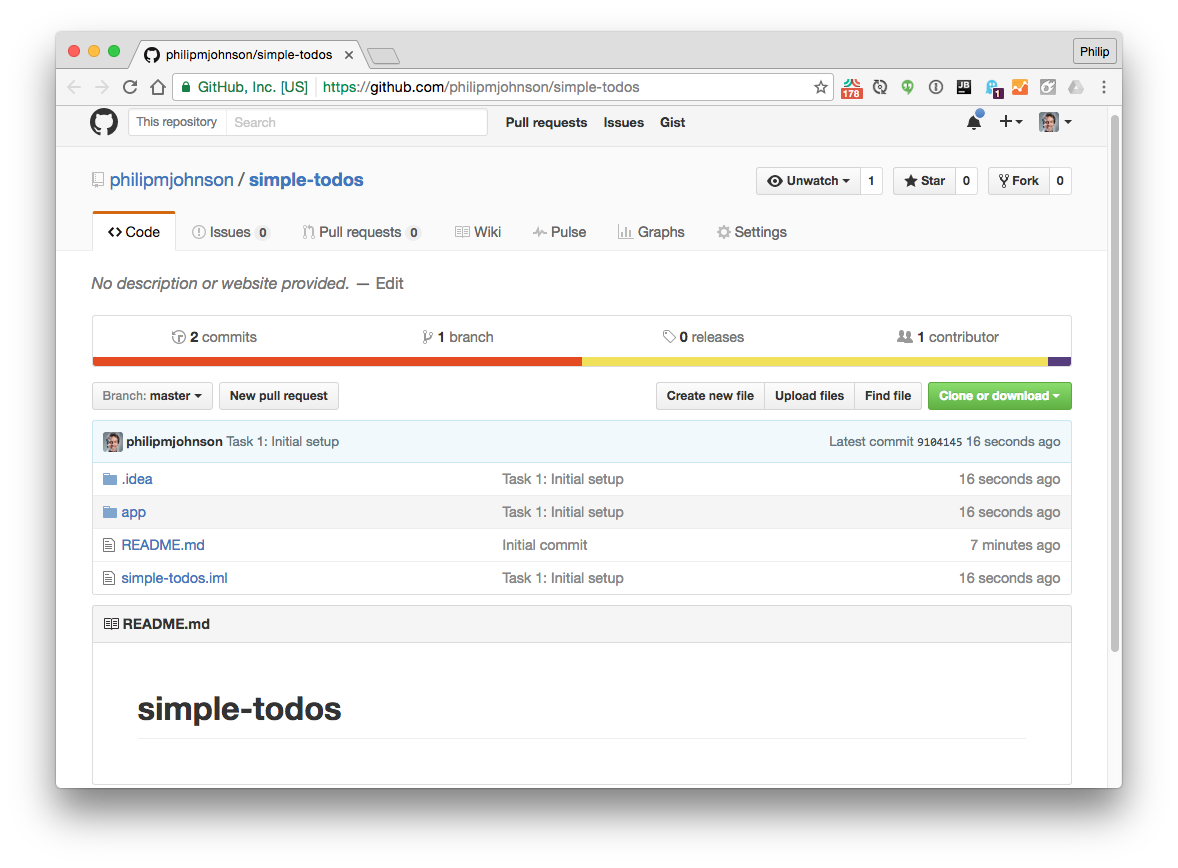
Here is what the top-level of your GitHub repo should look like at the conclusion of this step:
Task 2: Templates
Now start working through the Meteor Blaze Tutorial.
The prior task already accomplished Step 1: Creating an app.
Now work through Step 2: Templates. Delete the existing code and create some new files and directories. After you get done, you might want to watch this short screencast where I walk through the code a little:
When you get done with Step 2 in the tutorial and your system displays appropriately in the browser, commit your code to GitHub with the commit message “Task 2: Templates”.
Task 3: Collections, Forms and events, update and remove
Work through Step 3: Collections. In this step, you define a Mongo collection containing the tasks to display in the ToDo list.
The step also asks you to create a new console, cd into the app directory, run meteor mongo to connect to the underlying Mongo database, and insert some data. Here’s what that instruction looks like in more detail:
[~]-> cd github/philipmjohnson/simple-todos/app
[~/github/philipmjohnson/simple-todos/app]-> meteor mongo
MongoDB shell version: 3.2.6
connecting to: 127.0.0.1:3001/meteor
meteor:PRIMARY> db.tasks.insert({ text: "Hello world!", createdAt: new Date() });
WriteResult({ "nInserted" : 1 })
meteor:PRIMARY> db.tasks.insert({ text: "Hello solar system!", createdAt: new Date() });
WriteResult({ "nInserted" : 1 })
meteor:PRIMARY> db.tasks.insert({ text: "Hello galaxy!", createdAt: new Date() });
WriteResult({ "nInserted" : 1 })
meteor:PRIMARY>
Work through Step 4: Forms and events to see how to define and process form data.
Work through Step 5: Update and remove to add the ability to update and remove tasks.
I think the following explanation of this might be a little cryptic:
“Inside the event handlers, this refers to an individual task object. In a collection, every inserted document has a unique _id field that can be used to refer to that specific document. We can get the _id of the current task with this._id. Once we have the _id, we can use update and remove to modify the relevant task.”
So, I created a little screencast to attempt to provide more details on what this means. Watch this to see if it helps:
When you’ve got this working, commit your changes with the message “Task 3: Collections, Forms and events, update and remove”.
Task 4: Temporary UI State, Adding user accounts.
Step 6: Running on mobile is optional for this experience. I recommend you skip it for now and come back and do it later if you have extra time. If you’re running Windows, you can’t do this step anyway.
Work through Step 7: Temporary UI State.
When you’re done, watch the following video for some additional explanation of what’s going on:
Now work through Step 8: Adding user accounts.
When you’ve got this working, commit your changes with the message “Task 4: Collections, Temporary UI State, Adding user accounts”.
Task 5: Security with methods, Filtering data with publish and subscribe
Work through Step 8: Security with Methods.
When you’re done, take a moment to read What is a method? and Defining and calling methods from the Meteor Guide.
It’s also a good time to learn a little bit about Optimistic UI and Latency Compensation so read the posting associated with that link as well.
Now work through Step 10: Filtering data with publish and subscribe.
When you’re finished, commit your changes with the message “Task 5: Security with methods, Filtering data with publish and subscribe”.
For this week, we’ll skip the step on Testing. But don’t worry, we’ll cover testing in detail in a couple of weeks!
Submission instructions
By the time and date indicated on the Schedule page, submit this assignment via Laulima. You should submit the complete URL to the GitHub repo containing your code for this assignment. There should be the five commits associated with the five tasks and each commit should contain a running version of the system as specified above.
One more time in case you missed it: As noted above, the Thursday WOD this week will be based upon this code base, so be sure to have completed this experience by Thursday!