E61: Experience testing meteor application template react
This experience will help you become familiar with the process of writing acceptance tests and setting up a continuous integration process using our template.
Prelude
Before starting this experience, please set up your environment.
A. Set up testcafe-test
To begin, make a copy of meteor-application-template-react:
-
Create a private repo called “testcafe-test”, using meteor-application-template-react as a template. Clone this repo to your laptop, run
meteor npm installand thenmeteor npm run startto bring it up. Go to http://localhost:3000 to verify that the template is running. -
Create an IntelliJ project called testcafe-test that points to your repo. Check to make sure that ESLint is running by creating an ESLint error, such as two newlines at the end of the file.
B. Run the existing TestCafe tests
Meteor-application-template-react comes with an initial set of TestCafe tests, plus two NPM scripts to run them. The script to use when you are developing tests is meteor npm run testcafe-development. To use it, you must run you application in one command console (using meteor npm run start), then create a second command console and invoke test-cafe-development.
Try that now. You should see new windows pop up on your screen as the tests execute. Here is what the contents of the second command console should look like upon successful execution of the tests:
$ meteor npm run testcafe-development

> meteor-application-template-react@ testcafe-development /Users/philipjohnson/github/philipmjohnson/testcafe-test/app
> testcafe chrome tests/*.testcafe.js

 Running tests in:
 - Chrome 86.0.4240.111 / macOS 10.15.7

 meteor-application-template-react localhost test with default db
 ✓ Test that landing page shows up
 ✓ Test that signin and signout work


 2 passed (7s)
$
C. Review the tests/ directory
The app/tests directory contains all of the TestCafe test code. The top-level file is “tests.testcafe.js”, which contains the TestCafe fixture command as well as two TestCafe test commands.
The remaining files (navbar.component.js, landing.page.js, signin.page.js, etc) implement the Page Object Model design pattern for tests. In this approach, you define a Javascript Class for each page (and NavBar) of your application, with methods that implement all of the behaviors available on that page. This design pattern makes your actual tests both quite short and quite easy to read. For example:
test('Test that signin and signout work', async (testController) => {
  await navBar.gotoSigninPage(testController);
  await signinPage.signin(testController, credentials.username, credentials.password);
  await navBar.isLoggedIn(testController, credentials.username);
  await navBar.logout(testController);
  await signoutPage.isDisplayed(testController);
});
The first line of the test indicates to “Use the NavBar to go to the Signin page”, the second line indicates “on the Signin page, sign in the user with the specified credentials”, and so forth.
Look at each of the methods to see how they are implemented. For example, here is the navBar.gotoSigninPage method:
async gotoSigninPage(testController) {
  await this.ensureLogout(testController);
  await testController.click('#login-dropdown');
  await testController.click('#login-dropdown-sign-in');
}
This method starts by calling another NavBar method (ensureLogout), to make sure no one is logged in, the clicks on two buttons to go to the signin page.
In this approach, HTML “id” tags are used to test TestCafe which buttons on the page to click. In the above example, the use of the “#” indicates an HTML id tag. Now look at the corresponding code in ui/components/NavBar.jsx:
<Dropdown id="login-dropdown" text="Login" pointing="top right" icon={'user'}>
  <Dropdown.Menu>
    <Dropdown.Item id="login-dropdown-sign-in" icon="user" text="Sign In" as={NavLink} exact to="/signin"/>
    <Dropdown.Item id="login-dropdown-sign-up" icon="add user" text="Sign Up" as={NavLink} exact to="/signup"/>
  </Dropdown.Menu>
</Dropdown>
This fragment shows that three HTML ids are present: login-dropdown, login-dropdown-sign-in, and login-dropdown-signup.
Go through the tests.testcafe.js, as well as the Page Object Model classes, and finally inspect the corresponding UI components to see where id tags have been placed in the code. This should give you a basic idea for how to proceed to write your own tests.
Experience: Test the ListStuff page
To begin learning how to write acceptance tests using TestCafe, let’s add a test for the ListStuff page:

This will involve the following steps.
1. Create ListStuff test case
First, create the “shell” code for this test. You can simply copy and paste the following code into tests.testcafe.js:
test('Test the List Stuff page', async (testController) => {

});
Now run your tests to see that this “test” passes:
$ meteor npm run testcafe-development

> meteor-application-template-react@ testcafe-development /Users/philipjohnson/github/philipmjohnson/testcafe-test/app
> testcafe chrome tests/*.testcafe.js

 Running tests in:
 - Chrome 86.0.4240.111 / macOS 10.15.7

 meteor-application-template-react localhost test with default db
 ✓ Test that landing page shows up
 ✓ Test that signin and signout work
 ✓ Test the List Stuff page


 3 passed (9s)
$
2. Create gotoListStuff method
Second, update the NavBar test class with a method called gotoListStuffPage. This method should click on the List Stuff link in the navbar. You’ll need to add an id called “navbar-list-stuff” to the NavBar.jsx file.
Now, update your test code to the following:
test('Test the List Stuff page', async (testController) => {
  await navBar.gotoSigninPage(testController);
  await signinPage.signin(testController, credentials.username, credentials.password);
  await navBar.gotoListStuffPage(testController);
});
Run this test and make sure it passes.
3. Create the ListStuffPage test class
Third, implement a new test class called ListStuffPage. This class should be modeled on the other Page test classes, and should include a method called isDisplayed that can be used to test whether or not the current page in the browser is the ListStuff page. You’ll need to add an id tag to the ListStuff.jsx component.
Test that this class works by updating your test code as follows. Note you’ll also have to import listStuffPage:
test('Test the List Stuff page', async (testController) => {
  await navBar.gotoSigninPage(testController);
  await signinPage.signin(testController, credentials.username, credentials.password);
  await navBar.gotoListStuffPage(testController);
  await listStuffPage.isDisplayed(testController);
});
Run this test and make sure it passes.
4. Check for the presence of a table
Fourth, let’s check to see that this page displays a table with at least two items. You will want to review the TestCafe Selector count documentation.
You will also find the BowFolios ProfilesPage.hasDefaultProfiles to be useful.
Implement a method in the ListStuffPage.js test class called “hasTable”. This method should check to see if the page contains a table with at least two rows.
You might want to use Chrome Developer Tools to inspect the HTML source code for the ListStuff page. This can help you determine the appropriate parameters to the Selector call.
Test that this method works by updating your test code:
test('Test the List Stuff page', async (testController) => {
  await navBar.gotoSigninPage(testController);
  await signinPage.signin(testController, credentials.username, credentials.password);
  await navBar.gotoListStuffPage(testController);
  await listStuffPage.isDisplayed(testController);
  await listStuffPage.hasTable(testController);
});
Run this test and make sure it passes.
5. Add these acceptance tests to continuous integration
It is useful to automatically run these tests whenever there is a commit to the master branch of your repository. To do so, we first need to ensure that we can run these tests in “headless” mode—i.e. without popping up a window. For continuous integration, we also want to be able to run the tests without requiring us to first bring up the application in a separate window.
Let’s check to make sure this is working. First, control-c to end your running Meteor process in your first command shell.
Second, in your other command shell, invoke meteor npm run testcafe. The output should look like this:
$ meteor npm run testcafe

> meteor-application-template-react@ testcafe /Users/philipjohnson/github/philipmjohnson/testcafe-test/app
> testcafe chrome:headless tests/*.testcafe.js -q --app "meteor npm run start"

 Running tests in:
 - Chrome 86.0.4240.111 / macOS 10.15.7

 meteor-application-template-react localhost test with default db
 ✓ Test that landing page shows up (unstable)
 ✓ Test that signin and signout work
 ✓ Test the List Stuff page


 3 passed (28s)
You can safely ignore the fact that the first test is marked “unstable”. This is an artifact of the way TestCafe waits for the application to initially come up.
Once you have tested that “meteor npm run testcafe” runs the tests successfully, you can edit the GitHub Action file in .github/workflows/ci.yml to invoke this command on the last line of the file.
The last four lines should now look like this:
      - uses: meteorengineer/setup-meteor@v1
      - run: meteor npm install
      - run: meteor npm run lint
      - run: meteor npm run testcafe
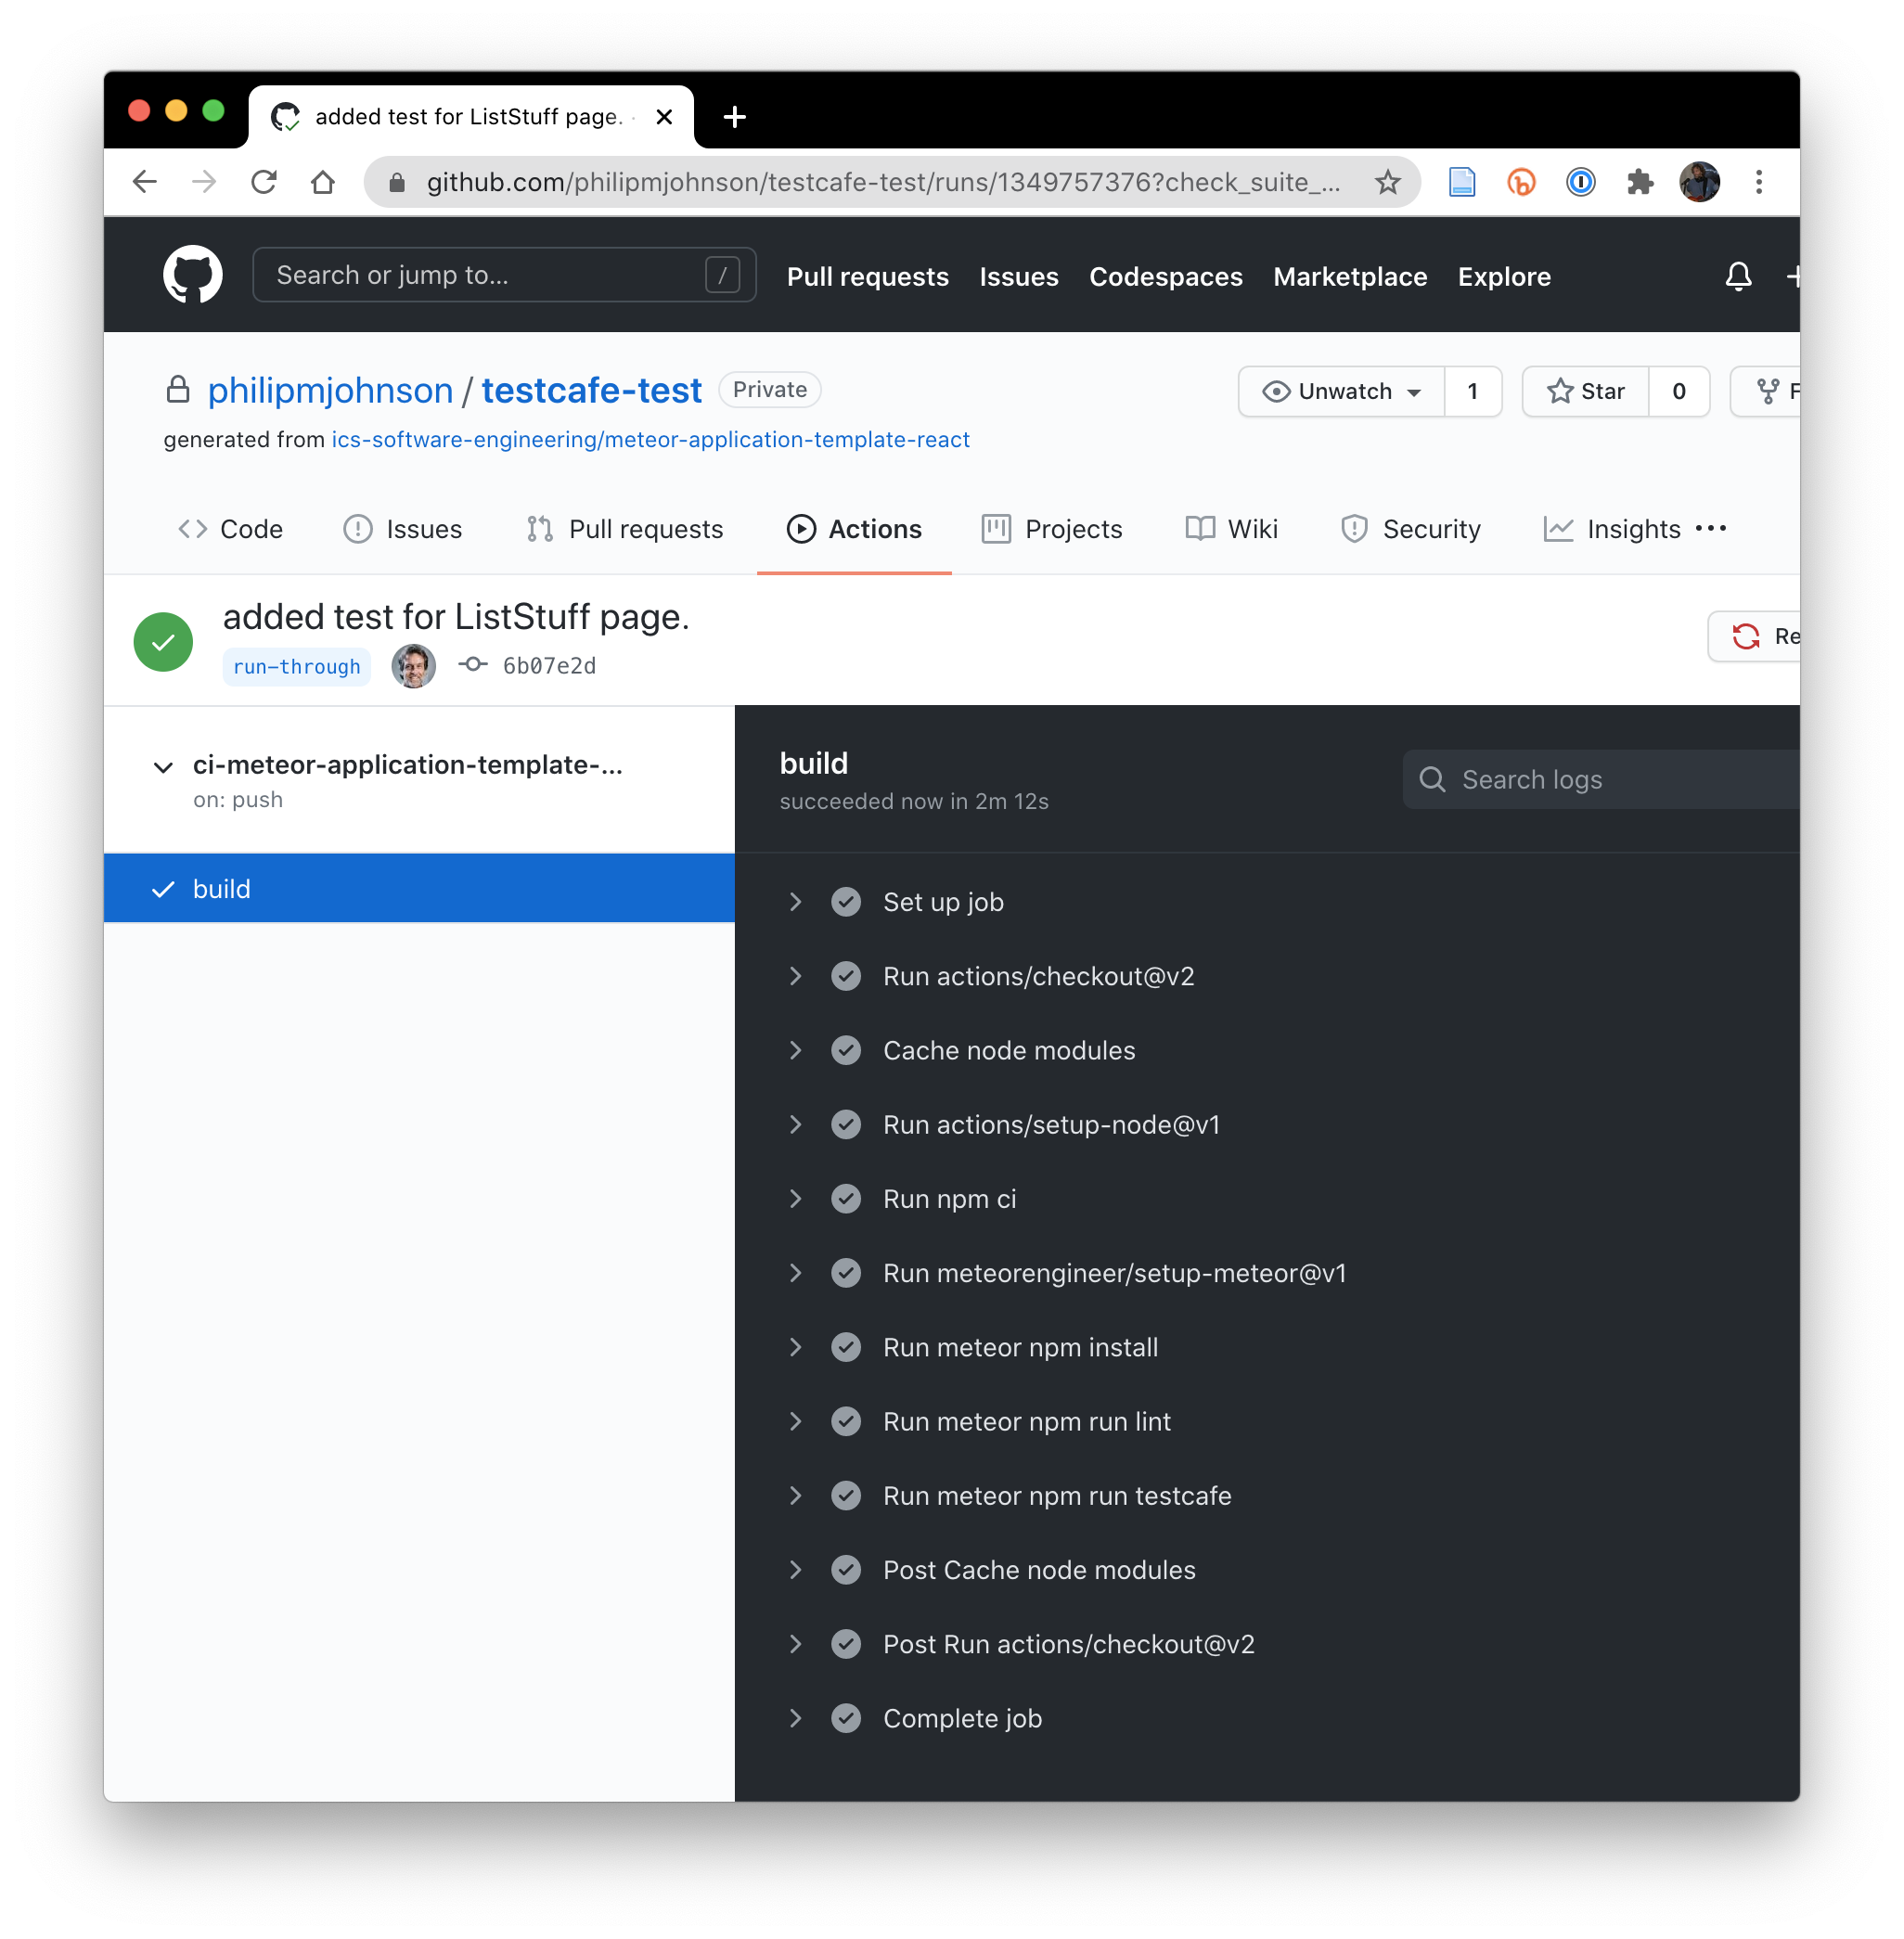
Commit your master branch to GitHub, then click on the Actions tab to see the execution of your updated workflow. A successful run should look like this:
Demonstration
Here’s a screencast of me working through this problem. You can watch this prior to attempting it for the first time yourself.
Submission Instructions
By the time and date indicated on the Schedule page, submit this assignment via Laulima. To submit, please provide the URL to your GitHub repository.
Note that you only need to complete this experience once. All of your work will be in the master branch.
You must now grant read access to this repo to the TA for your section. To do this:
- Retrieve your repository in a browser, then click on “Settings”. Depending upon the GitHub UI you are provided, you’ll then click on either “Collaborators” or “Manage Access”. Let us know if you can’t find either of these.
- Search for “bsogata”, then click “Add collaborator”.