E24: Improve code quality using ESLint in IntelliJ
Motivation
One of the most important steps you can take to improve the quality of your code is to use a quality assurance tool appropriate for your programming language that enforces basic coding standards.
In the case of Javascript, the emerging consensus is ESLint as it is extensible and supports the latest versions of Javascript.
For our class, ESLint is good because there is a configuration file for the AirBnb Javascript Style Guide, and because there is support for ESLint in IntelliJ IDEA.
Installation
1. Install NodeJS and NPM
To begin, you must install NodeJS following the instructions for your OS at https://nodejs.org/en/. You should install the “LTS” version. When completed, verify that the installation was successful by running the node and npm commands in a console:
[~]-> node --version
v10.5.0                   // (or later)
[~]-> npm --version
6.1.0                    // (or later)
[~]->
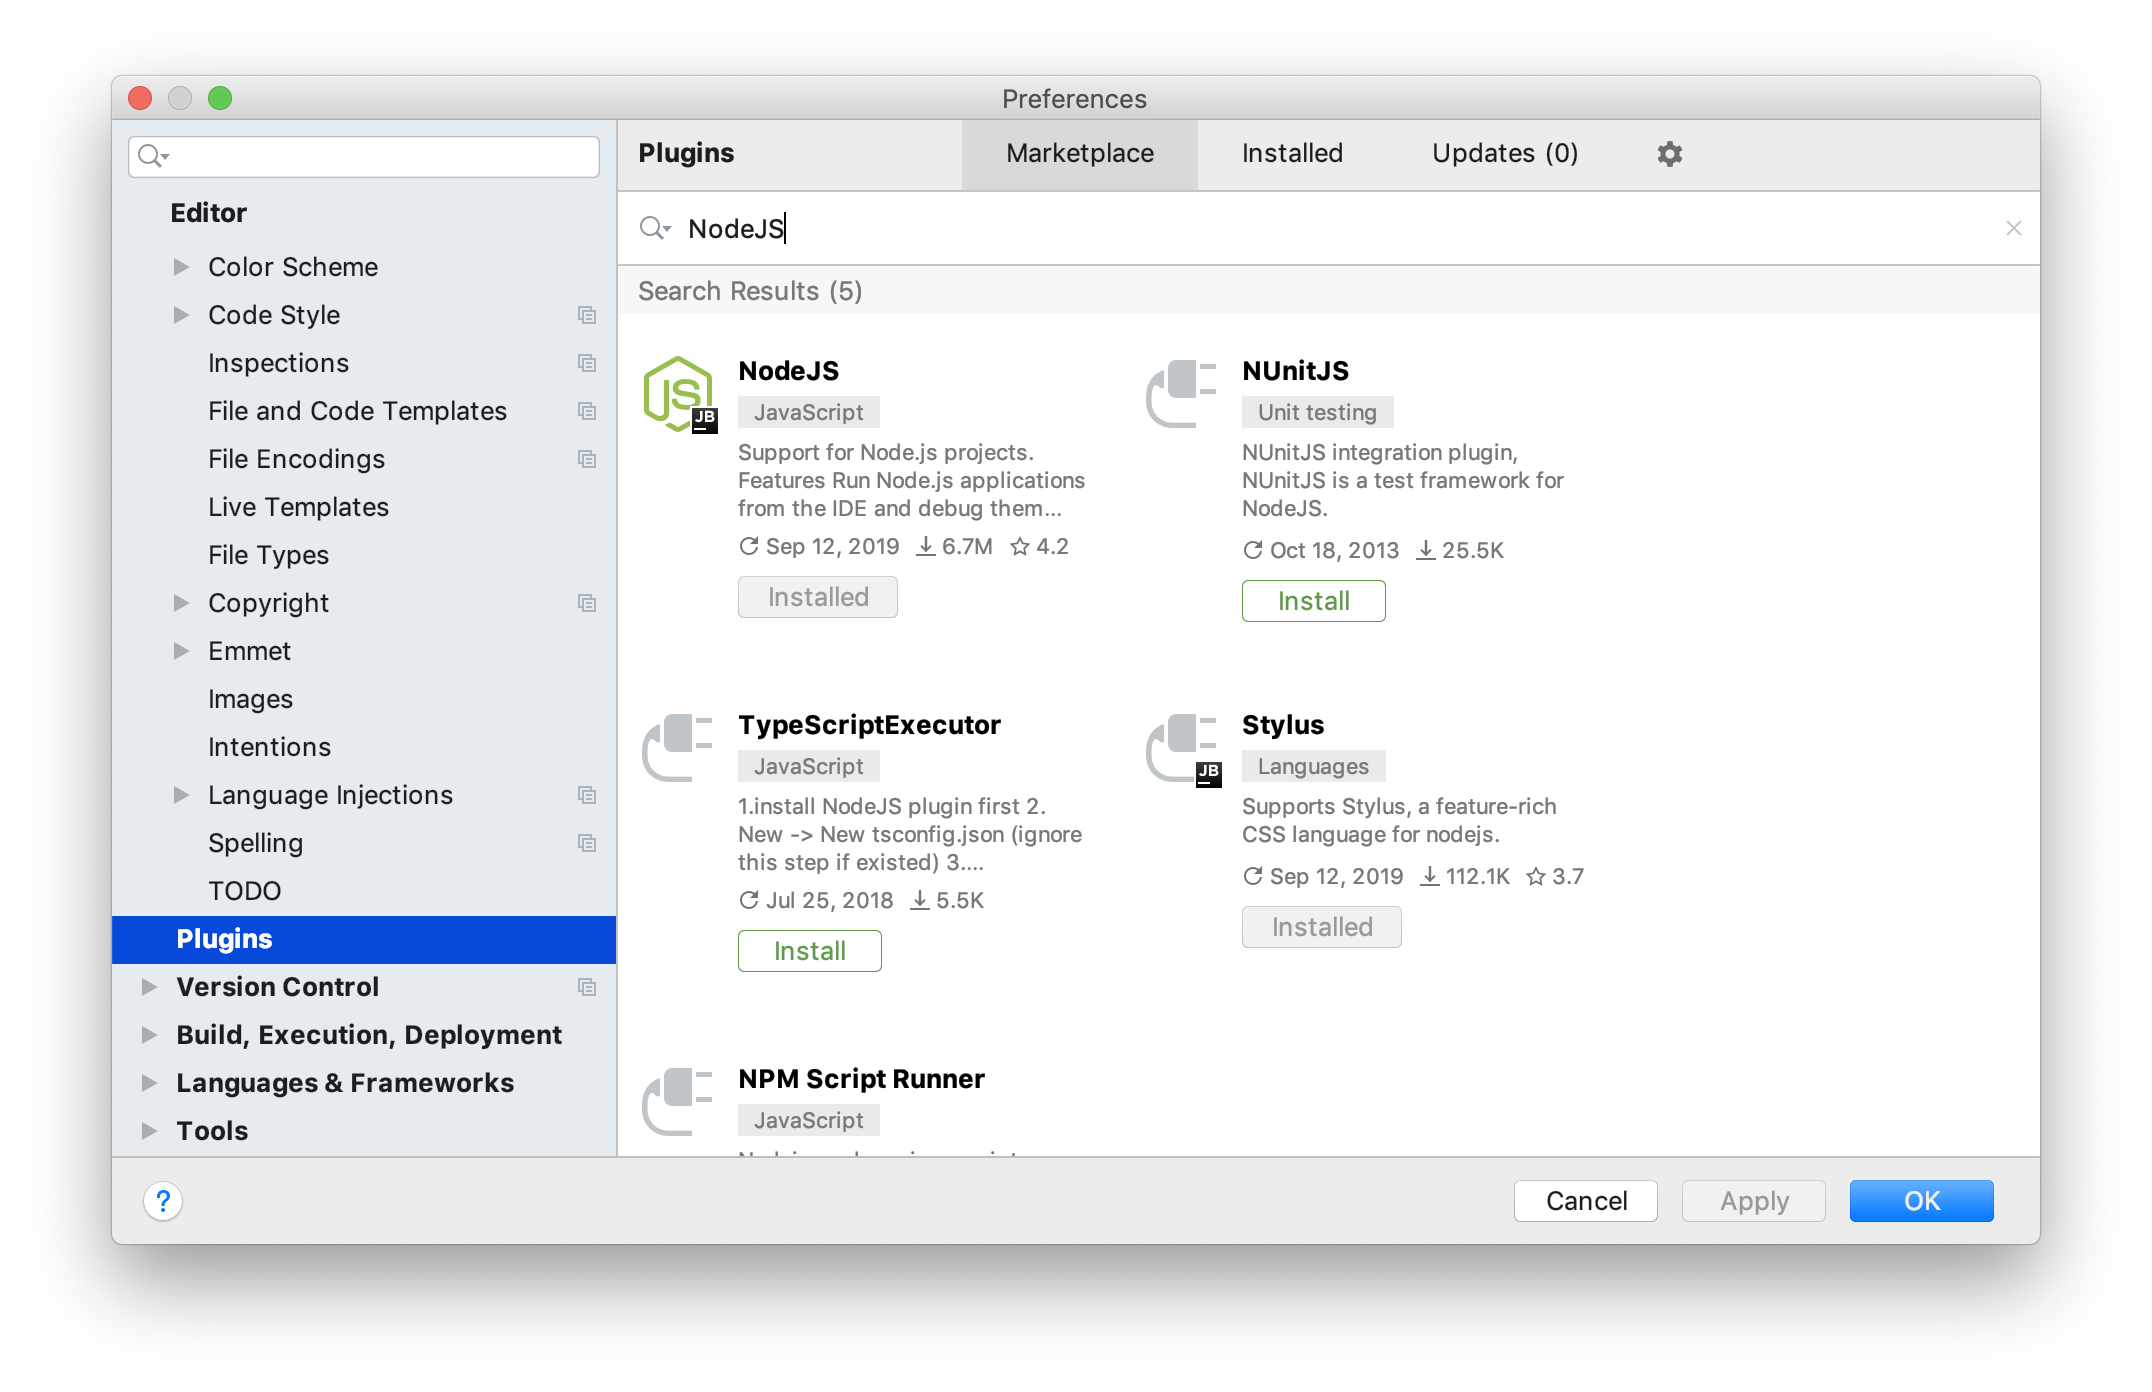
2. Install the Node plugin in IntelliJ
Next, activate the NodeJS plugin. Go to Preferences > Plugins, then search for “NodeJS”, and install it. You will need to restart IntelliJ. When done, you should see it in your list of installed plugins like this:
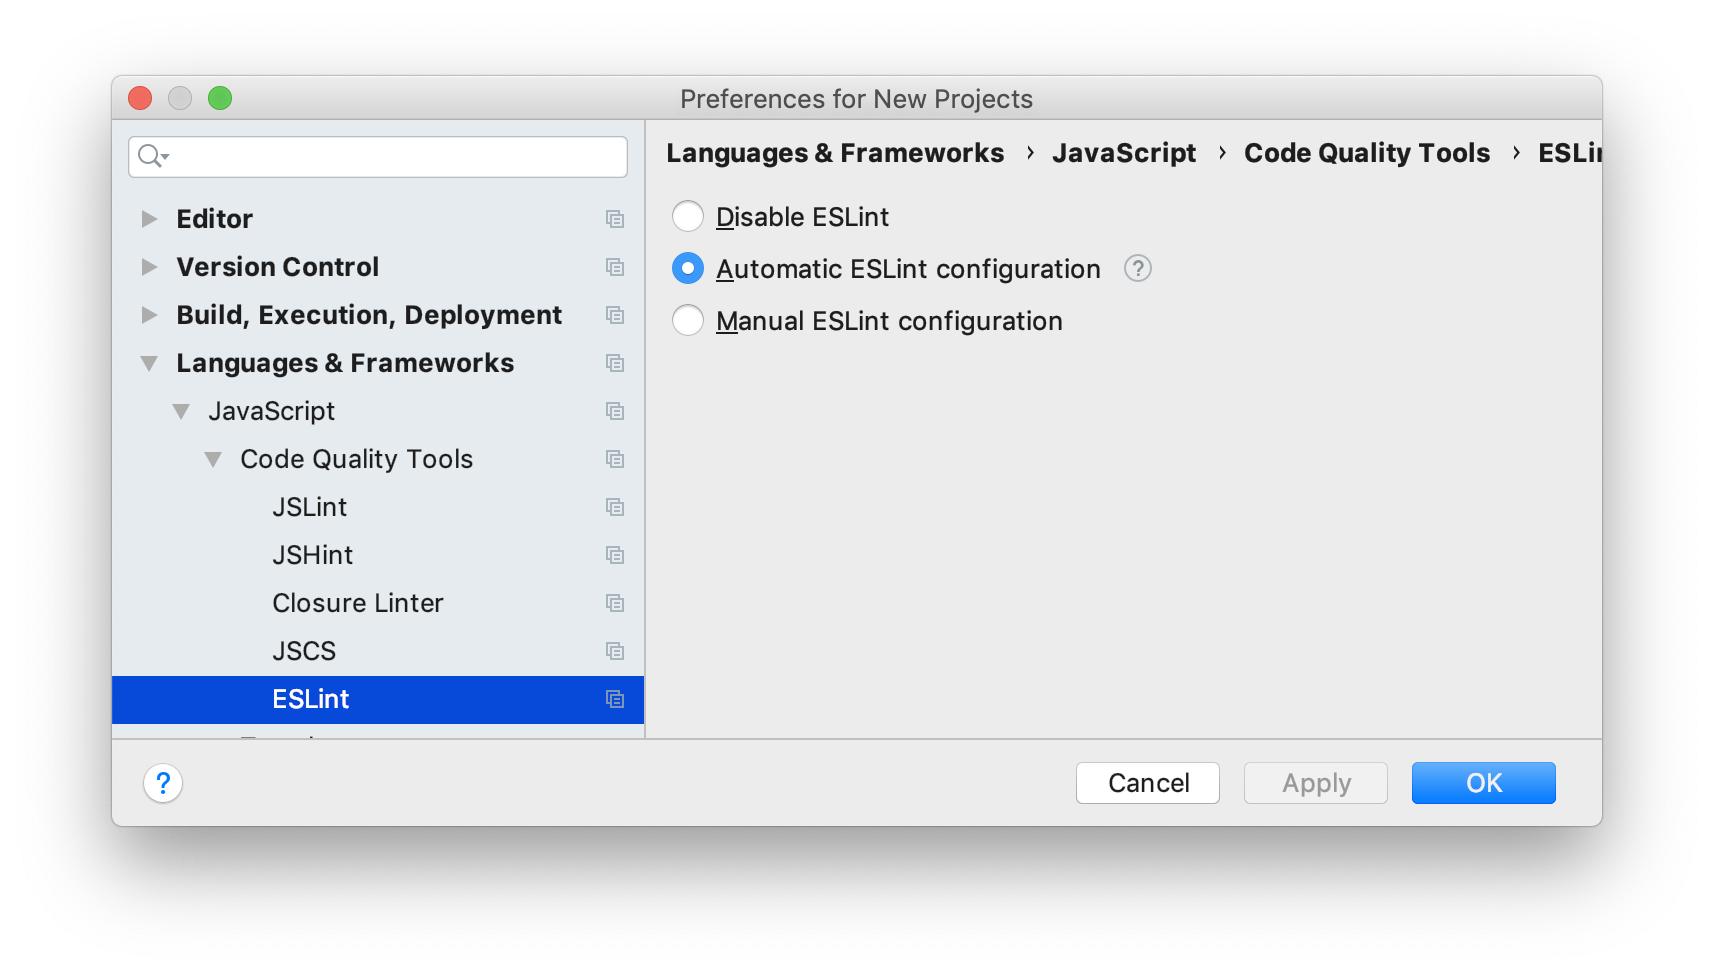
3. Configure default settings for Javascript and ESLint
To simplify future Javascript project definition, it is helpful to configure some default settings. You do this configuration by bringing up a dialog box found in File > Other settings > Preferences for New Projects.
Once that dialog box appears, go to Languages and Frameworks > Javascript > Code Quality Tools > ESLint, and check to make sure that “Automatic ESLint Configuration” is checked:
Next, for this class, ESLint is the only tool you need to use for automated coding standard compliance checking. However, IntelliJ enables other compliance checkers by default. This means that even if you have eliminated all of the problems detected by ESLint from your code, you might get a yellow box in the upper right corner rather than the green arrow. A yellow box in the upper right corner indicates that another IntelliJ inspector has signalled a “warning”.
For this class, your code only needs to be compliant with ESLint, so it’s helpful to disable these other inspectors. To do this, go to File > Other Settings > Preferences for New Projects as before, and then go to Editor > Inspections. Ensure that the Profile dropdown has a value of “Default IDE”; if not, open the dropdown and select the IDE item below Stored in IDE.
Next, select the Javascript language and uncheck all inspectors except for ESLint. When you’re done, only ESLint errors will be enabled for all future Javascript projects that you create:

4. Test your installation
Create a new IntelliJ project where the project directory is the one you created for the Hello Javascript experience. IntelliJ will ask you if you want to overwrite the previous IntelliJ project files. Let IntelliJ do that. By recreating the project, your project definitions will now inherit from the defaults that you specified above.
Next, download three files into your project directory:
- sample.eslintrc, rename it to .eslintrc.
- sample.package.json, rename it to package.json.
- sample.gitignore, rename it to .gitignore.
Finally,
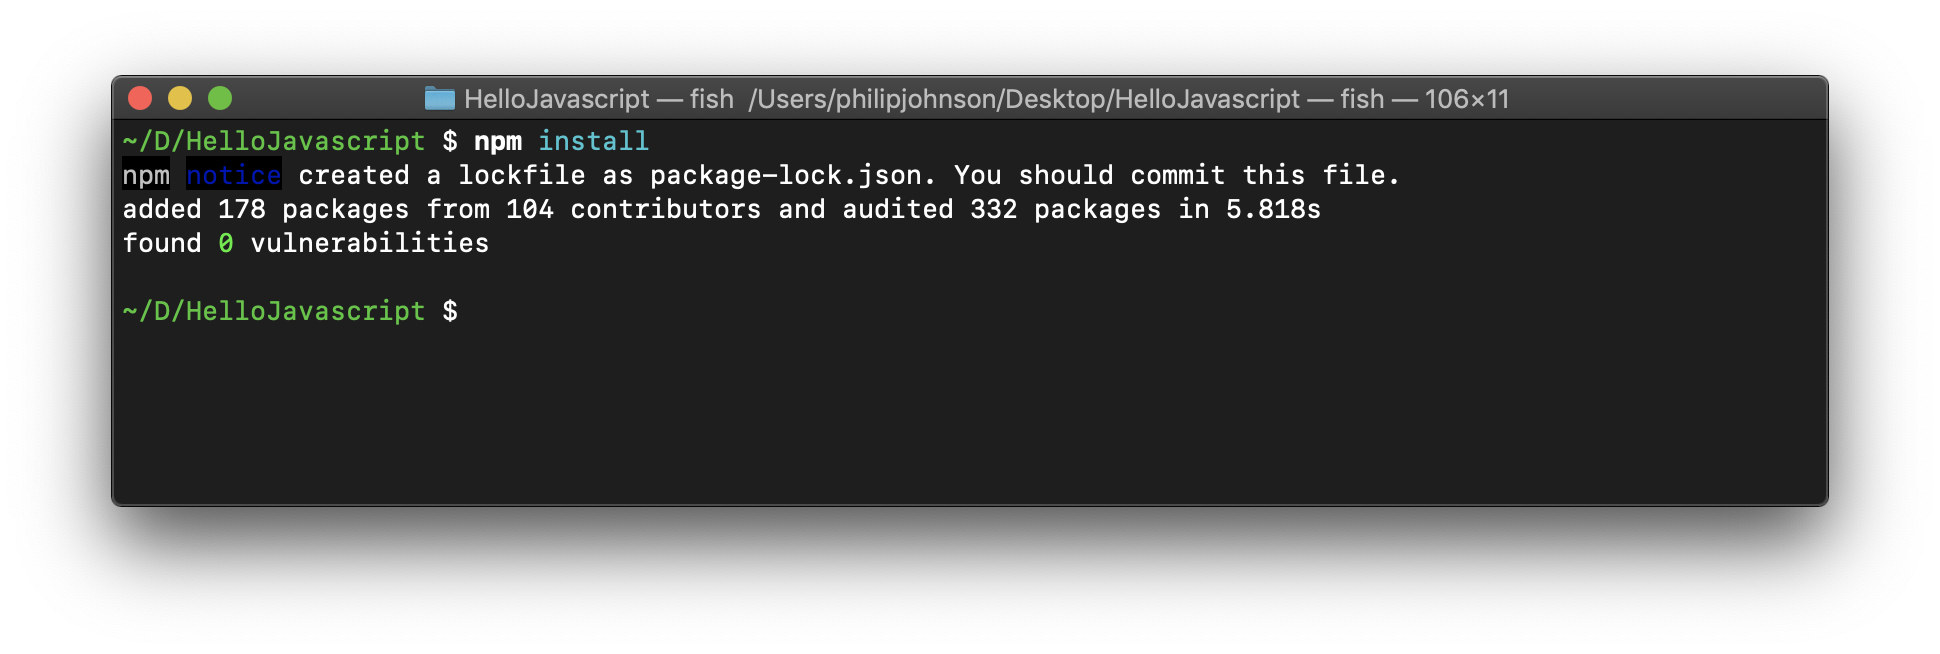
Now open up a shell, cd into the HelloJavascript directory, and invoke npm install. This will create a node_modules directory and install ESLint libraries into it. Your console window should look like this after installation:
Switch back to IntelliJ. If IntelliJ pops up a dialog box asking whether or not to run npm, you can dismiss it since you have already run it from the command line.
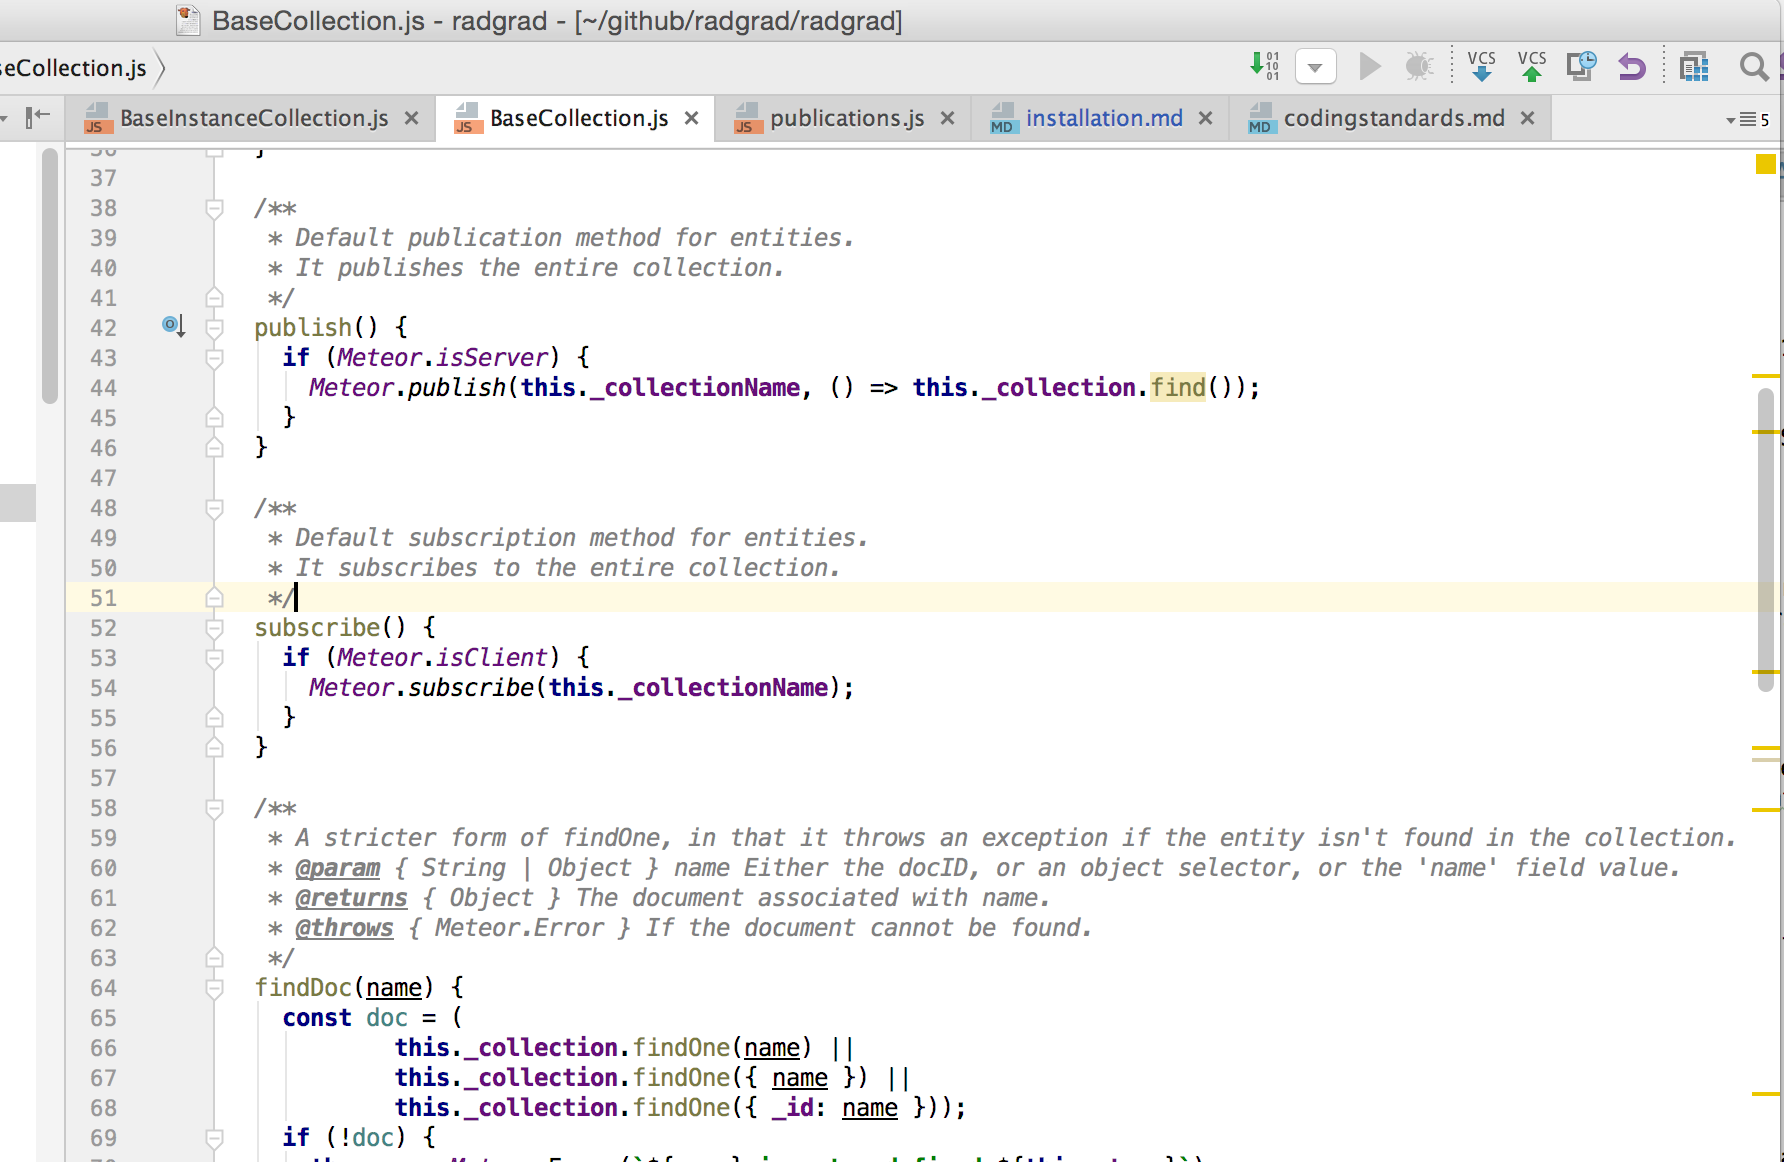
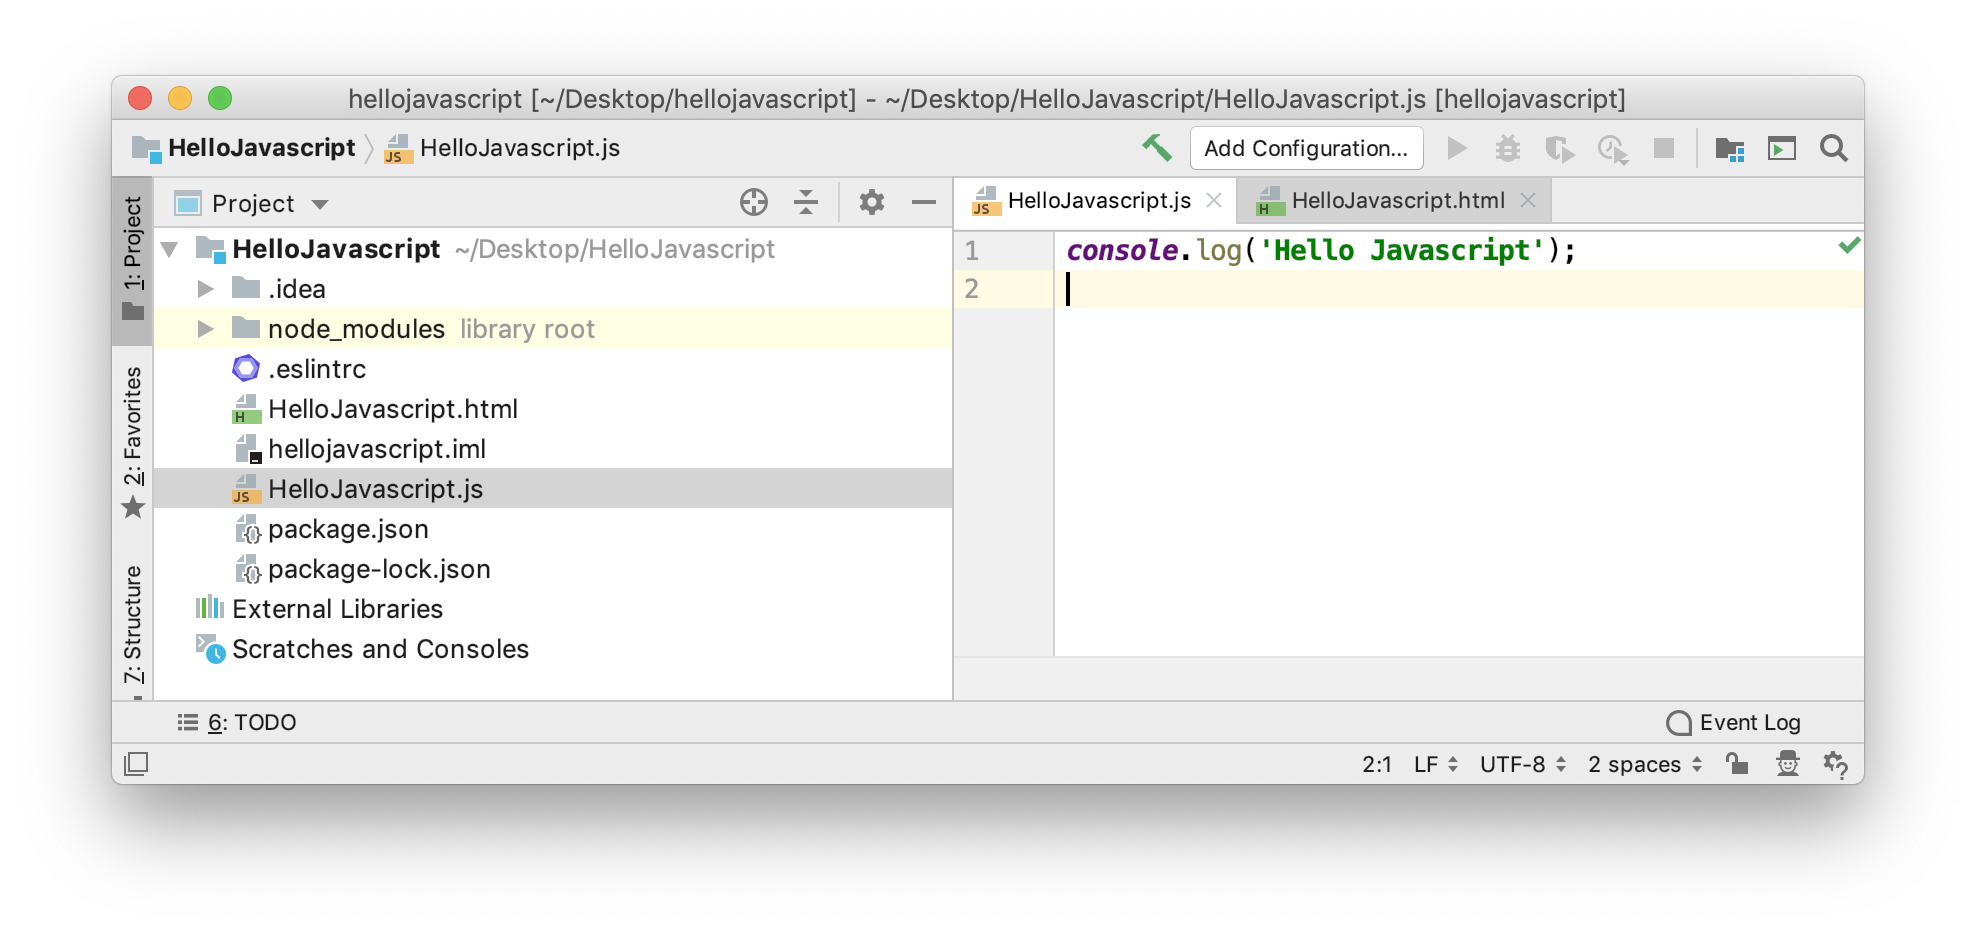
Now IntelliJ should now be running ESLint in the background on your Javascript files and displaying any errors as red lines in the right margin. For example, this is what my HelloJavascript.js file looks like with ESLint enabled and the cursor over the red line:

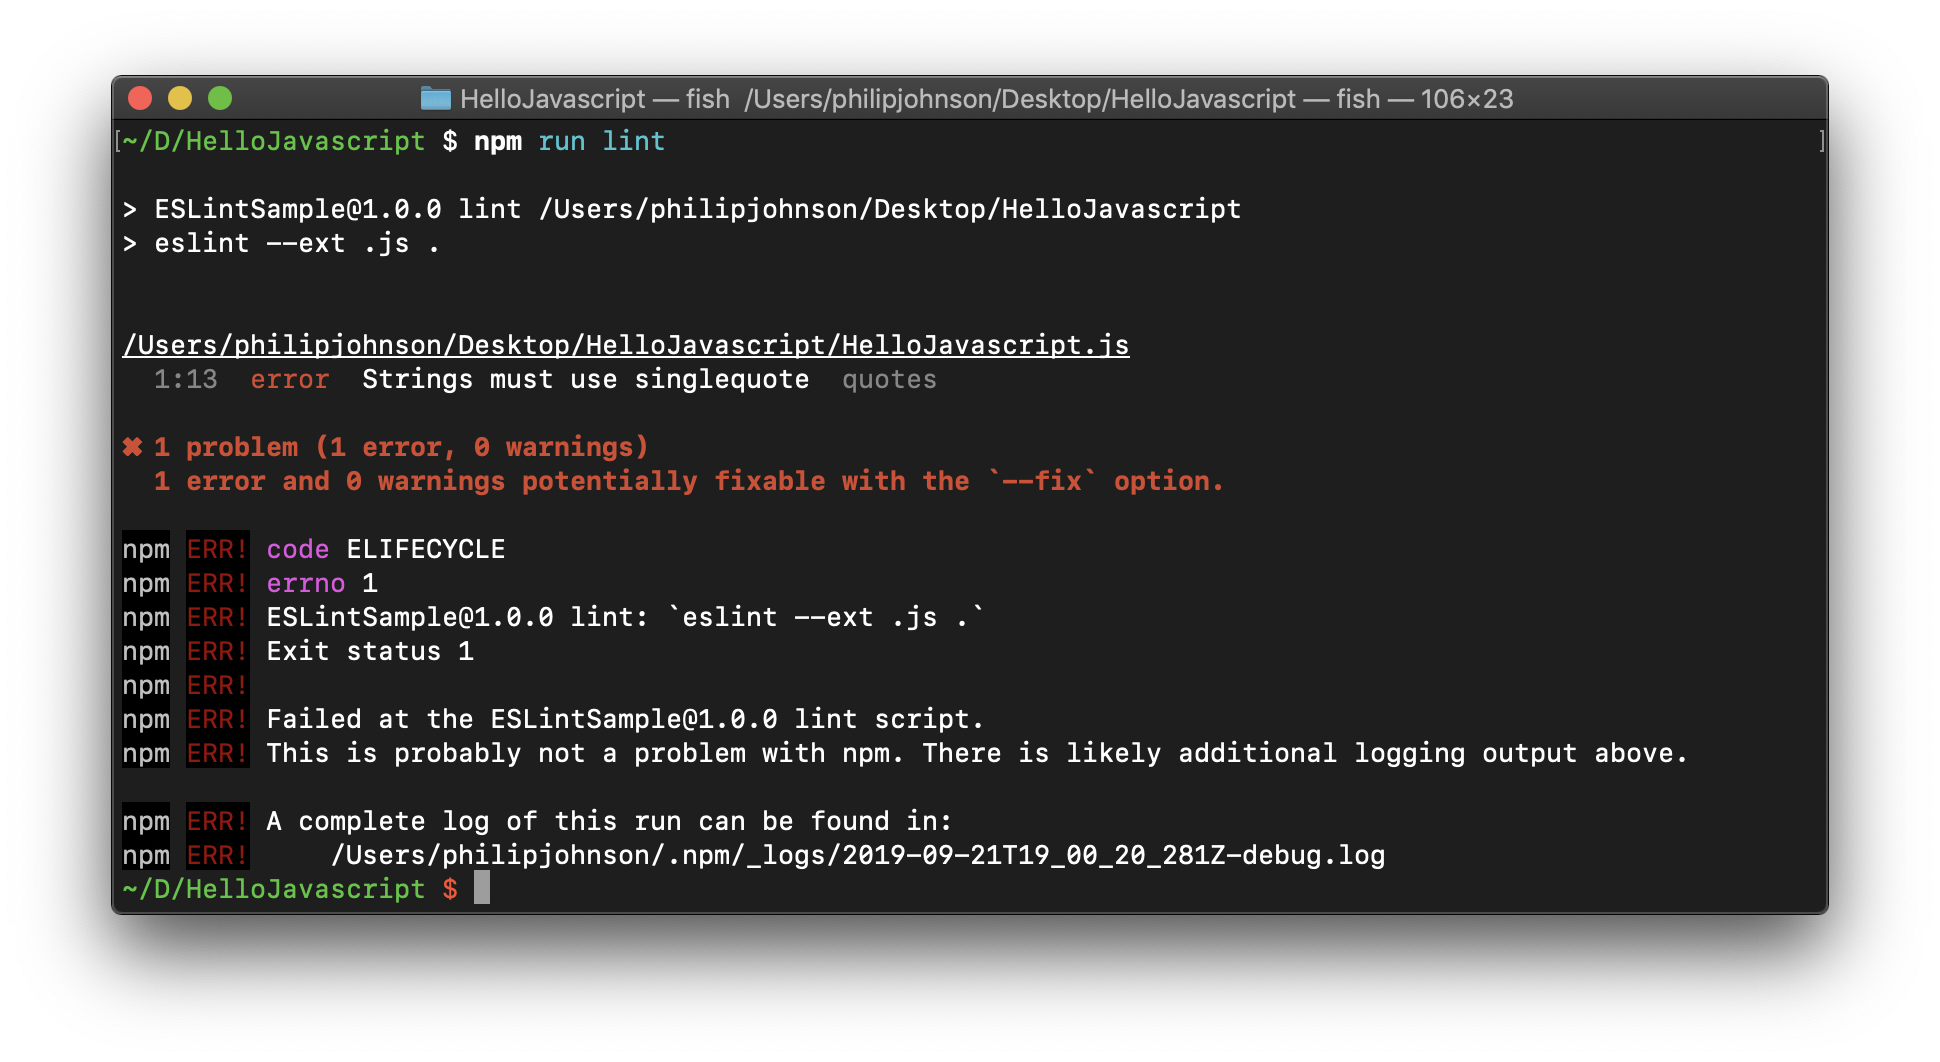
Next, let’s switch back to the console and invoke npm run lint. This invokes the “lint” script defined in the package.json file to run ESLint over all Javascript files. As you can see, the same error is discovered from the command line:
Now switch back to IntelliJ, and change the double quotes to single quotes. The red bar will disappear and a green checkmark will appear to indicate that no code style problems can be found in the file:
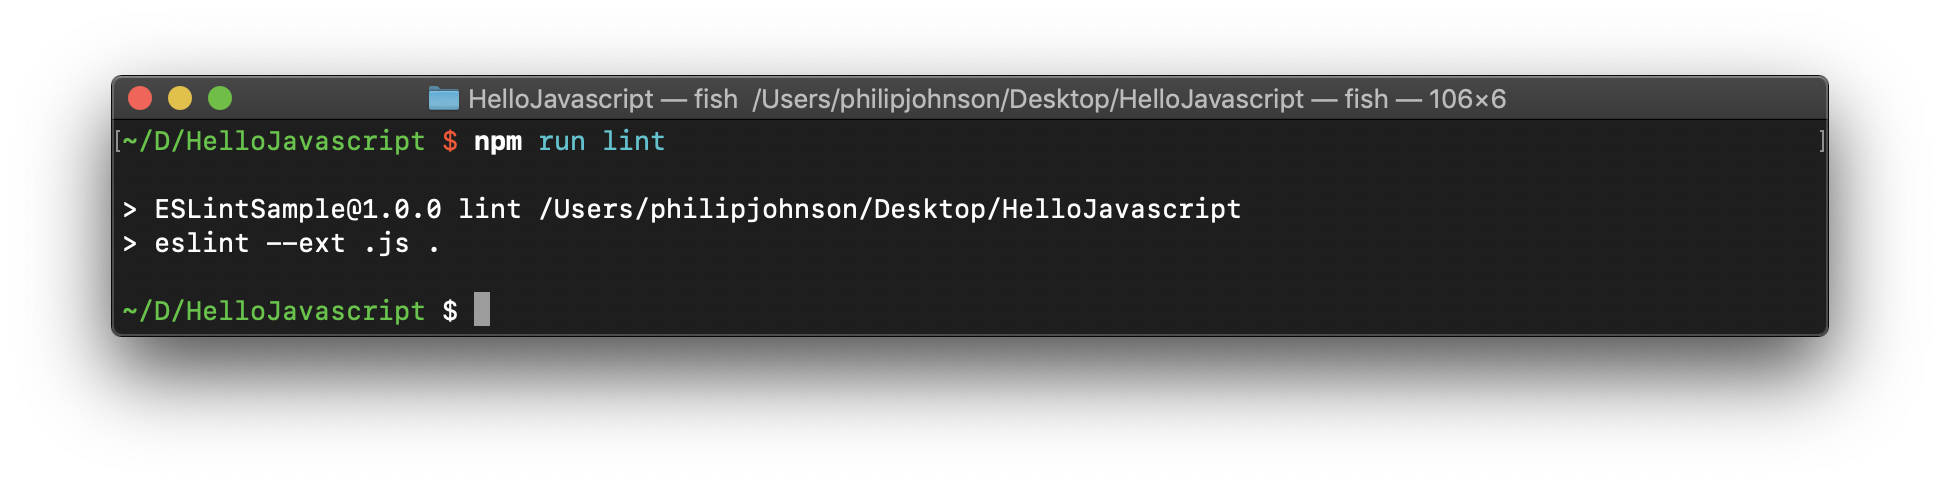
Running it from the command line yields no errors as well:
5. Troubleshooting
If npm run lint does not work, and you get a message like “eslint is not recognized…”, then there are a couple of things to check.
First, make sure that the absolute path to your source code does not include a directory with a space in its name. For example, “Users/philipjohnson/Amazon Files/ics314/test/foo.js” will lead to a problem loading ESLint, because of the directory named “Amazon Files”.
Second, on Windows, you may need to run npm -g i eslint-cli. See this stackoverflow question.
Submission instructions
You do not have to submit anything for this experience. However, your ability to install ESLint and use it to remove warnings will be evaluated in subsequence experiences, so be sure to complete this experience successfully!