E52: Digits, Part 4 (Add and Edit Contacts)
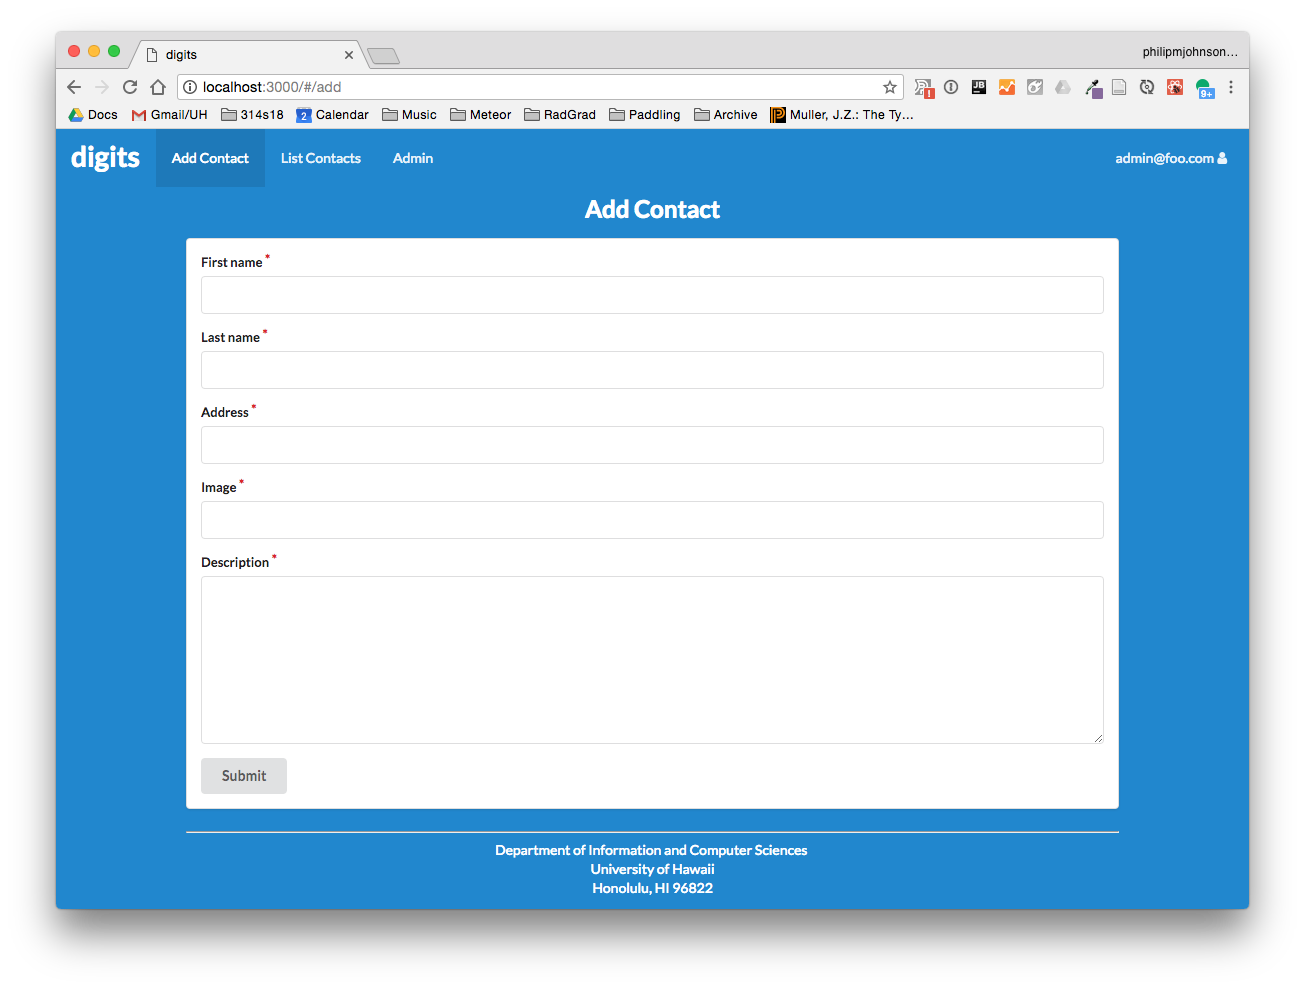
For this experience, you will create pages to add new contacts and edit existing ones. When finished, the AddContact page will look like this:
And the EditContact page will look like this:
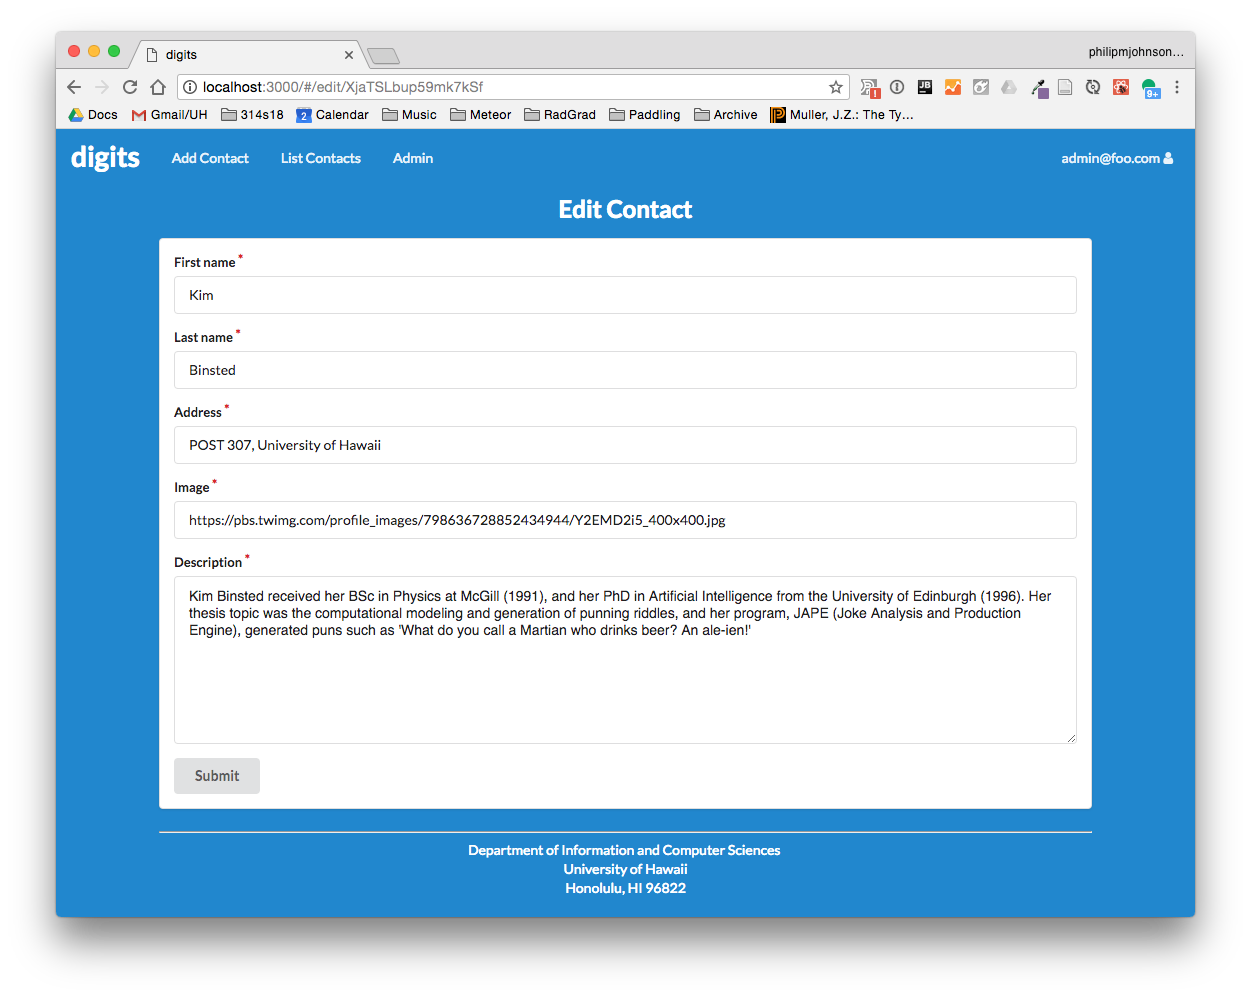
Note that the URL for the Edit Contact page contains the docID of the Contact document to be edited.
Prelude
First, please review meteor-example-form-react, and be sure to watch the 35 minute screencast. Familiarity with this system will make this WOD (and all your future efforts to implement forms in Meteor) much more straightforward.
Second, I suggest you watch my screencast before trying this WOD for the first time. I have not been able to find suitable resources for you to read prior to doing this WOD to cover all of the Meteor concepts I will cover. So, it’s best for you to watch the solution one time through to orient yourself.
Merge your contacts-collection branch into master
At the conclusion of the last WOD, your contacts collection mockup was in a branch called contacts-collection-1 (and contacts-collection-2).
Quit meteor if it is running.
Now switch to the master branch in GitHub Desktop, and merge one of your contacts-collection branches into it. Push your master branch to GitHub after the merge completes.
Start meteor using meteor npm run start, and check http://localhost:3000 (and the console) to ensure that the merge worked correctly.
The WOD
Now you’re ready to do this practice WOD. There are two rounds to this WOD, each timed individually.
Round 1
Start your timer.
1. Create a branch to hold your work.
Create a branch called contact-forms-1 using GitHub Desktop, and publish this branch to GitHub.
If necessary, start up your application using meteor npm run start. Check to see that it’s running at http://localhost:3000. Take a look at the console to be sure there are no errors.
2. Create the AddContact page.
Make a copy of app/imports/ui/pages/AddStuff.jsx called AddContact.jsx. Change the component name to AddContact and change all other references. At the top of the file, change the import of Stuffs to import Contacts from imports/api/contact/Contacts.jsx.
Change the formSchema variable to specify the five strings to be collected by the form: firstName, lastName, address, image, and description.
In the submit() method, extract the five form field names from the data object, then provide them to the insert call. Don’t forget to include the owner field in the insert call.
In the render() method inside the AutoForm, change the Header to Add Contact, and replace the form fields for Stuff documents by 5 form fields for Contact documents. The fields firstName, lastName, address, and image, can be represented by TextFields, and description can be represented by a LongTextField.
3. Create the routing for AddContact.
In app/imports/ui/layouts/App.jsx, change the route for AddStuff to AddContact. In app/imports/ui/components/NavBar.jsx, change the Add Stuff link to Add Contact.
Now you should have a link to Add Contact in the NavBar.
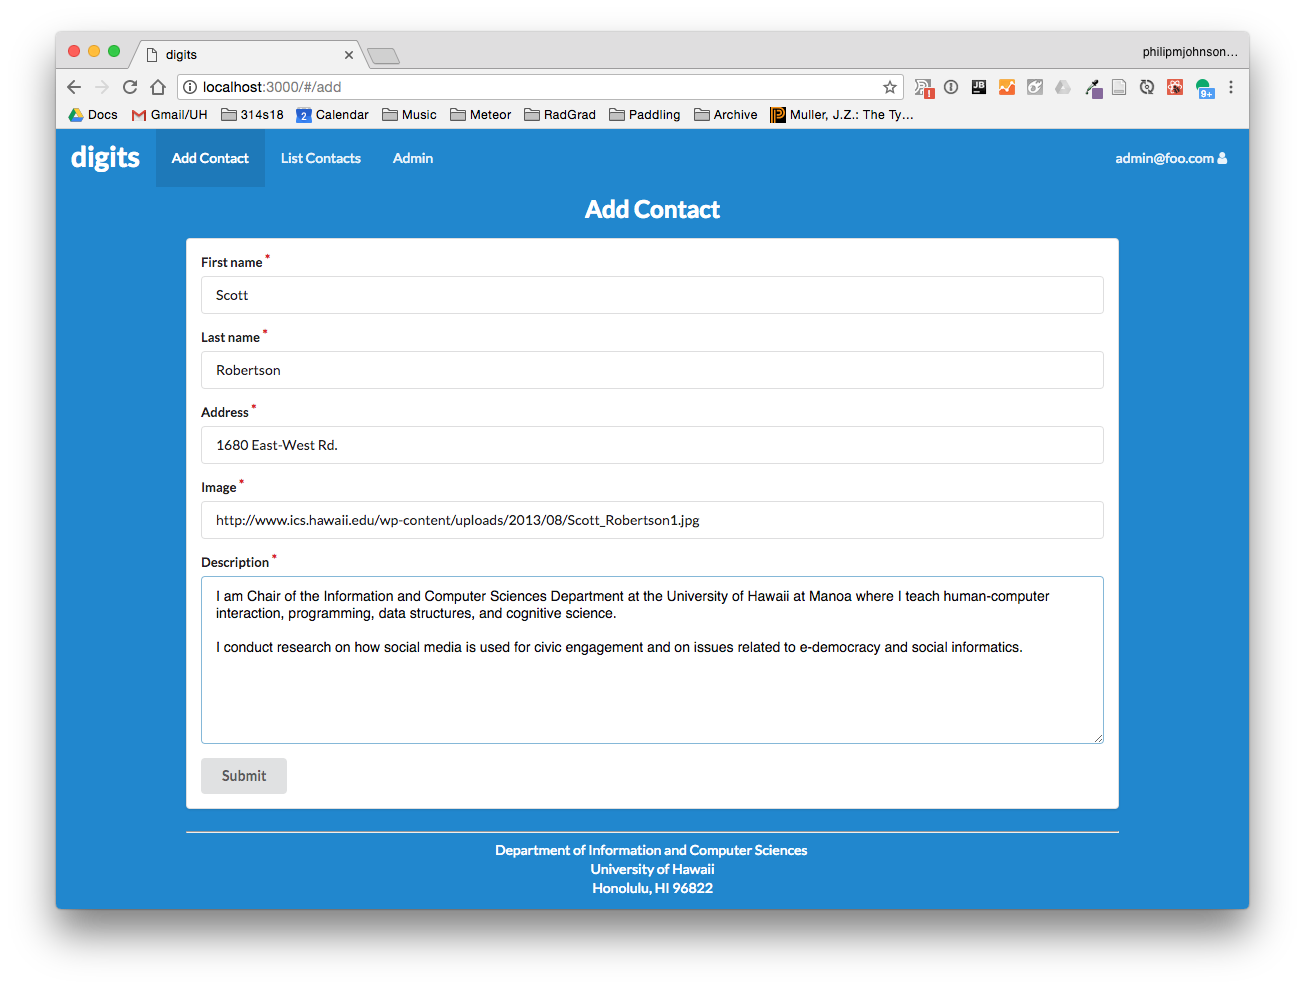
Test your AddContact code by filling out and submitting a new contact. In the screencast, I used info from Scott Robertson.
Here is an example of the page with a new contact filled in:
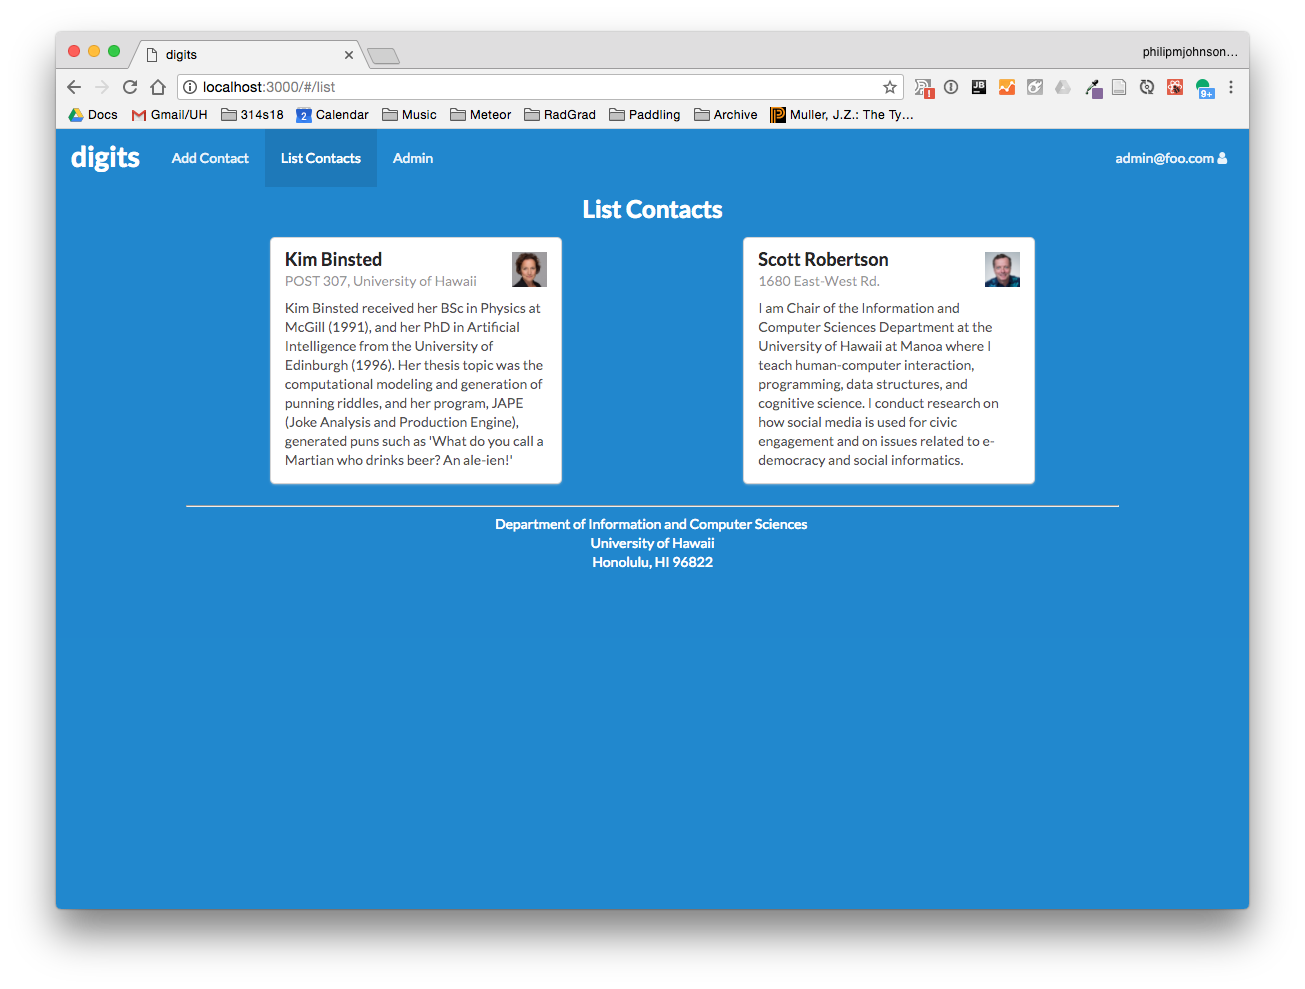
After submitting, the new contact should appear in the List Contacts page:
4. Create the EditContact page.
Go through a similar sequence of actions to create the EditContact page:
- Make a copy of EditStuff.jsx called EditContact.jsx.
- Replace occurrences of EditStuff by EditContact.
- Import Contacts and ContactsSchema, not Stuffs and StuffSchema.
- Update submit() method to update the Contacts collection with contact data.
- Update renderPage() method to render the Contacts fields.
- Change the subscription call to subscribe to the “Contacts” publication.
5. Create a routing to EditContact.
Create a routing for EditContact by editing App.jsx.
(There is nothing to change in NavBar.jsx, since the edit link will appear in the Contact card.)
6. Add an edit link to the Contact card.
To create the Edit link, take a look at app/imports/ui/components/StuffItem.jsx to see and example of the React Router Link component. You will want to add that Link element into Contact.jsx. I added a “Card.Content extra” component with the Link component inside like this:
<Card.Content extra>
  <Link to={`/edit/${this.props.contact._id}`}>Edit</Link>
</Card.Content>
When you are done, the List Contacts page should include an Edit link at the bottom of each Contact:

And clicking on the Edit link should display a page that looks like this:
7. Check for ESLint errors.
As a last step, run meteor npm run lint to ensure that there are no ESLint errors anywhere in your application.
8. Commit your finished work.
When your page renders correctly,
- control-c to stop Meteor.
- Stop your timer and note your time.
- Commit and push your contact-forms-1 branch to GitHub with the message ‘contact forms finished in NN minutes.’, where NN is the number of minutes it took you to do it according to your timer.
Round 2
To ensure that you understand this material, you must do this WOD a second time.
Switch back to the master branch. This will revert your local repo to its state just before starting the WOD.
Create a new branch called contact-forms-2.
Go through the WOD again. When you’re done, commit and push your contact-forms-2 branch to GitHub with the message ‘contact forms finished in NN minutes.’, where NN is the number of minutes it took you to do it according to your timer.
Your TA will check whether both branches are in GitHub.
Rx: <18 min Av: 18-22 min Sd: 22-30 min DNF: 30+ min
Demonstration
Here’s a screencast of me working through this problem. You can watch this prior to attempting it for the first time yourself.
Submission instructions
By the time and date indicated on the Schedule page, submit this assignment via Laulima.
Your submission should contain:
- A link to each branch of the GitHub repository created as a result of your latest attempt at this practice WOD. Make sure you include the complete URLs for all branches so that I can click on them in my mailer. Note: the final commit for these branches must have been made before the submission time and date, otherwise you will not receive credit for this assignment.
You will receive full credit for this practice WOD as long as you have attempted it the required number of times and submitted the email with all required data before the due date. Your code does not have to run perfectly for you to receive full credit. However, if you do not repeat each practice WOD until you can finish it successfully in at least AV time, you are unlikely to do well on the in-class WOD. To reduce the stress associated with this course, I recommend that you repeat each practice WOD as many times as necessary to achieve at least AV before its due date.