How to set up application performance monitoring for Meteor
Application Performance Monitoring (APM) is a vital component of deployment. APM allows you to investigate questions like:
- Is my hardware sufficient to handle the load on my application?
- Are the run-time errors occurring in my application, on either the client or server side?
- How many users is my application servicing, both right now and over time?
- How long does it take my pages to load?
- How long are queries to the database taking? Are there queries that need to be optimized?
There are a wide variety of APM services. This page explains how to install and use an exceptionally full-featured APM system designed specifically for Meteor called Monti APM.
These instructions assume that you have deployed an app following How to deploy a Meteor app to Digital Ocean.
1. Sign up for Monti APM.
First, go to Monti APM and sign up. If you don’t have a Meteor account already, you’ll need to create one in order to sign up with Monti APM.
Once you have signed up, you will be on your Monti APM home page, which will look something like this:
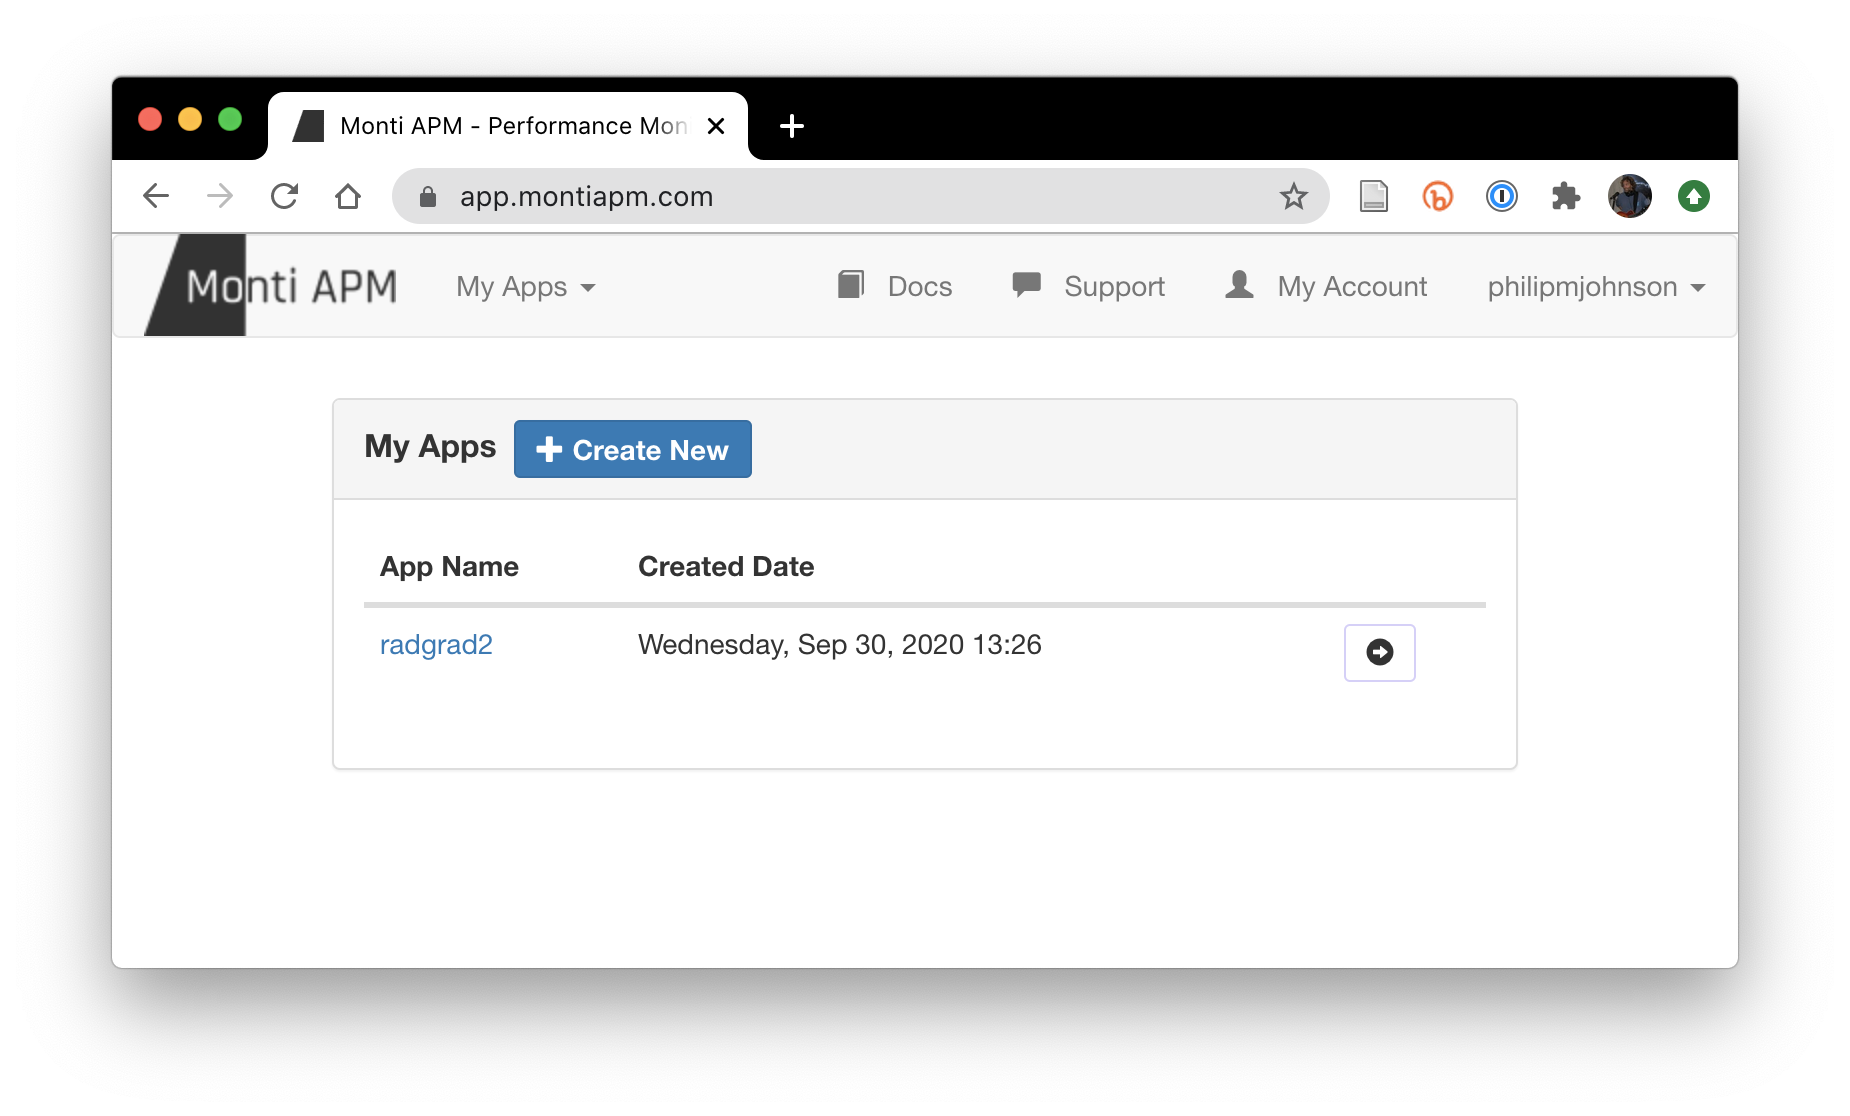
2. Create an app
Click the “Create New” button to create a new app:
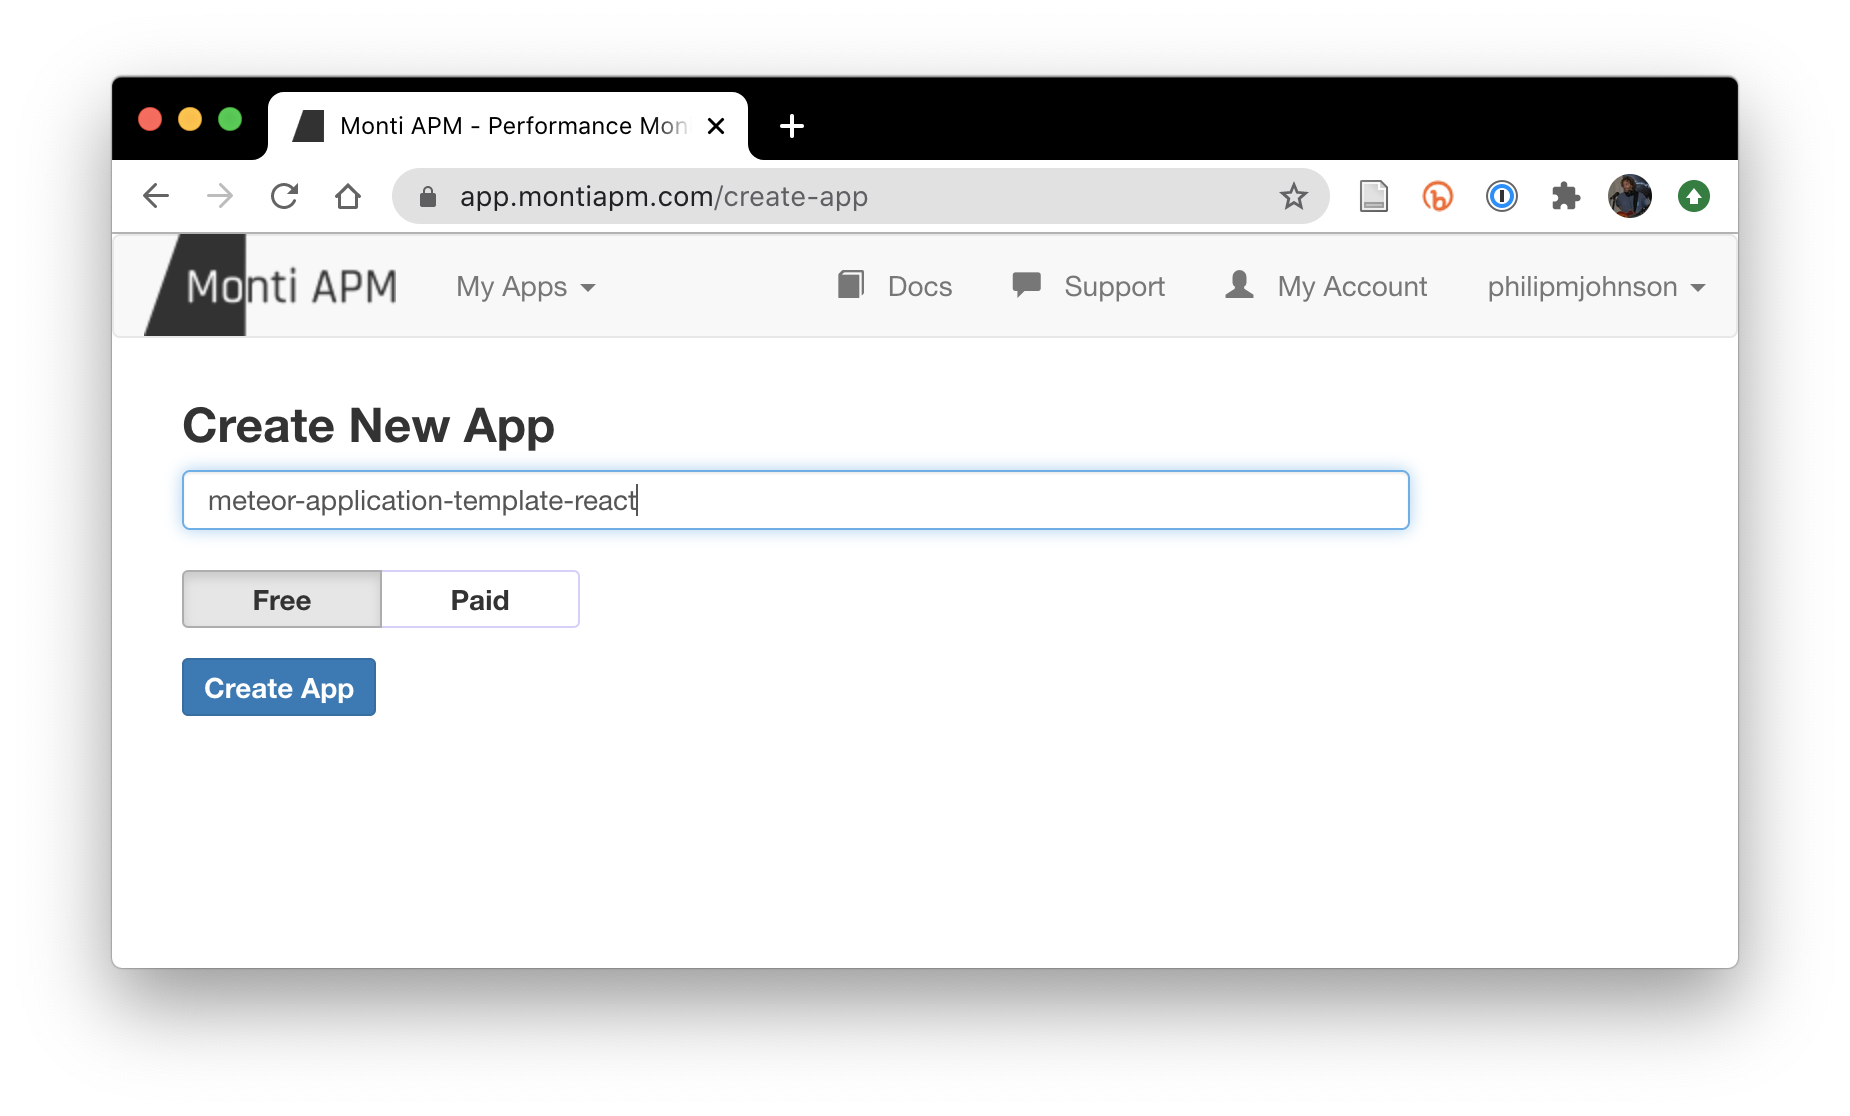
The Free Plan is fine for starters. For just $5/month, you can retain logs for longer, and also display instrumentation separately for different hosts. This is useful to separate out the behavior of your app in production from the behavior of your app during development.
3. Configure your app
Once you’ve created the app, you’ll see the following page. I have selected the “Via Meteor Settings” tab:
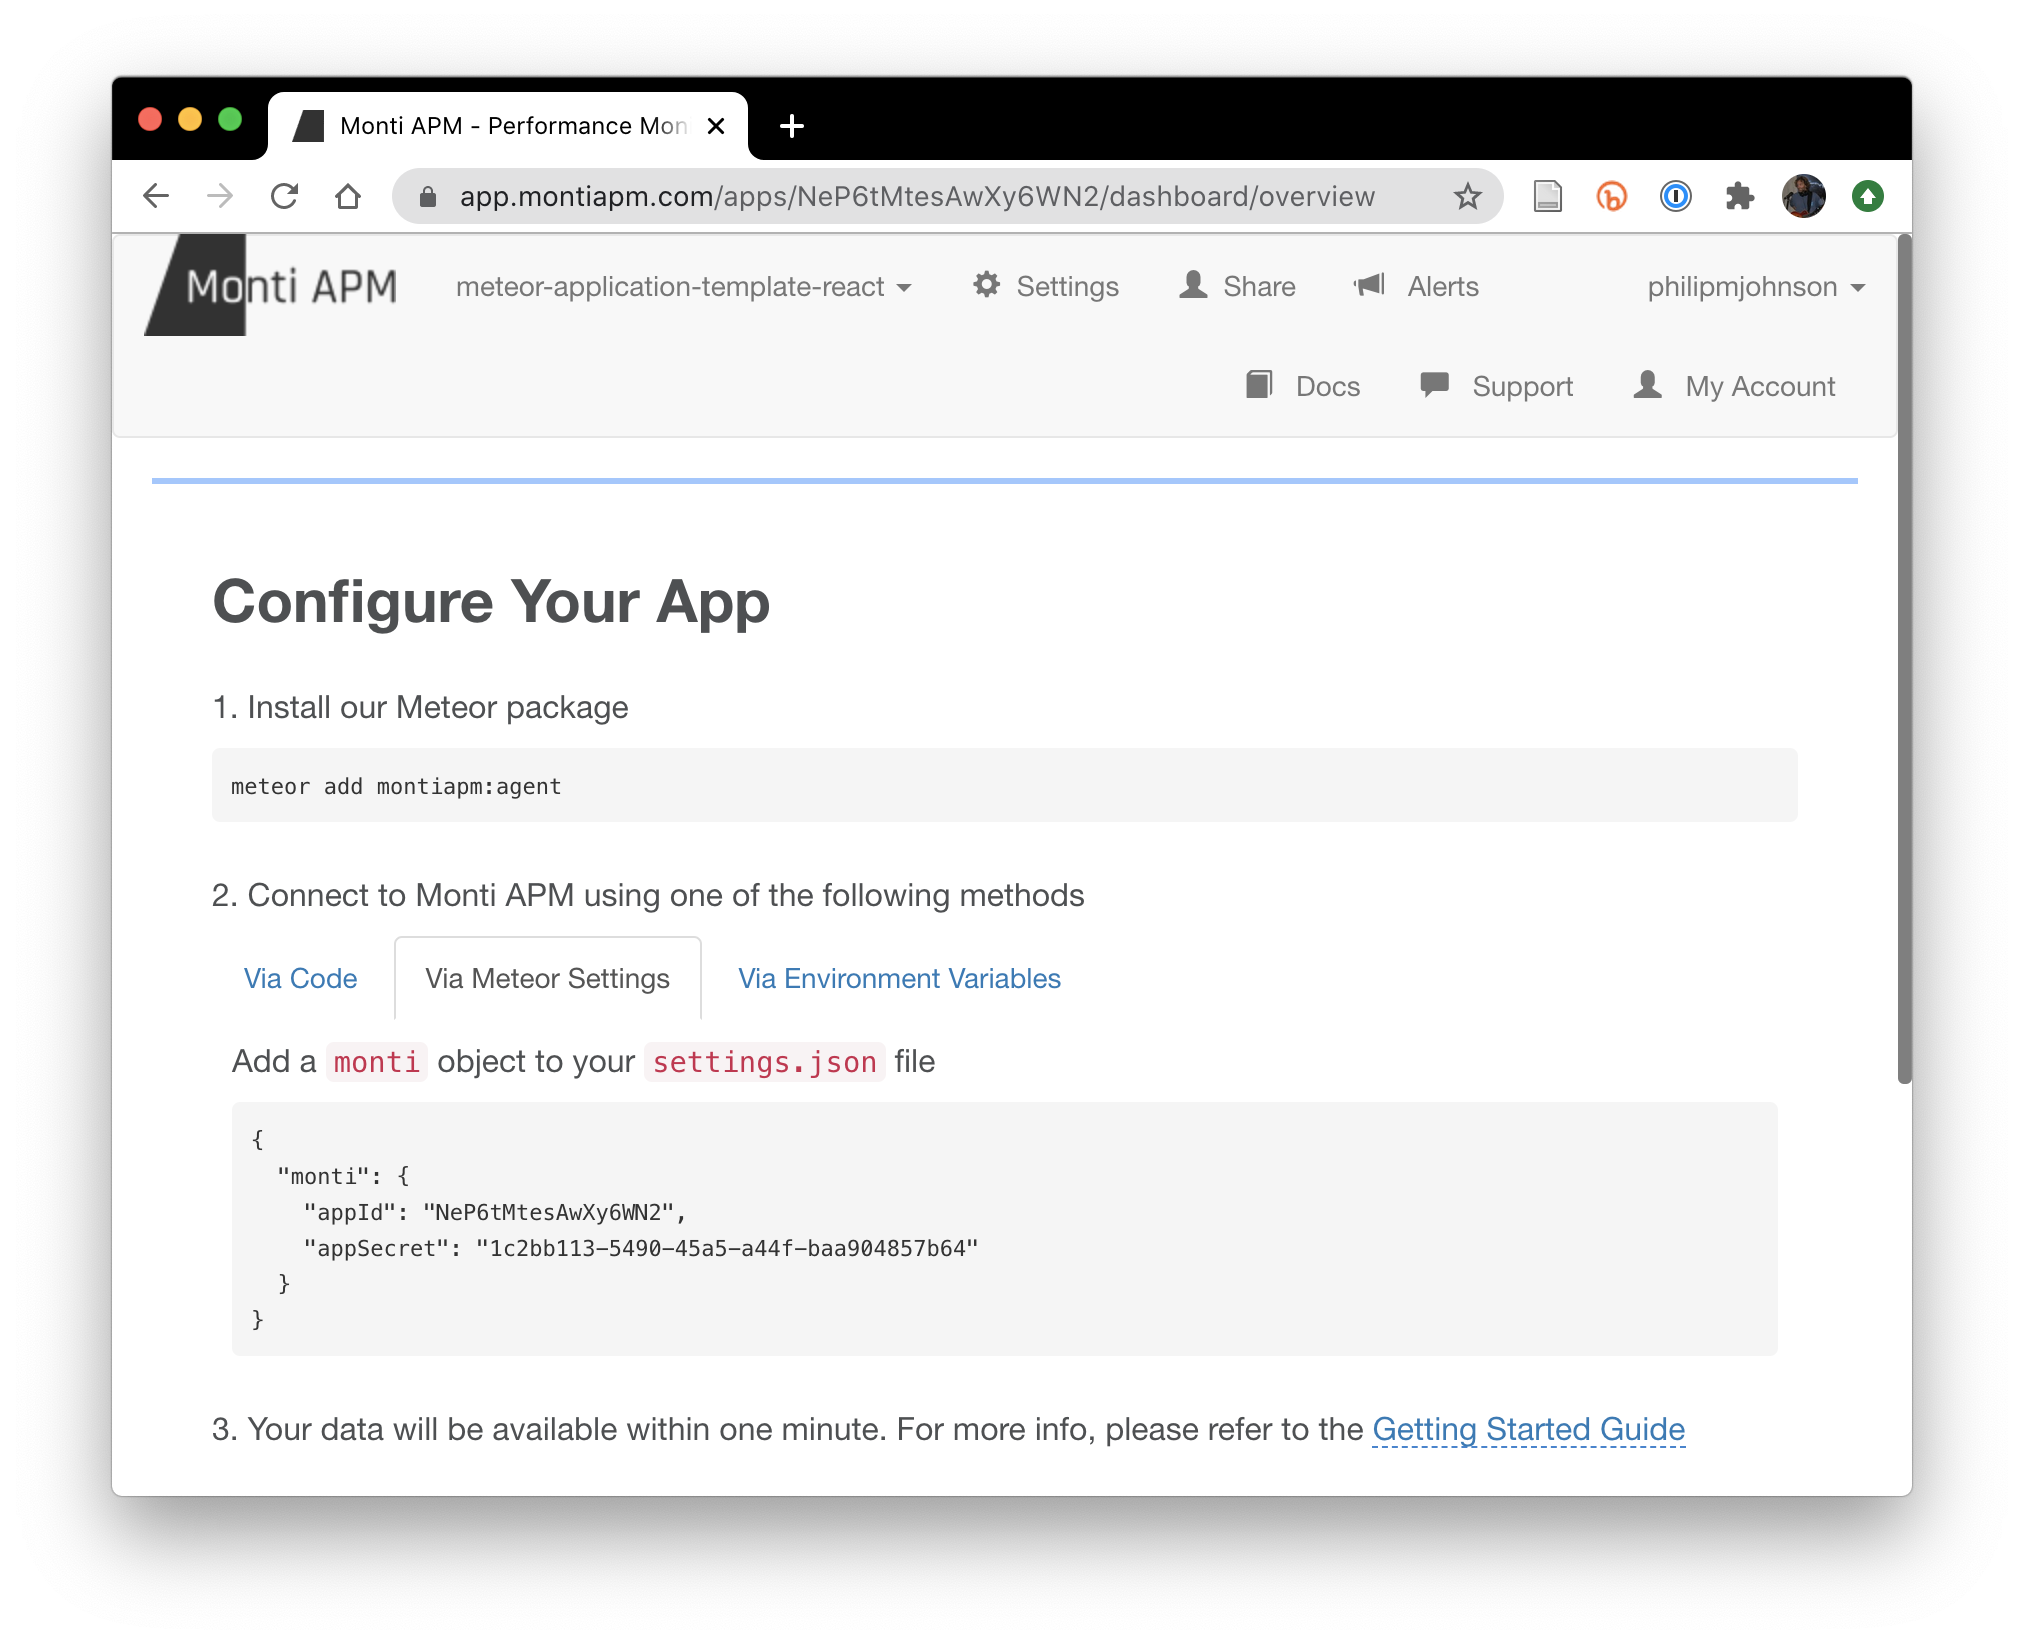
Note that meteor-application-template-react already has the monti:apm package installed.
Also note that I have deleted this Monti APM app after producing these instructions, so these credentials are no longer valid.
4. Install APM for development
To set up APM for development, add the “monti” field to settings.development.json, and supply your own credentials:
{
  "monti": {
    "appId": "YOUR OWN APP ID",
    "appSecret": "YOUR OWN APP SECRET"
  },

  "defaultAccounts": [
    { "email": "admin@foo.com", "password": "changeme", "role": "admin" },
    { "email": "john@foo.com", "password": "changeme" }
  ],

  "defaultData": [
    { "name": "Basket", "quantity": 3, "owner": "john@foo.com", "condition": "excellent" },
    { "name": "Bicycle", "quantity": 2, "owner": "john@foo.com", "condition": "poor" },
    { "name": "Banana", "quantity": 2, "owner": "admin@foo.com", "condition": "good" },
    { "name": "Boogie Board", "quantity": 2, "owner": "admin@foo.com", "condition": "excellent" }
  ]
}
Second, invoke “meteor npm run start”:
$ meteor npm run start

> meteor-application-template-react@ start /Users/philipjohnson/github/ics-software-engineering/meteor-application-template-react/app
> meteor --no-release-check --exclude-archs web.browser.legacy,web.cordova --settings ../config/settings.development.json

[[[[[ ~/github/ics-software-engineering/meteor-application-template-react/app ]]]]]

=> Started proxy.
=> Started MongoDB.
W20201009-11:34:50.734(-10)? (STDERR) Note: you are using a pure-JavaScript implementation of bcrypt.
W20201009-11:34:50.776(-10)? (STDERR) While this implementation will work correctly, it is known to be
W20201009-11:34:50.776(-10)? (STDERR) approximately three times slower than the native implementation.
W20201009-11:34:50.777(-10)? (STDERR) In order to use the native implementation instead, run
W20201009-11:34:50.777(-10)? (STDERR)
W20201009-11:34:50.777(-10)? (STDERR)   meteor npm install --save bcrypt
W20201009-11:34:50.777(-10)? (STDERR)
W20201009-11:34:50.777(-10)? (STDERR) in the root directory of your application.
I20201009-11:34:51.464(-10)? Monti APM: completed instrumenting the app
=> Started your app.

=> App running at: http://localhost:3000/
I20201009-11:34:52.456(-10)? Monti APM: Successfully connected
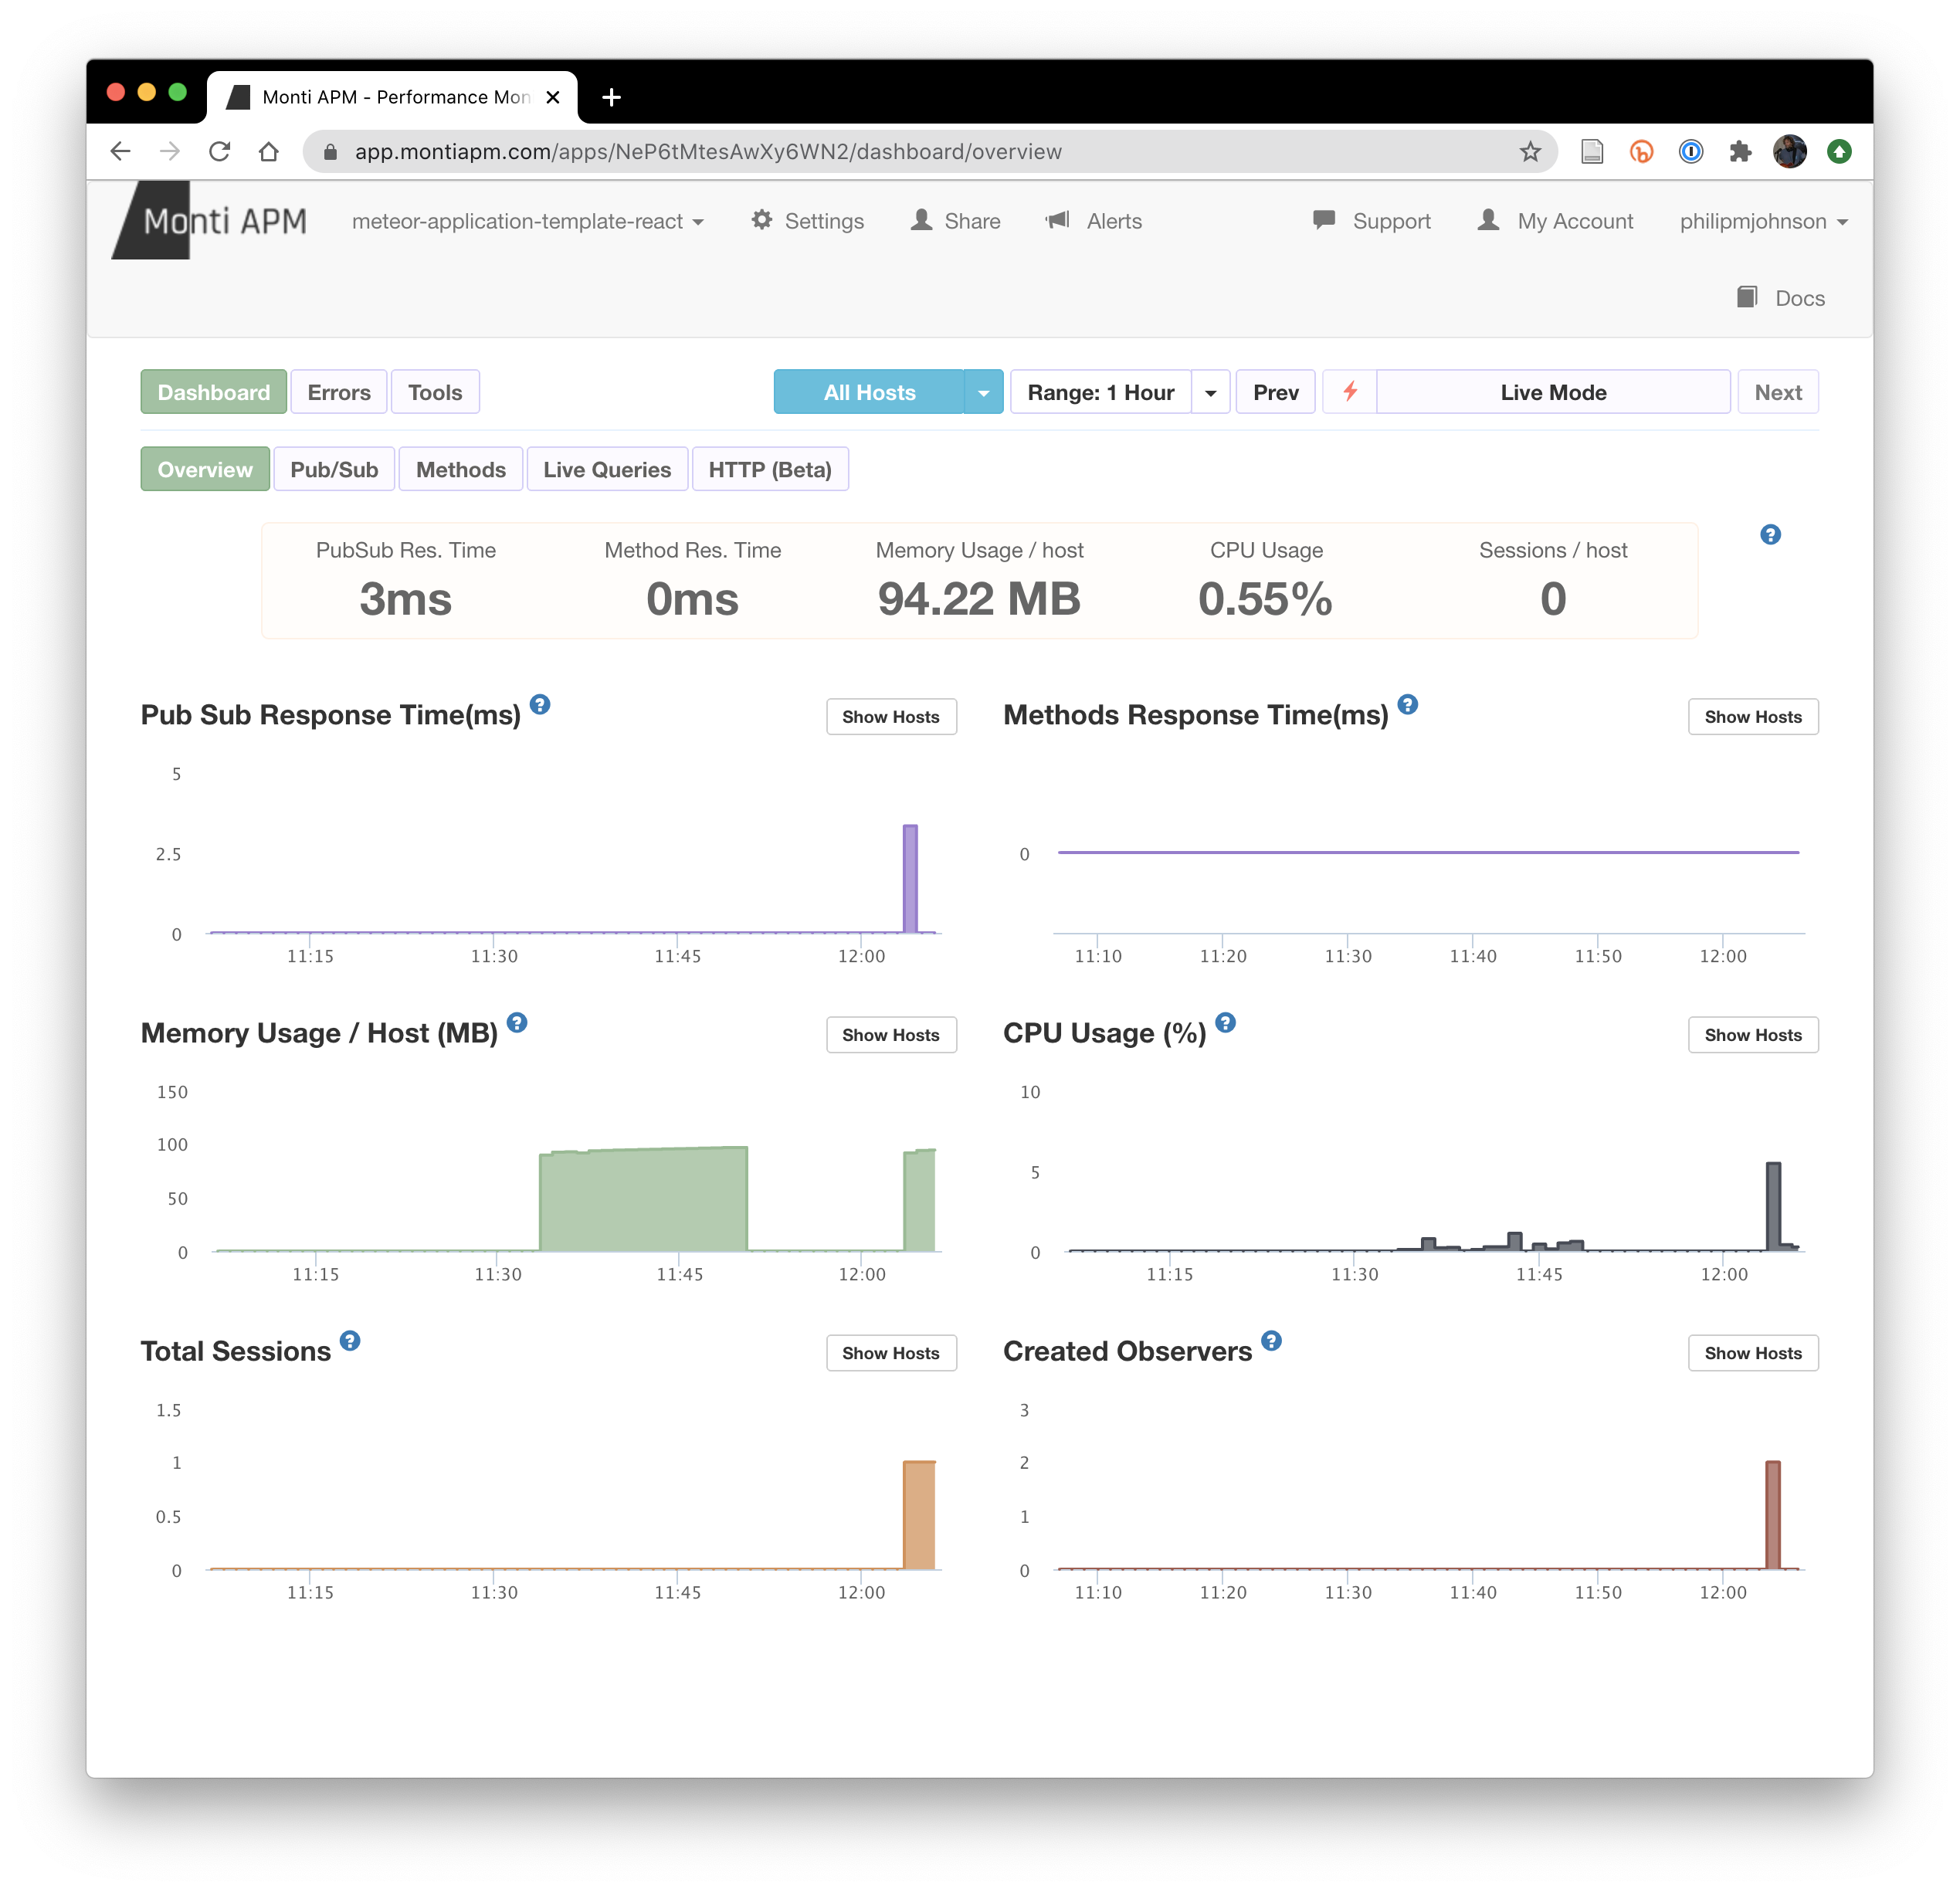
You should see the Monti APM browser window change to a dashboard showing metrics:
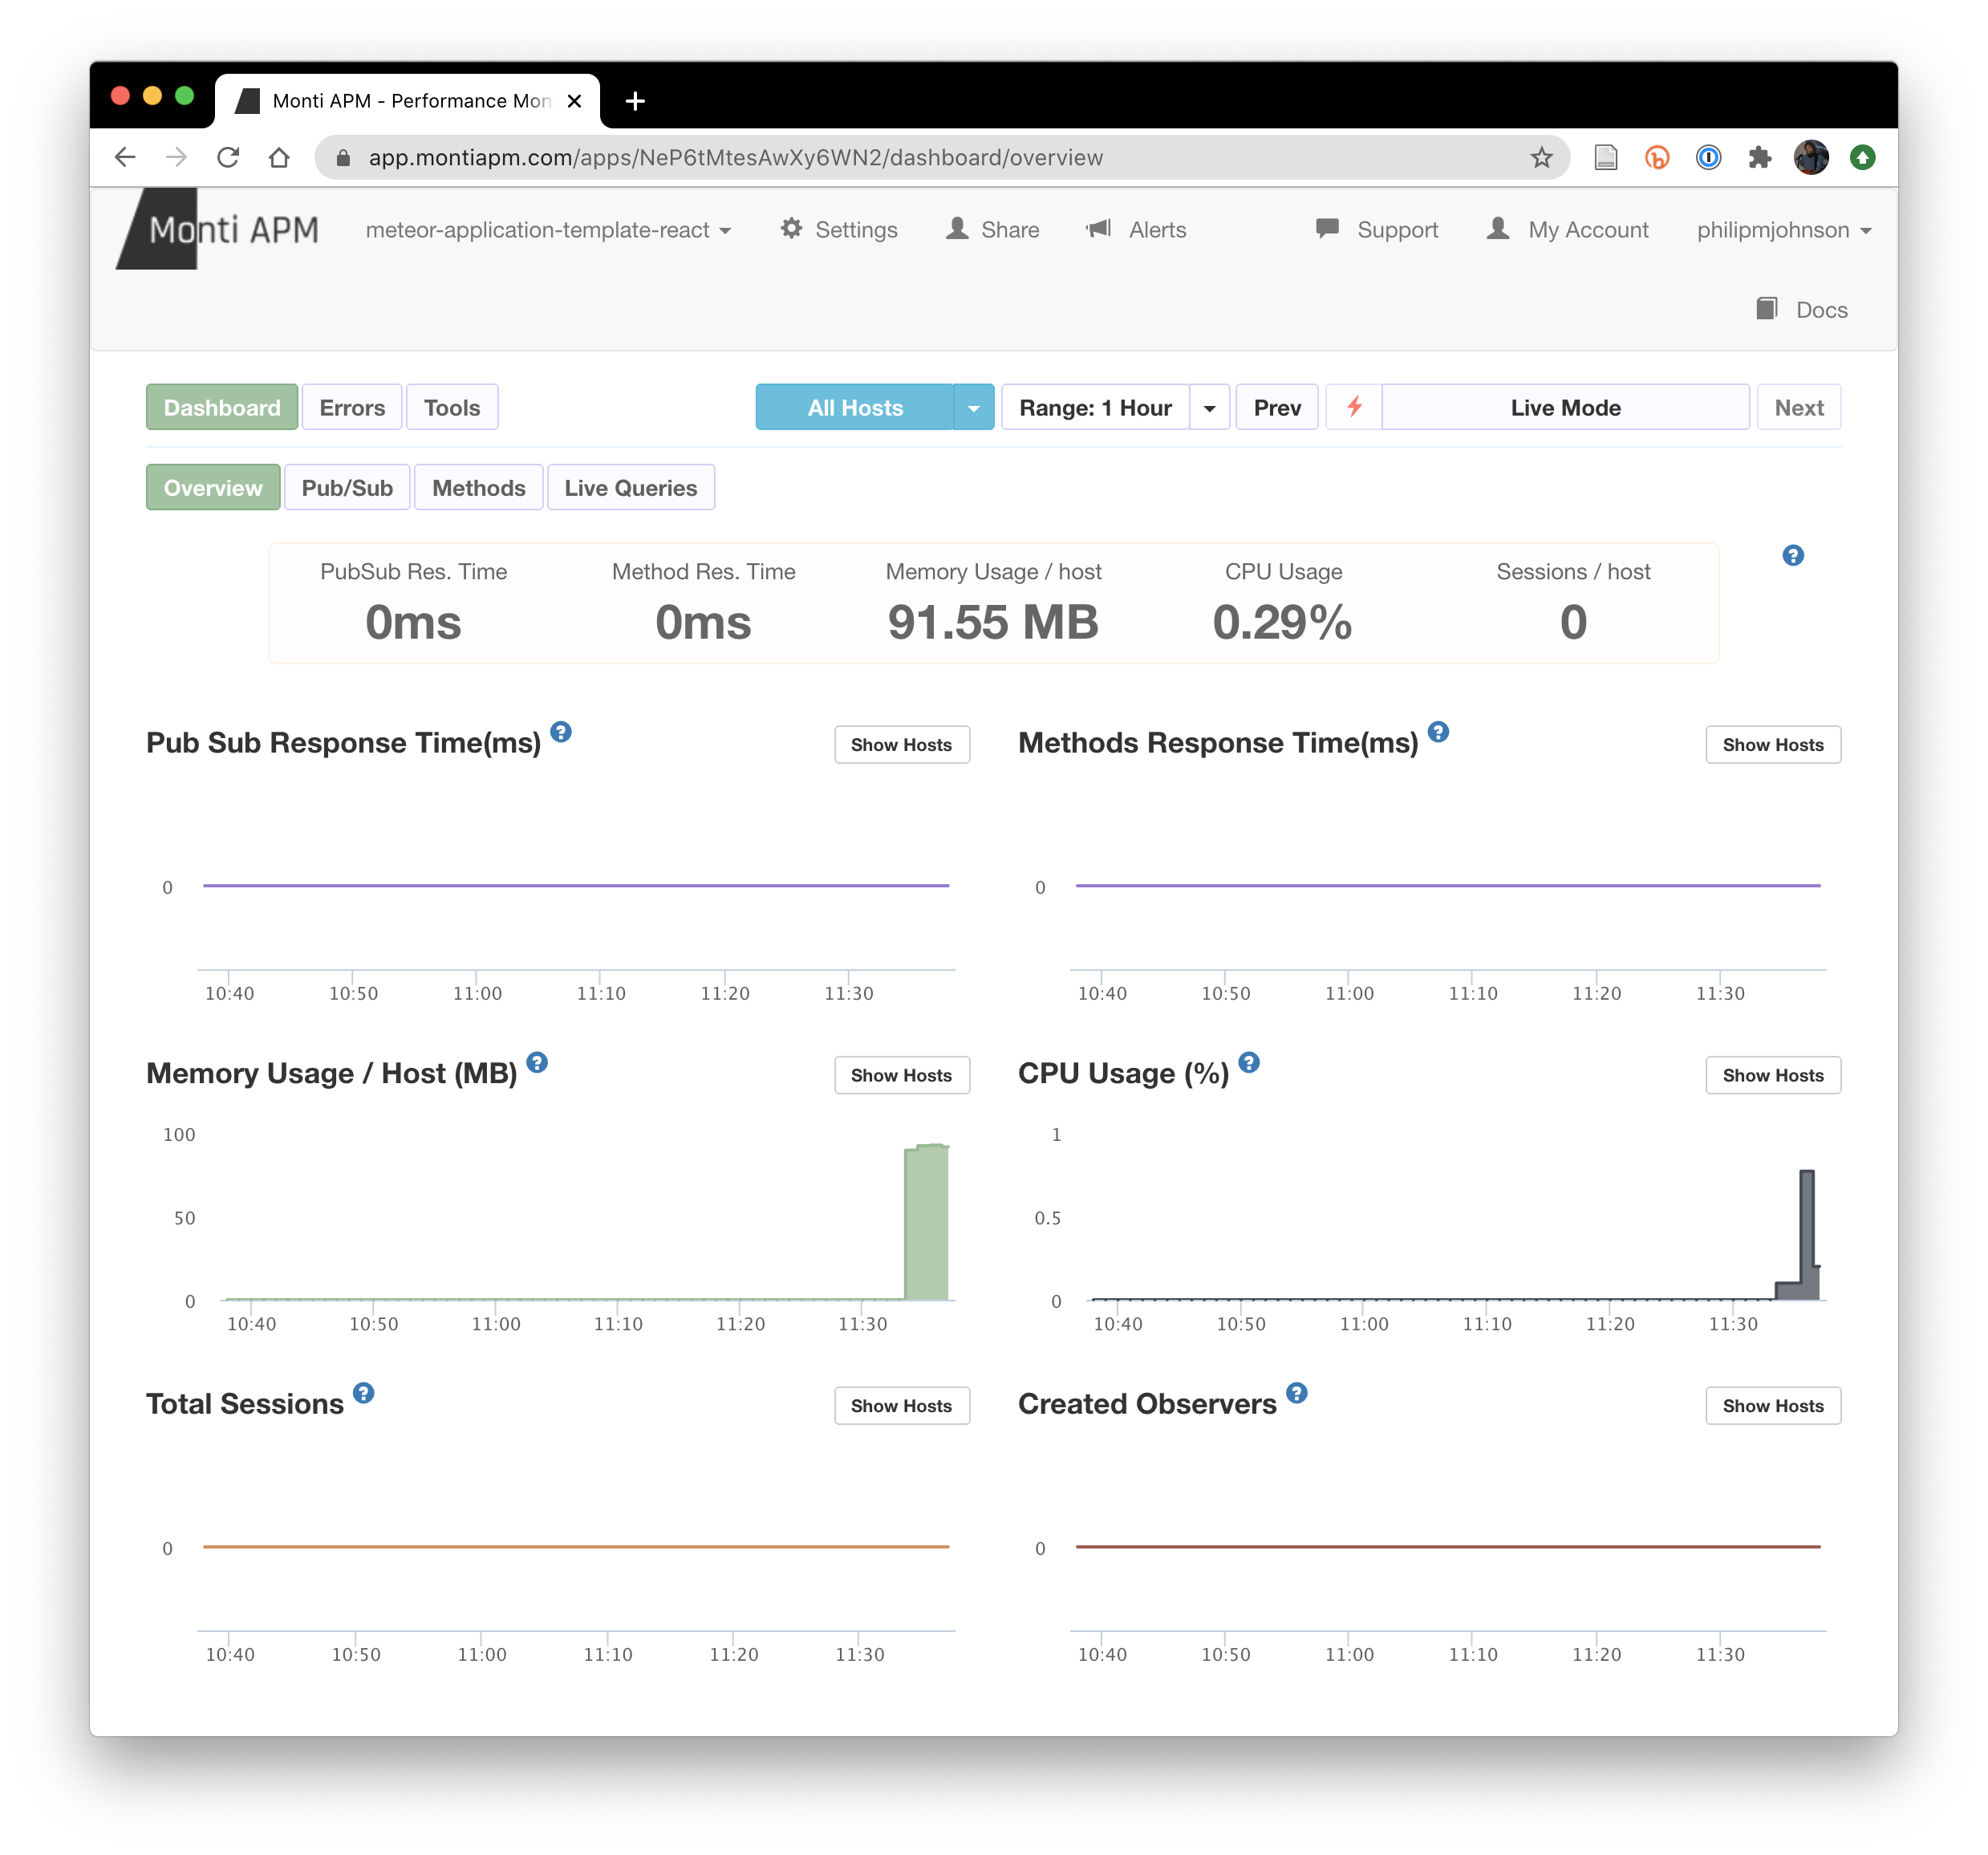
5. Use the app, watch Monti APM
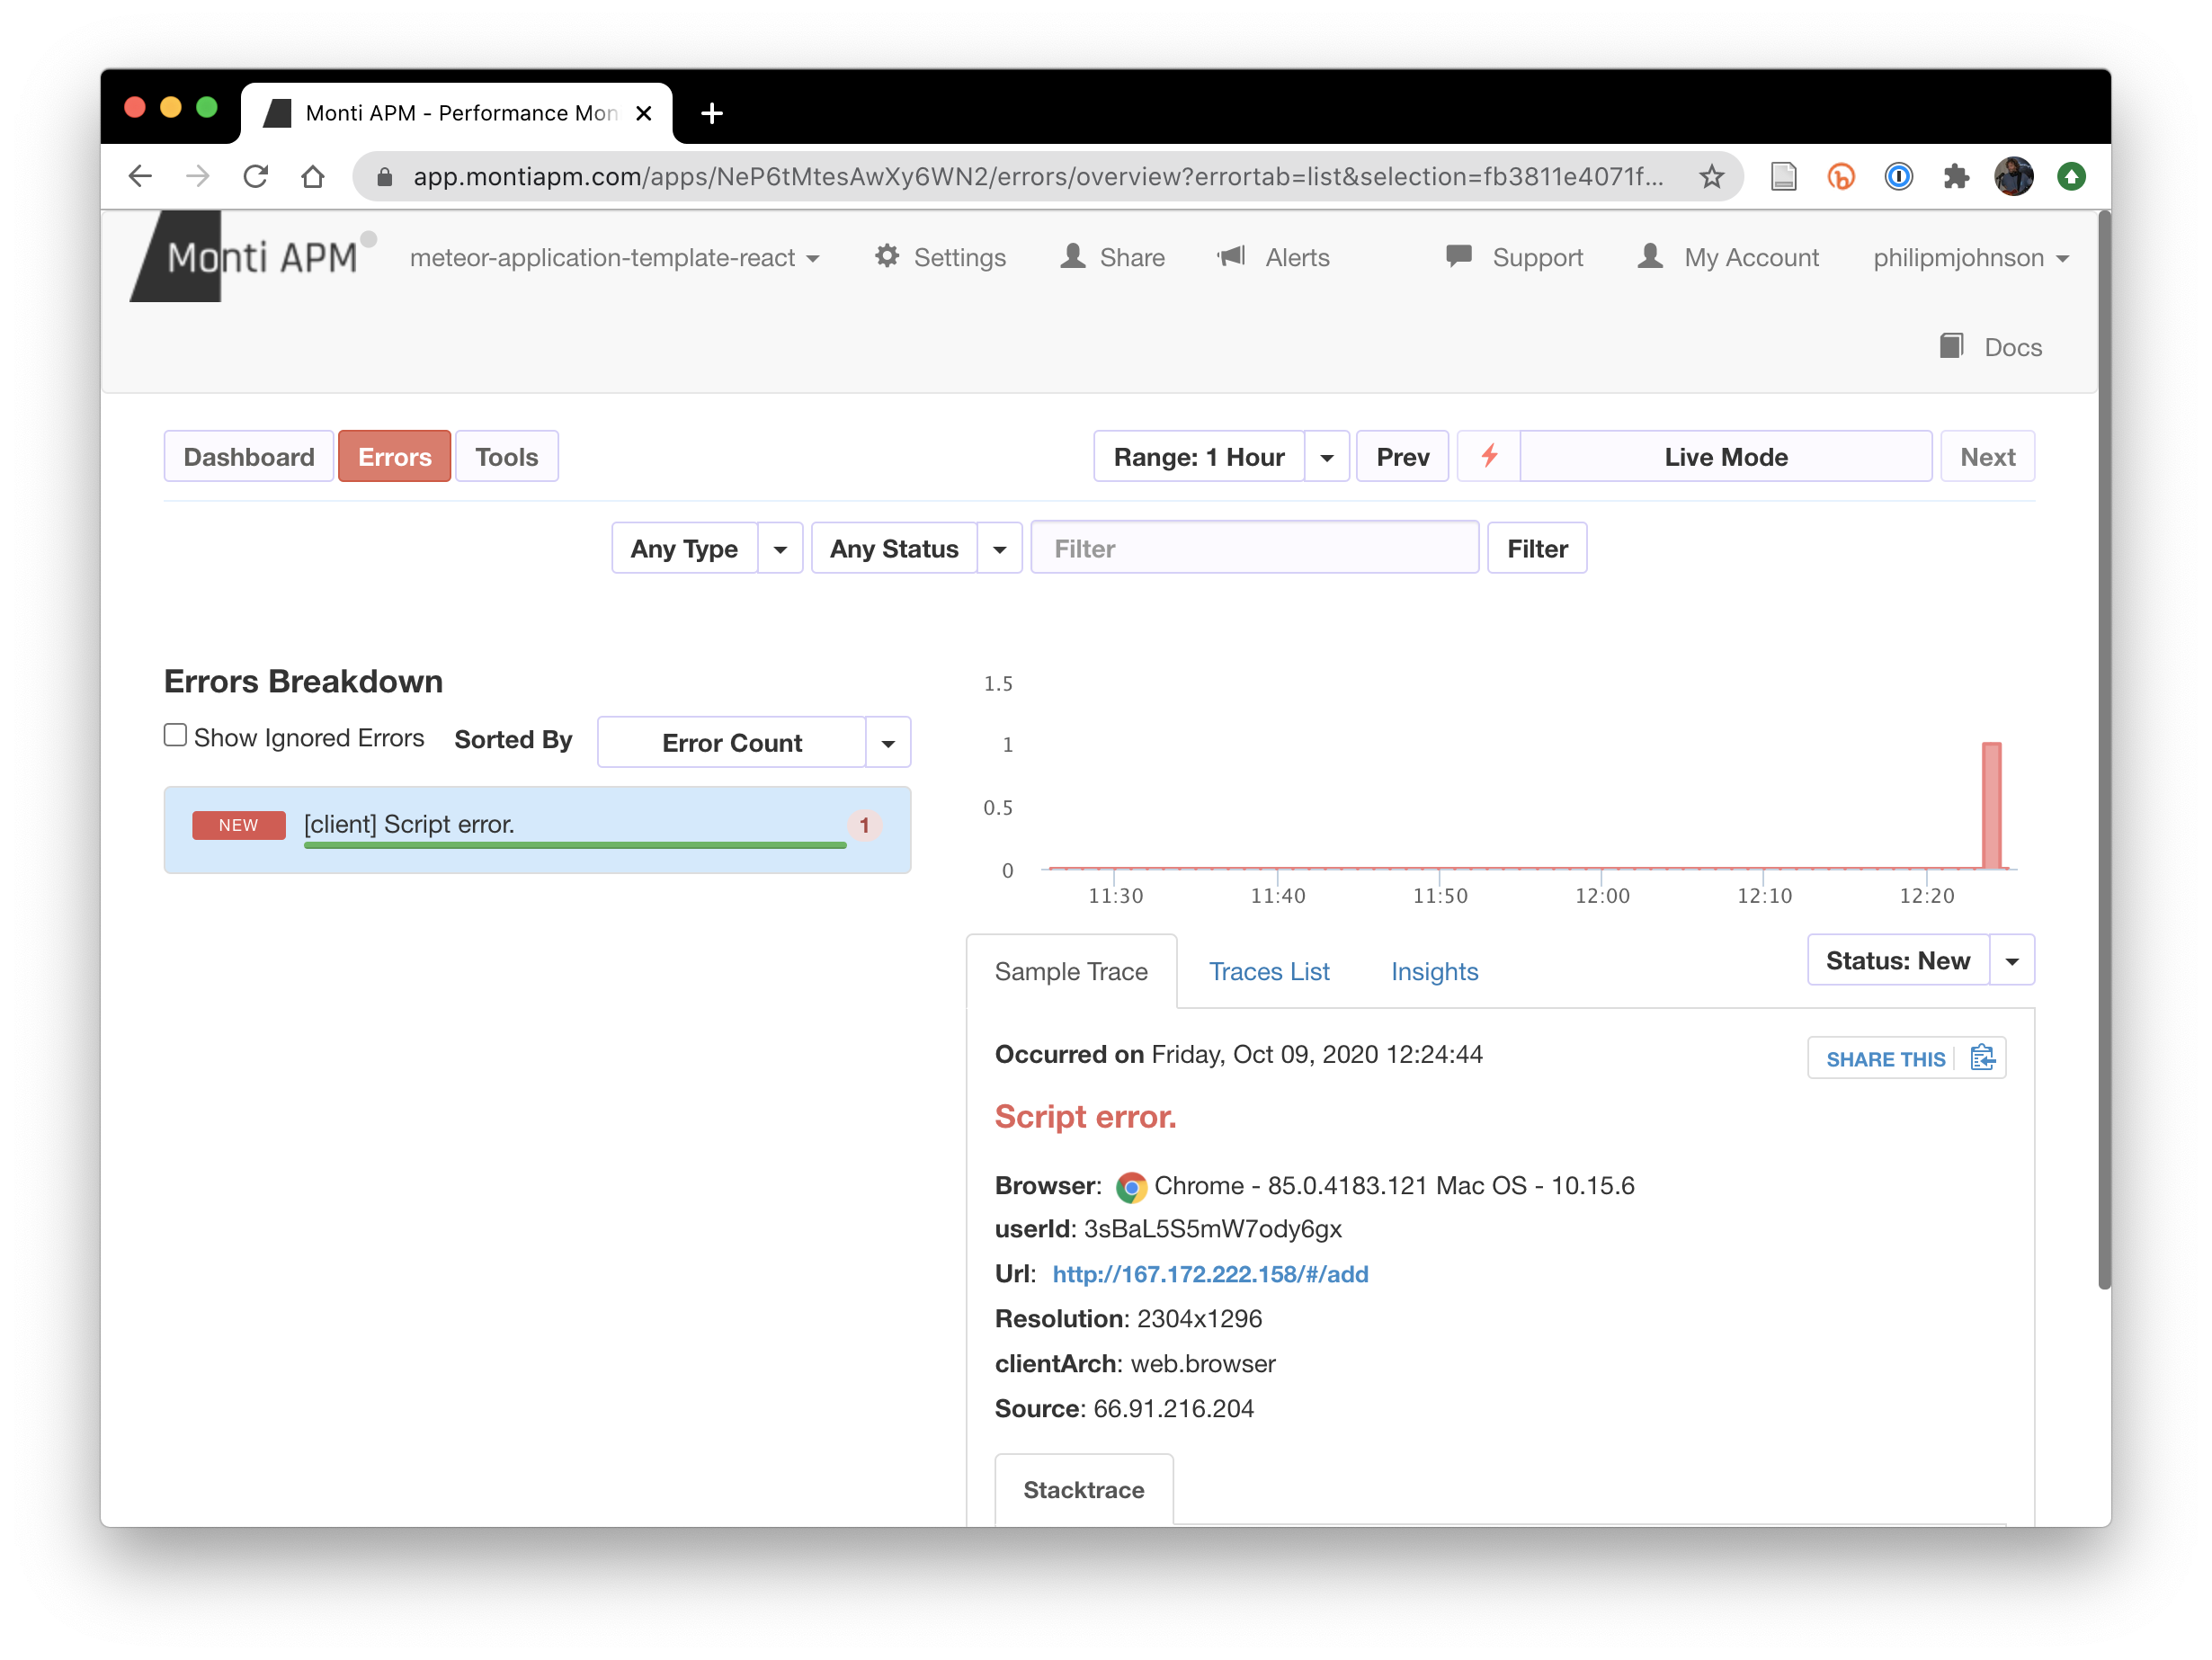
To begin to understand how to apply APM, login to meteor-application-template-react, then retrieve pages and perform actions, and see how the dashboard and various subpages change. One of the more useful features of Monti APM is its ability to show errors that occur client-side, in the browsers of your users while they run your app. For example:
6. Install APM for production.
This section assumes that you have already set up your application and deployed it following the instructions in How to deploy a Meteor application to Digital Ocean.
To set up APM for your deployed system, add the “monti” field to app/.deploy/settings.json, using your own credentials:
{
  "monti": {
    "appId": "YOUR OWN APP ID",
    "appSecret": "YOUR OWN APP SECRET"
  },

  "defaultAccounts": [
    { "email": "admin@foo.com", "password": "changeme", "role": "admin" },
    { "email": "john@foo.com", "password": "changeme" }
  ],

  "defaultData": [
    { "name": "Basket", "quantity": 3, "owner": "john@foo.com", "condition": "excellent" },
    { "name": "Bicycle", "quantity": 2, "owner": "john@foo.com", "condition": "poor" },
    { "name": "Banana", "quantity": 2, "owner": "admin@foo.com", "condition": "good" },
    { "name": "Boogie Board", "quantity": 2, "owner": "admin@foo.com", "condition": "excellent" }
  ]
}
Then invoke “mup setup” (or, on Windows, “mup.cmd setup”) to process the settings.json:
$ mup setup

Started TaskList: Setup Docker
[167.172.222.158] - Setup Docker
[167.172.222.158] - Setup Docker: SUCCESS

Started TaskList: Setup Meteor
[167.172.222.158] - Setup Environment
[167.172.222.158] - Setup Environment: SUCCESS

Started TaskList: Setup Mongo
[167.172.222.158] - Setup Environment
[167.172.222.158] - Setup Environment: SUCCESS
[167.172.222.158] - Copying Mongo Config
[167.172.222.158] - Copying Mongo Config: SUCCESS

Started TaskList: Start Mongo
[167.172.222.158] - Start Mongo
[167.172.222.158] - Start Mongo: SUCCESS

Next, you should run:
    mup deploy
Now invoke “mup deploy” (or, on Windows, “mup.cmd deploy”) to deploy the app and start sending instrumentation data to Monti APM:
mup deploy
Building App Bundle Locally

Started TaskList: Pushing Meteor App
[167.172.222.158] - Pushing Meteor App Bundle to the Server
[167.172.222.158] - Pushing Meteor App Bundle to the Server: SUCCESS
[167.172.222.158] - Prepare Bundle
[167.172.222.158] - Prepare Bundle: SUCCESS

Started TaskList: Configuring App
[167.172.222.158] - Pushing the Startup Script
[167.172.222.158] - Pushing the Startup Script: SUCCESS
[167.172.222.158] - Sending Environment Variables
[167.172.222.158] - Sending Environment Variables: SUCCESS

Started TaskList: Start Meteor
[167.172.222.158] - Start Meteor
[167.172.222.158] - Start Meteor: SUCCESS
[167.172.222.158] - Verifying Deployment
[167.172.222.158] - Verifying Deployment: SUCCESS
You can check to see what happened during deployment by checking the logs with “mup logs -tail 50”:
$ mup logs -tail 50
[167.172.222.158]=> Starting meteor app on port:3000
[167.172.222.158]Note: you are using a pure-JavaScript implementation of bcrypt.
[167.172.222.158]While this implementation will work correctly, it is known to be
[167.172.222.158]approximately three times slower than the native implementation.
[167.172.222.158]In order to use the native implementation instead, run
[167.172.222.158]
[167.172.222.158]  meteor npm install --save bcrypt
[167.172.222.158]
[167.172.222.158]in the root directory of your application.
[167.172.222.158]Monti APM: completed instrumenting the app
[167.172.222.158]Monti APM: Successfully connected
And, finally, the Monti APM dashboard should be working again within a minute: